
Blooming
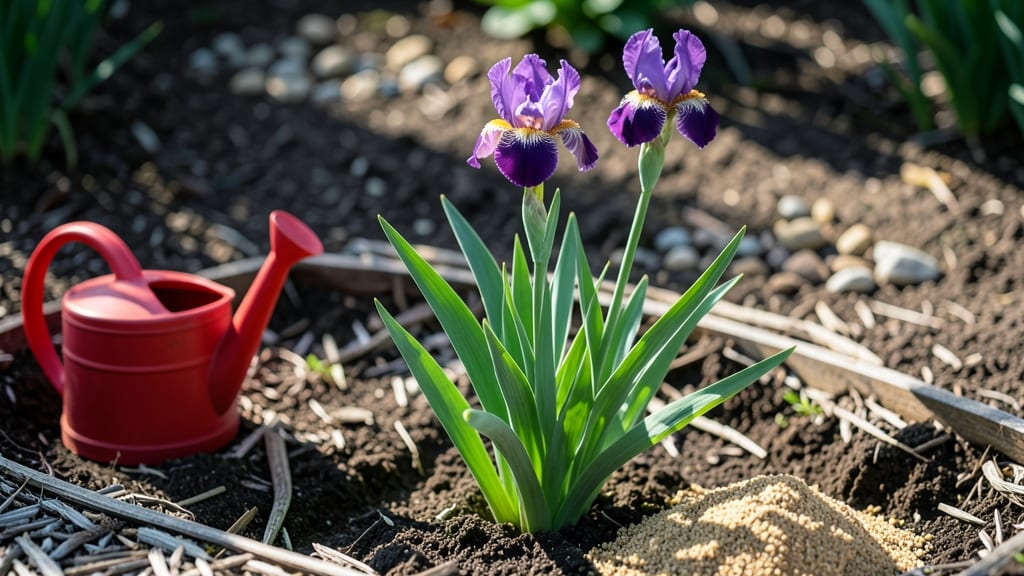
Forcing iris blooms indoors isn’t magic—it’s timing, light, and a little patience. 🌸 I’ve turned stubborn iris rhizomes into showstopping indoor blooms in just 3 weeks by mimicking their natural dormancy cycle, and you can too.
The secret lies in the 8-week window before blooming season: dig up mature rhizomes in late summer, let them dry slightly, then pot them in gritty soil.
Place them in a cool, dark spot for 6-8 weeks to break dormancy—this tricks them into thinking winter’s passed, and they’ll burst into bloom when moved to bright light. By week 3, you’ll see tight buds forming, followed by vibrant purple, yellow, or white blooms that last for weeks.
The key is consistency: keep soil barely moist, avoid overcrowding, and rotate pots for even light exposure. Works for bearded irises, Siberians, or even Louisiana types. Here’s the exact method that’s forced blooms for me every spring—no green thumb required!
📚 In This Guide
- What you need
- Instructions
- Tips and common mistakes
- Wrapping up and next steps
What you need
- ● Iris rhizomes: Healthy, firm rhizomes (preferably Iris germanica or Iris xiphium) with visible roots and no signs of rot. (Quantity: 3–5 per pot, depending on size.)
- ● Well-draining potting mix: A blend of cactus/succulent mix (60%) and perlite or coarse sand (40%) for aeration. (1–2 gallons per pot.)
- ● Containers: Shallow pots or trays with drainage holes (6–8 inches in diameter). (Avoid deep pots—irises hate soggy roots!)
- ● Watering can or spray bottle: For gentle hydration (no soaking!).
- ● Pruning shears or sharp knife: To trim roots or stems if needed.
- ○ Cold treatment (optional but recommended): Refrigerator or cool basement: Set to 35–45°F (2–7°C) for 4–6 weeks (pre-forcing step).
- ● Vernalization tray: If using a commercial setup, ensure it mimics winter conditions.
- ● Grow lights or sunny windowsill: A south-facing window (6+ hours of light/day) or LED grow lights (12–14 hours/day).
- ● Slow-release fertilizer: A balanced 10-10-10 or low-nitrogen blend (sprinkle lightly during planting).
- ● Humidity tray: A shallow tray with pebbles and water to increase moisture (if your home is dry).
- ● Plant labels: To track varieties and blooming progress!
- ● Bloom boosters: Epsom salt: 1 tsp dissolved in water (monthly for magnesium).
- ● Compost tea: For a gentle nutrient boost.
Step-by-step instructions for forcing iris blooms indoors
Here's how to coax vibrant iris blooms indoors in just three weeks—no greenhouse needed.
🌱 Step 1: Select and Prepare the Iris Rhizomes
Choose healthy iris rhizomes with firm, plump roots and no signs of rot or soft spots. I look for rhizomes that are about 2-3 inches long—smaller ones may not produce strong blooms, while giant ones can overwhelm a container. Gently rinse off any old soil, being careful not to damage the roots or the fan of leaves growing from the top.
Place the rhizomes in a shallow container of room-temperature water for about 12 hours to rehydrate. This step is crucial—it jumpstarts the blooming process. You'll know they're ready when the roots look plump and the base feels firm to the touch. Avoid soaking them longer than necessary, as this can cause them to rot.
☀️ Step 2: Position for Bright, Indirect Light
Set up your forcing container in a spot that gets bright, indirect light for at least 12-14 hours a day. A south-facing window with sheer curtains works well, but avoid direct sunlight, which can scorch the delicate blooms. If natural light is limited, supplement with a grow light placed 6-12 inches above the container.
Iris rhizomes are sensitive to temperature fluctuations, so keep them in a room that stays between 60-65°F during the day and no lower than 55°F at night. If your home runs cooler, consider using a small space heater or placing the container on a heat mat to maintain consistent warmth. Watch for the leaves to perk up and stand upright—this is your sign they're thriving.
💧 Step 3: Control Watering for Optimal Blooming
Water the rhizomes sparingly—just enough to keep the soil lightly moist but never soggy. Overwatering is the fastest way to kill iris rhizomes, as they rot easily. I use a spray bottle to mist the soil around the rhizomes, ensuring water doesn’t pool on top. Aim for 1-2 tablespoons of water every 3-4 days, adjusting based on how quickly the soil dries out.
Check the soil daily by pressing your finger about ½ inch deep. If it feels dry, it’s time to water. If it’s still damp, wait another day. The goal is to keep the rhizomes hydrated without drowning them. You’ll notice the leaves start to grow more vigorously within a week—that’s your cue that the forcing process is working.
⏰ Step 4: Monitor and Adjust for Blooming
After about 10-14 days, you should see flower stalks beginning to emerge from the center of the rhizomes. This is the moment that matters: once the stalks reach about 3-4 inches tall, move the container to a cooler spot with 50-55°F temperatures for 4-5 days. This temperature drop mimics the natural conditions iris rhizomes need to trigger blooming.
During this cooling period, reduce watering slightly—just enough to keep the soil from drying out completely. You’ll see the flower buds swell and open within 3-5 days after the cold treatment. If the buds appear wilted or droopy, mist them lightly with water and move them back to a slightly warmer spot for a few hours to revive them.
🌿 Step 5: Enjoy and Extend the Blooms
Once the iris blooms open, place the container in a bright, cool spot to prolong their life. Cut-stem arrangements will last 5-7 days in a vase with fresh water, while the rhizomes themselves can be replanted outdoors after blooming if you’d like to enjoy them again next season.
Here’s the thing—iris blooms forced indoors are a fleeting but magical experience. To make the most of it, I like to photograph each bloom in its unique color and shape. After the flowers fade, you can either compost the rhizomes or store them in a cool, dry place until next year’s forcing season. Either way, you’ve just created a stunning indoor display in just three weeks!
Tips & tricks for perfect forced iris blooms
These little details make all the difference between wilting disappointment and show-stopping blooms.
Rhizome Selection Matters: Look for rhizomes with firm, plump roots that feel heavy for their size—this is your sign they're hydrated and ready to bloom. I always avoid any with soft spots or hollow centers, as these won't produce strong blooms. The 2-3 inch length is ideal because smaller rhizomes often lack the energy reserves for full blooms, while larger ones can overwhelm your container and struggle to establish roots quickly.
Temperature Consistency is Key: Maintaining that 60-65°F range during the day is non-negotiable for healthy growth. I've learned the hard way that even slight dips below 55°F at night can shock the rhizomes and delay blooming. If your home runs cool, a small space heater placed near the container (not touching it!) can create a microclimate that keeps things perfect. The leaves should stand upright and look plump—if they're flopping, your temps are too low.
Lighting Strategy for Maximum Blooms: That 12-14 hours of bright, indirect light is crucial, but positioning matters just as much. Place your container where it gets morning sun and afternoon shade—this prevents scorching while maximizing photosynthesis. If using grow lights, keep them 6-12 inches above and set a timer for consistent light exposure. I notice the leaves develop a deeper green color when they're getting the right light, which translates to stronger blooms later.
Watering Precision Prevents Rot: The 1-2 tablespoons every 3-4 days is a guideline, but soil texture matters more. Use your finger to check moisture—if the top ½ inch feels dry, that's your cue. I've ruined several batches by overwatering, so I always use a spray bottle to mist around the rhizomes rather than pouring water directly on them. This keeps the soil lightly moist without creating soggy conditions that lead to rot.
Pro Tips for Make Iris Bloom
- These little details make all the difference between wilting disappointment and show-stopping blooms.
- Rhizome Selection Matters: Look for rhizomes with firm, plump roots that feel heavy for their size—this is your sign they're hydrated and ready to bloom.
- Temperature Consistency is Key: Maintaining that 60-65°F range during the day is non-negotiable for healthy growth.
Frequently asked questions
Got questions about forcing iris blooms indoors? You’re not alone! Here are some of the most common inquiries—plus quick, actionable answers to help you succeed.
Can I force any iris variety to bloom indoors?
Not all irises respond well to indoor forcing. Iris xiphium (dwarf Spanish iris) and Iris histrioides (rocket iris) are the best choices—they’re hardy, compact, and thrive in controlled environments. Avoid large bearded irises; they’re better suited for outdoor gardens.
How do I know when to start the forcing process?
Timing is key! Begin in late summer (August–September) by digging up iris rhizomes (the thick, fleshy roots) and storing them in a cool, dry place (like a paper bag in the fridge) for 8–10 weeks. This mimics winter dormancy, priming them for blooming in 3 weeks indoors.
What if my irises don’t bloom after forcing?
Don’t panic! Common culprits include:
- Insufficient chilling: Ensure rhizomes rested in a cool (35–45°F) spot for 8–10 weeks.
- Overwatering: Keep soil moist but not soggy—root rot can kill blooms.
- Poor light: Place them in bright, indirect light (south-facing windows work best).
Can I reuse iris rhizomes after forcing?
Yes, but with care! After blooming, let the foliage die back naturally, then store the rhizomes in a dry, cool place for 6–8 weeks before replanting outdoors in fall. Over time, they may produce fewer blooms indoors, so rotate rhizomes yearly for best results.
Do I need a greenhouse to force iris blooms?
Nope! A sunny windowsill, grow lights, or even a bright basement can work. Just ensure temperatures stay between 60–70°F during the day and 50–55°F at night. A small, well-ventilated space with consistent moisture is all you need.
Wrapping up and next steps
Watch your irises burst into vibrant color in just three weeks with these simple steps! By controlling light, temperature, and moisture, you’ve unlocked their natural blooming potential—no green thumb required. 🌸
Now that you’re ready to force your irises, grab those bulbs and get creative. Try experimenting with different varieties or even share your blooms with friends! For even more blooming magic, explore indoor gardening hacks to keep your garden thriving year-round.