
Blooming
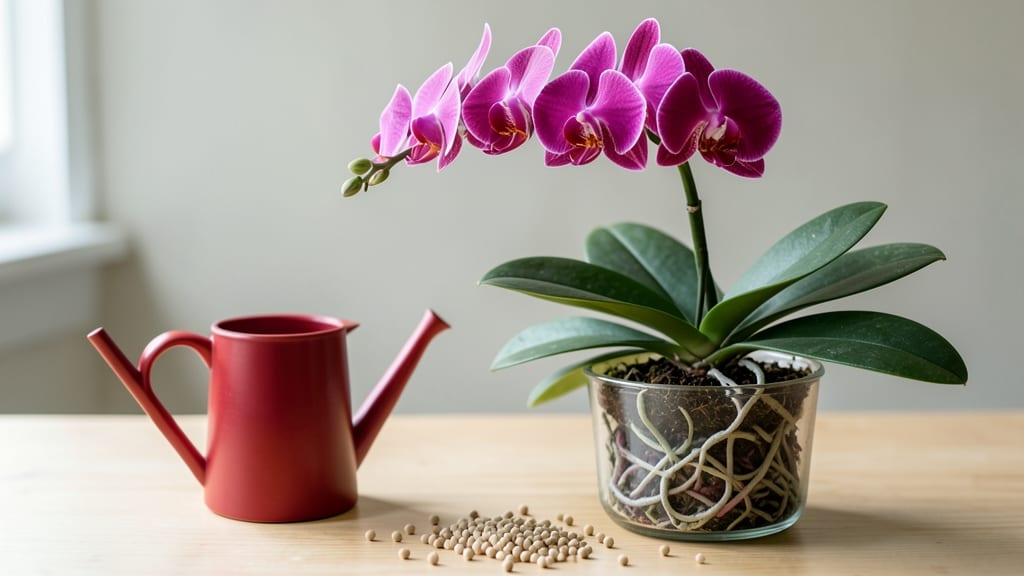
Keeping orchids blooming for months isn't magic—it's light, timing, and a little patience. 🌿 I've had Phalaenopsis orchids with blooms lasting 8+ weeks using just a few simple tricks, and I'm sharing the exact routine that works every time.
Most people overwater or move their plants too much, and the blooms suffer. The secret? Bright, indirect light and consistent care after those first stunning flowers appear.
Start with the right light spot—east or west-facing windows work best, or use a grow light for 12-14 hours daily. Too much direct sun scorches leaves, while dim corners make orchids stretch and drop blooms faster.
I also adjust my watering schedule after blooms fade: once a week instead of every 5 days. The roots need time to recover before pushing new growth. A humidity tray underneath keeps the air just right without fuss.
By the time your first bloom fades, you'll see a new flower spike forming if you've nailed the light and watering. The key is fertilizing lightly—half-strength balanced fertilizer every 2 weeks—and never letting the plant dry out completely.
My orchids now rebloom 3-4 times a year with this routine, and the blooms stay vibrant longer than store-bought ones. The trick is consistency, not perfection.
Works for Phalaenopsis, Cattleyas, and Dendrobiums alike—just tweak the light intensity based on your plant's natural habitat. Here's how to make it happen without guesswork.
📚 In This Guide
- What you need
- Instructions
- Tips and common mistakes
- Wrapping up and next steps
What you need
- ● Orchid pot: A clear plastic or slotted ceramic pot (4–6 inches in diameter) with good drainage. Pro tip: 💡 Avoid decorative pots without drainage holes—they cause root rot!
- ● Well-draining orchid mix: A blend of bark, sphagnum moss, perlite, and charcoal (available at garden centers). Skip regular potting soil—it’s too dense!
- ● Watering can or spray bottle: A gentle spray nozzle (like a misting bottle) or a can with a rose attachment for controlled watering.
- ● Humidity tray or pebble tray: A shallow tray filled with pebbles and water (place the pot on top to boost humidity).
- ○ Grow lights (optional but helpful): LED grow bulbs (10,000–20,000 lux, full-spectrum) for 12–14 hours/day if natural light is insufficient.
- ● Adjustable lamp clips to position lights 6–12 inches above the plant.
- ● Pruning shears or scissors: Sterilized (rubbing alcohol wipe) for trimming spent blooms or roots.
- ● Fertilizer: A balanced orchid fertilizer (20-20-20 or 10-10-10, diluted to half-strength). Bonus: 🌡️ Use a slow-release fertilizer for convenience!
- ○ Thermometer/hygrometer (optional): To monitor temperature (65–80°F day, 55–65°F night) and humidity (40–70%).
- ● A sunny windowsill (east or west-facing) or a grow light setup for 12–14 hours of indirect light daily.
- ● Patience! Orchids thrive on consistency—avoid moving them frequently.
- ● A dedicated spot with stable conditions (no drafts, AC vents, or heaters nearby).
Step-by-Step instructions for extending orchid blooms with light
Light is the secret weapon for keeping orchids in bloom longer—here's how to use it right.
☀️ Step 1: Position Your Orchid for Bright, Indirect Light
Orchids need 10-14 hours of bright, indirect light daily—think of it like morning sun through a sheer curtain. Place your orchid near an east-facing window or 2-3 feet back from a south-facing window. Direct afternoon sun will scorch the leaves within days, so avoid southern exposures without filtering.
Here's the thing—your orchid's leaves will tell you if it's getting the right light. If they're dark green with no visible veins, it's too dark. If they're yellowing or have red marks, it's too intense. Adjust the position until the leaves are medium green with faint purple streaks—this is the sweet spot for consistent blooming.
⏰ Step 2: Mimic Natural Daylight Cycles
Orchids respond to predictable light patterns, so keep their schedule consistent. If you notice blooms wilting slightly during the day, it's not a problem—this is normal. What matters is giving them 12+ hours of light daily, even if it's cloudy. Use a grow light on a timer for 4-6 hours if natural light falls short, especially in winter.
I always set my timer for sunrise and sunset times to match the season. In winter, extend light to 14 hours to compensate for shorter days. Watch for buds that form but don't open—this is your signal the light isn't sufficient to support blooming.
🌱 Step 3: Rotate the Pot Weekly for Even Growth
Orchids grow toward the light, so rotate the pot a quarter turn weekly to prevent lopsided growth and encourage even blooming. You'll see the stems lean toward the light source if you skip this step. This simple habit keeps the plant balanced and maximizes flower production on all stems.
Don't worry if the pot feels awkward to turn—just grip the base firmly and twist gently. The roots will follow the light automatically, and you'll notice new flower spikes emerging from different areas of the plant. This ensures you get blooms all season long instead of just from one side.
💧 Step 4: Adjust Watering Based on Light Exposure
More light means more water evaporation, so increase watering slightly during sunny periods. Water when the top inch of potting mix feels dry, but never let the roots sit in water. I use the "soak and drain" method: place the pot in a sink with room-temperature water for 5-10 minutes, then let it drain completely.
Here's where it gets tricky—overwatering in bright light causes root rot, while underwatering in low light stresses the plant. Check moisture by lifting the pot: if it feels light, it's time to water. If buds form but drop before opening, it's usually a watering issue combined with inconsistent light.
✂️ Step 5: Prune Spent Blooms Strategically
After blooms fade, cut the stem 1 inch above a visible node (that little bump where leaves or roots grow). This encourages new blooms to form from that node. Never cut below a node—you'll remove potential future flowers. Use clean, sharp scissors to avoid crushing the stem.
Watch for new flower spikes emerging from the same stem within 4-8 weeks. If your orchid produces multiple stems, prioritize pruning the oldest stems first to keep the plant's energy balanced. I always leave the healthiest stems longest to maximize next season's blooms.
Tips & tricks for perfect orchid care
Light is everything when it comes to keeping orchids blooming—here's how to get it just right without the guesswork.
The Light Factor: That 10-14 hour daily light range in Step 1 is your golden window. I've found that east-facing windows provide the perfect balance—morning sun is bright enough but not scorching. If you notice leaves developing red marks after just a few hours in a south-facing window, you're getting too much direct sun. Move it back immediately—those marks mean the plant is already stressed. Think of it like sun protection for your orchid.
Seasonal Light Strategy: The 12+ hours of light in Step 2 is non-negotiable, but winter throws a wrench in things. When natural light drops below 10 hours, I extend with a simple grow light on a timer. Set it for 4-6 hours in the evening to mimic sunset—this prevents buds from forming but not opening. Pro tip: Use a timer that syncs with your phone so you can adjust automatically when daylight savings changes.
Rotation Reality Check: That weekly quarter-turn in Step 3 might feel like overkill, but trust me—it works. I've seen orchids grow completely lopsided when skipped, with all the blooms coming from just one side. The key is consistency: rotate the same direction each time. You'll start noticing new flower spikes emerging from different areas after just a few weeks of this habit.
Watering Wisdom: The 5-10 minute soak in Step 4 is about more than just hydration—it's about giving roots time to absorb what they need. I always use room-temperature water because cold water can shock the roots. Here's the thing about watering: if your orchid's leaves start curling downward during the day, it's usually a sign of too much water. But if they feel crispy to the touch, you're underwatering. Both extremes stress the plant and can cause buds to drop.
Pro Tips for Keep An Orchid Blooming
- Light is everything when it comes to keeping orchids blooming—here's how to get it just right without the guesswork.
- The Light Factor: That 10-14 hour daily light range in Step 1 is your golden window. I've found that east-facing wind...
- Seasonal Light Strategy: The 12+ hours of light in Step 2 is non-negotiable, but winter throws a wrench in things. Wh...
Frequently asked questions
Got questions about keeping your orchids in full, long-lasting bloom? You’re not alone! Here are some of the most common concerns—and straightforward answers—to help you troubleshoot and thrive.
Why won’t my orchid rebloom after the first flowers fall?
Orchids often need a resting period after blooming to rebloom. After flowers drop, reduce watering and fertilizer for 1–2 months. Once new growth appears (usually 3–4 inches tall), resume care. Patience is key—some varieties take 6–12 months to rebloom!
How do I know if my orchid is getting the right amount of light?
Check for these signs: Too little light = slow growth, small leaves, and no blooms. Too much light = yellow or brown spots on leaves. Ideal light should be bright but indirect—think east-facing windows or filtered sunlight. Rotate your orchid weekly for even exposure!
Can I use tap water to water my orchids, or do I need special water?
Tap water can work, but chlorine, fluoride, and minerals may harm orchids. If your water is hard or treated, use filtered, distilled, or rainwater instead. Always let water sit out for 24 hours before using to evaporate chlorine. Bottom-watering (placing the pot in a tray of water) is gentler than top-watering.
What should I do if my orchid’s blooms wilt too quickly?
Wilting blooms often signal stress from overwatering, temperature swings, or drafts. Move your orchid to a stable spot (60–80°F during the day, 55–65°F at night). Avoid placing it near vents, AC units, or direct sunlight. Deadhead spent blooms promptly to encourage new growth and extend the plant’s energy for future flowers.
Are there any natural tricks to make my orchid bloom longer?
Yes! Try these low-cost hacks:
- Humidity boost: Place the pot on a tray with pebbles and water (not touching the roots) to increase moisture.
- Fertilizer tweak: Switch to a low-nitrogen, high-phosphorus fertilizer (like 10-30-20) during blooming season.
- Ethylene trick: Place a ripe apple near your orchid (for 1–2 days) to stimulate ethylene gas, which can delay wilting.
Wrapping up and next steps
Keeping your orchids blooming long-term is all about understanding their light needs—balancing bright, indirect sunlight with strategic adjustments to prevent stress.
Whether you’re tweaking your home setup, using sheer curtains, or leveraging artificial grow lights, small changes can make a huge difference in extending those stunning blooms for months! 🌸
Don’t let frustration slow you down—experiment with confidence, observe your orchid’s reactions, and celebrate each step forward. Ready to take it further? Dive into our guide on orchid care routines to master watering, humidity, and fertilizing for year-round beauty!