
Pruning
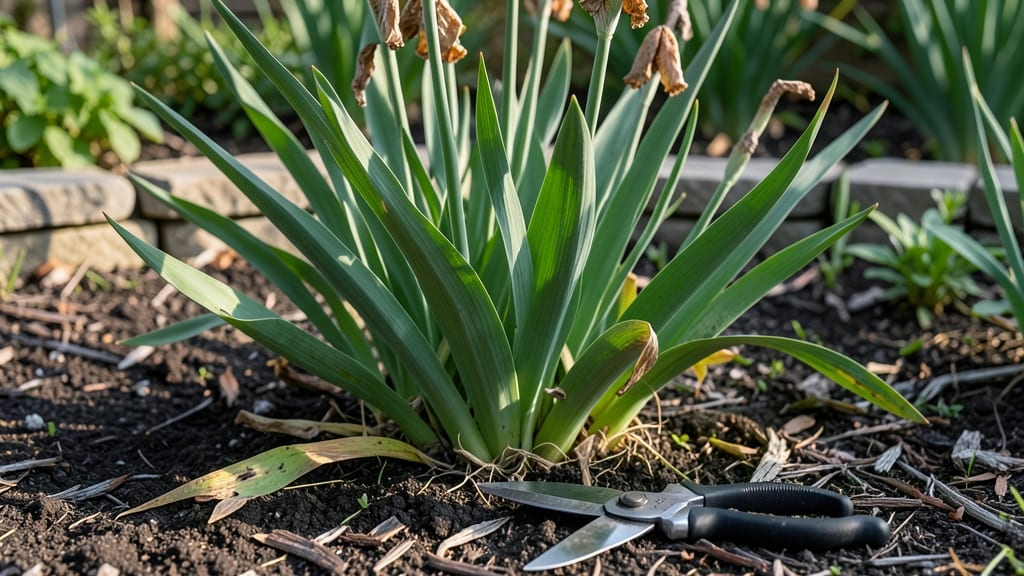
Cutting back irises after they bloom isn’t just tidying up—it’s the secret to next year’s showstopper blooms. 🌸 I’ve learned the hard way that skipping this step means fewer flowers and weaker plants.
The key is timing and technique, and once you master it, your irises will reward you with bigger, bolder blooms every season.
You’ll need sharp pruners (clean ones are critical) and about 10 minutes per plant. The goal is to remove the spent flower stalks cleanly without disturbing the rhizomes—the thick, fleshy roots that store energy for next year.
Cut each stalk back to the ground, but leave the fan of leaves untouched. These leaves feed the rhizomes until fall, so never trim them.
What you’ll end up with is a garden bed that looks tidy now and produces twice as many blooms next spring. The rhizomes stay strong, the roots grow deeper, and you avoid the most common mistake: cutting into the rhizomes, which can rot them.
Just focus on the flower stalks and let the leaves do their job.
This method works for both bearded and Siberian irises, and it’s just as effective in containers as it is in garden beds. The only variation is the timing—do it right after the blooms fade, but before the leaves start yellowing.
That’s when the plant shifts its energy back into the rhizomes for next year’s growth.
📚 In This Guide
- What you need
- Instructions
- Tips and common mistakes
- Wrapping up and next steps
What you need
- ● Sharp pruning shears or bypass pruners – Must be clean and sterilized (1 pair). Avoid dull tools—they crush stems instead of cutting cleanly.
- ○ Garden gloves – Optional but highly recommended (1 pair) to protect hands from thorns and dirt.
- ● Disinfectant (rubbing alcohol or bleach solution) – For sterilizing tools (small bottle or spray). Mix 1 part bleach to 9 parts water if using a solution.
- ● Garden twine or plant ties – For tying up foliage if needed (small roll, ~50 ft).
- ● Compost bin or trash bag – For disposing of cuttings (1-2 bags/bin).
- ● Hand pruners or loppers – For thicker stems (1 pair, if your irises are mature).
- ● Knee pads or stool – For comfort if you’re on the ground.
- ● Label markers or stakes – If you’re dividing irises and want to keep track (small pack).
- ● Garden hose or water spray bottle – To rinse tools or clean up afterward.
Step-by-step guide for cutting back irises after blooming
Here’s the easy, foolproof method I use every year to keep my irises thriving—and blooming bigger next season.
✂️ Step 1: Wait Until Flowers Fade Completely
Don’t rush to cut back those spent blooms. Wait until the flower stalks turn brown and crispy—usually 4-6 weeks after blooming. Cutting too soon removes the seed pods that feed next year’s growth. I mark my calendar after the last iris opens to avoid this mistake.
Use clean, sharp pruners or shears to cut the stalks 1-2 inches above the ground. This leaves enough foliage for the plant to store energy in its rhizomes. If you’re unsure, leave a little extra—irises are tough and will bounce back.
✂️ Step 2: Remove Only the Flower Stalks
Here’s the key: never cut the fan-shaped leaves. Those are the plant’s food factories, converting sunlight into energy for next year’s blooms. Only the leathery, brown seed stalks (called “sword-like” stems) get trimmed. I always double-check by running my fingers over the plant—if it’s still green and flexible, it stays.
If your irises are crowded, this is also the time to thin out extra fans. Space them 12-18 inches apart for better airflow and fewer pests. Just leave the healthiest, most vigorous clumps—weak ones won’t recover.
🌱 Step 3: Divide and Replant if Needed
Every 3-5 years, irises need dividing to prevent overcrowding. After cutting back, gently dig up the rhizomes (the thick, horizontal roots). Split them into sections with 2-3 healthy fans each. Discard any that look mushy or shriveled—they won’t regrow.
Replant the divisions 1 inch deep, with the tops exposed to sunlight. Water lightly but don’t soak the rhizomes—rot is their worst enemy. I label new plantings with the variety name so I remember which ones need special care.
☀️ Step 4: Feed and Mulch for Next Season
After trimming, give your irises a boost with low-nitrogen fertilizer (like 5-10-10). Too much nitrogen makes leaves grow but stunts blooms. I sprinkle a handful around the base and water it in lightly. Avoid fertilizing in late summer—it encourages new growth that won’t harden off before winter.
Add 2-3 inches of mulch (like bark or straw) to retain moisture and suppress weeds. Keep it 6 inches away from the rhizomes—they need airflow to prevent rot. This simple step keeps my irises looking neat and healthy all winter.
⏰ Step 5: Monitor for Pests and Diseases
Check your irises monthly for iris borers (tiny holes in leaves) or fungal spots (purple-brown marks). Remove any infected leaves immediately and dispose of them in the trash—don’t compost them. I keep a spray bottle of neem oil handy for quick treatment if I spot trouble early.
By late fall, your irises should have plump, green leaves—a sign they’re storing energy for spring. If leaves yellow or wilt, they’re stressed. Adjust watering (they hate soggy soil) or move them to a sunnier spot. With this care, they’ll reward you with even bigger blooms next year.
Tips & tricks for perfect iris deadheading
These simple strategies will help you avoid common mistakes and keep your irises thriving year after year.
Timing Secret: The 4-6 week waiting period after blooming is critical. I’ve learned the hard way that cutting too soon removes the seed pods that store energy for next year’s flowers. Mark your calendar right after the last bloom opens to remember this important deadline. If you’re unsure, wait until the flower stalks feel completely dry and papery to the touch.
Visual Cue for Cutting: In Step 1, when you’re ready to trim, run your fingers along the stalks—if they’re stiff and brown like dried paper, they’re ready. The fan-shaped leaves should still feel plump and green; if they’re yellowing, your irises might need more sunlight or better drainage. This simple touch test saves me from making hasty cuts.
Division Strategy: When you’re ready to divide those crowded clumps (every 3-5 years), dig carefully to avoid damaging the rhizomes. I like to split them into sections with 2-3 healthy fans each—this gives each new plant enough energy to establish itself. A sharp garden knife works better than your hands for clean cuts. Label your new plantings right away so you remember which varieties you’ve got!
Fertilizer Timing: After trimming, that low-nitrogen fertilizer (like 5-10-10) should be applied in early fall, not late summer. I’ve seen too many gardeners make this mistake and end up with weak growth that won’t survive winter. The key is to fertilize when your irises are actively storing energy for next spring, not when they’re preparing for dormancy.
Pro Tips for Cut Back Irises After They Bloom
- These simple strategies will help you avoid common mistakes and keep your irises thriving year after year.
- Timing Secret: The 4-6 week waiting period after blooming is critical.
- Visual Cue for Cutting: In Step 1, when you’re ready to trim, run your fingers along the stalks—if they’re stiff and brown like dried paper, they’re ready.
Frequently asked questions
Got questions about cutting back irises after they bloom? You’re not alone! Here are some of the most common concerns—and straightforward answers—to help you keep your irises thriving.
When is the exact best time to cut back irises after blooming?
Cut back irises immediately after the blooms fade, but wait until the seed pods (if any) turn brown and dry. This usually happens 4–6 weeks after flowering. For most varieties, late spring to early summer is ideal. Pro tip: Never cut too early—you risk harming next year’s flower buds!
Do I need to cut back irises at all if they look fine?
Yes! Even if irises seem healthy, cutting back the foliage after blooming improves air circulation, reduces disease risk, and redirects energy to next year’s growth. Skipping this step can lead to weaker blooms or floppy stems. Think of it as a spa day for your irises!
What’s the difference between deadheading and cutting back irises?
Deadheading
means removing only the spent blooms (while leaves stay intact). Cutting back refers to trimming both the flower stalks and up to ⅓ of the oldest leaves after blooming. Do both for the best results!
Can I cut back irises too much? What if I accidentally trim the wrong leaves?
Yes, you can overdo it! Never cut more than ⅓ of the foliage, and always leave the youngest, healthiest leaves untouched. The oldest leaves (closest to the base) are safe to trim—they’ve done their job for the season. If you’re unsure, use this quick guide:
| Leaf Color | Action |
|---|---|
| Green & firm | Leave it! |
| Yellow/brown & crispy | Trim it (but not if it’s the only leaf left!). |
What if my irises don’t bloom well after cutting them back?
Poor blooming often signals over-trimming or nutrient deficiency. Double-check your cuts (leave those leaves!), and fertilize with a balanced, phosphorus-rich formula in early spring. Bonus: Irises need 6+ hours of sun—shady spots can also stunt blooms!
Wrapping up and next steps
Cutting back irises after they bloom is a simple yet rewarding task that ensures vibrant blooms year after year.
By deadheading spent flowers, removing seed pods, and trimming foliage strategically, you’re setting the stage for next season’s showstopping displays. Don’t let hesitation hold you back—your irises will thank you with lush, healthy growth and even more dramatic blooms!
Ready to take the next step? Check out our guide on fertilizing irises to give them the extra boost they need for a stunning comeback. Happy gardening! 🌸✂️