
Blooming
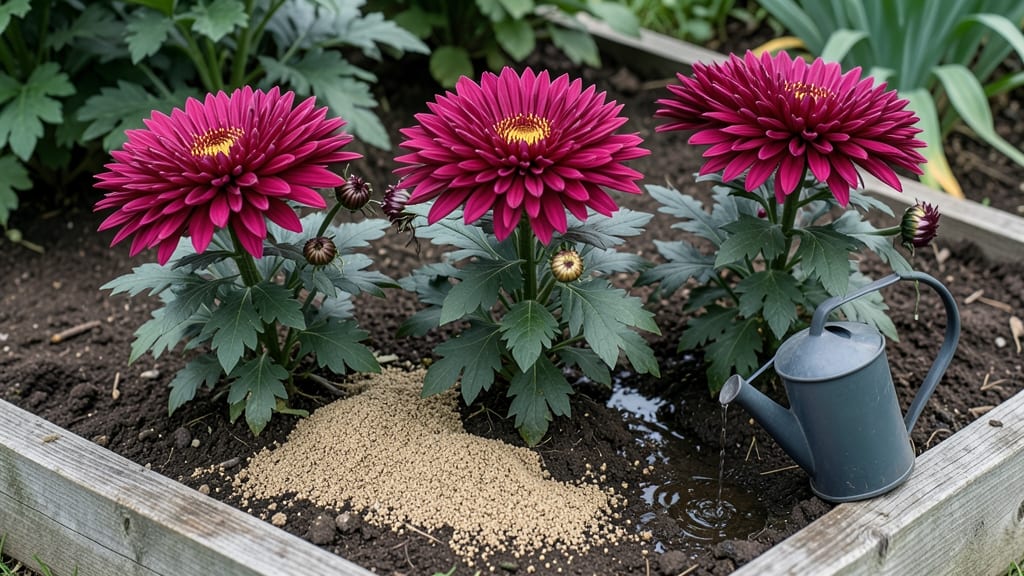
How do I keep mums blooming? That’s the magic of proper deadheading—something I learned after my first batch of chrysanthemums faded by Labor Day. 🌼 The secret isn’t complicated: snip spent blooms at the right time and spot, and your plants will keep producing vibrant flowers for weeks longer than store-bought bouquets. Most gardeners miss the timing or technique, but once you master it, your mums become the showstopper of fall.
You’ll need sharp pruners (or clean scissors), a sunny spot with at least 6 hours of light daily, and a balanced fertilizer like 10-10-10. The real game-changer? Deadheading just above a leaf node—not too high, not too low.
I’ve seen mums rebloom 3-4 weeks after proper pruning, even in cooler climates. And yes, this works for both garden mums and container varieties.
What you’ll end up with is a cascade of color that lasts until hard frost, with stems strong enough to hold up in vases. The flowers stay bright, the foliage stays lush, and you’ll avoid the sad, leggy look that kills a mum’s second flush.
This method even helps prevent powdery mildew by improving airflow—so it’s a two-for-one fix.
Works for garden beds, pots, or even cut flowers. The key is consistency: check blooms twice a week in peak season, and your mums will outperform every other fall flower in the neighborhood. Here’s exactly how to do it without overcomplicating things.
📚 In This Guide
- What you need
- Instructions
- Tips and common mistakes
- Wrapping up and next steps
What you need
- ● Pruning shears or sharp scissors – Clean, sharp tools to avoid damaging stems or spreading disease.
- ● Garden gloves – Durable, breathable gloves to protect your hands from thorns or dirt.
- ● Watering can or hose with a gentle nozzle – For post-pruning hydration (avoid soaking the foliage).
- ● Compost or balanced fertilizer (10-10-10 or 20-20-20) – 1 tbsp per plant after deadheading for a nutrient boost.
- ○ Mulch (optional but helpful) – 2-3 inches of organic mulch (e.g., shredded bark or straw) to retain moisture and suppress weeds.
- ● Disinfectant spray (rubbing alcohol or bleach solution) – To sterilize tools between cuts and prevent bacterial spread.
- ● Plant support stakes – For tall mums that may need extra stability after pruning.
- ● Slow-release granules or liquid bloom booster – For an extra color boost (follow package instructions).
- ● Sun hat or umbrella – If deadheading on a sunny day to avoid overheating.
Step-by-Step instructions for extending mum blooms
Here’s how I keep my mums flowering for weeks—not days. It’s all about timing and a little maintenance.
✂️ Step 1: Deadhead Spent Blooms Daily
As soon as a mum flower fades—when petals start to brown or droop—snip it off with clean pruners. I cut just above the next set of buds or leaves, about ½ inch below the bloom. This prevents the plant from wasting energy on seed production and redirects it to new flowers. Do this in the morning when stems are dry; wet stems can harbor bacteria.
Don’t wait until the bloom is completely dead. The moment you see more than 30% of petals brown, that’s your cue. I check my mums every morning over breakfast—it’s become a habit. The key is consistency; one missed bloom won’t ruin things, but skipping for days will slow down new growth.
💧 Step 2: Water Deeply at the Base
Mums need 1-1.5 inches of water per week, but shallow watering encourages weak roots. I water deeply at the base—right at the soil line—using a soaker hose or watering wand to avoid wetting the leaves. Wet foliage invites fungal diseases like powdery mildew, which can stunt blooms.
Check moisture by sticking your finger 1-2 inches into the soil. If it feels dry, water thoroughly until it runs out the drainage holes. If it’s still damp, wait another day. Overwatering is the #1 reason mums stop blooming—roots need oxygen too. I’ve learned this the hard way after losing a whole bed to root rot.
☀️ Step 3: Ensure Full Sun and Fertilize Weekly
Mums thrive in 6+ hours of direct sun daily. If yours are in partial shade, you’ll see fewer blooms. I rotate my containers a quarter turn weekly so all sides get even light exposure. Without enough sun, the plant focuses on leaf growth instead of flowers.
Feed them with a balanced, water-soluble fertilizer (like 10-10-10) every 7-10 days during the blooming season. Mix it at half-strength to avoid burning roots. I always fertilize after watering—this helps the nutrients absorb faster. Stop fertilizing once night temperatures drop below 50°F, as mums need time to harden off for winter.
🌿 Step 4: Prune Leggy Stems for Bushier Growth
If your mums develop long, bare stems with just a few blooms at the top, it’s time to prune. Use clean pruners to cut back one-third of the tallest stems to just above a set of leaves. This encourages the plant to branch out and produce more flowers. Do this in the early morning so any cuts have time to dry before evening.
Don’t prune more than one-third at a time, or you’ll shock the plant. I prune mine in stages—first the leggiest stems, then the next batch a week later. After pruning, give them a light feeding to help them recover. You’ll see new growth within 7-10 days, and those fresh stems will soon be covered in buds.
⏰ Step 5: Watch for Pests and Adjust Care
Spider mites and aphids love mums, and an infestation will stress the plant enough to stop blooming. I inspect my plants weekly, especially on the undersides of leaves. If I see tiny webs or clusters of bugs, I spray them off with a strong stream of water or use neem oil as a preventative spray every 10-14 days.
Adjust your care based on the season. In hot weather, mums may need water every 2-3 days instead of weekly. In cool weather, reduce watering slightly to prevent root rot. The goal is to keep the soil evenly moist but not soggy. A happy mum is a blooming mum—and with these steps, yours will stay vibrant for months.
Tips & tricks for extending mum blooms
These little tweaks will help your mums stay vibrant and blooming for weeks instead of days.
Precision Deadheading: When you're ready to deadhead in Step 1, use clean pruners and make your cut just above the next set of buds or leaves—about ½ inch below the bloom. This small detail prevents the plant from wasting energy on seed production, which is exactly what we want to avoid. I always carry a small pair of pruners in my gardening bag so I can snip spent blooms immediately when I notice them. The sooner you remove faded blooms, the sooner the plant will redirect its energy to new flowers.
Soil Moisture Test: In Step 2, when checking soil moisture, stick your finger 1-2 inches deep—this is where the roots are actively growing. If the soil feels dry at this depth, it's time to water. I've found that using a soaker hose or watering wand helps deliver water directly to the roots without wetting the leaves, which prevents fungal diseases like powdery mildew that can stunt blooms. Remember, the goal is to keep the soil evenly moist but not soggy—this balance is crucial for healthy roots.
Sunlight Rotation Strategy: For Step 3, if your mums are in containers, rotate them a quarter turn weekly to ensure all sides get even light exposure. This simple rotation helps prevent the plants from leaning toward the sun, which can make them look lopsided. I've noticed that when my mums get uneven sunlight, they produce fewer blooms on the shaded side. The key is to give them that consistent 6+ hours of direct sun daily—this is what triggers the blooming process.
Pruning Timing: In Step 4, when pruning leggy stems, always do it in the early morning. This gives any cuts time to dry before evening, which helps prevent fungal infections. I prune in stages—first the leggiest stems, then the next batch a week later—so I don't shock the plant by removing too much at once. After pruning, I always give them a light feeding to help them recover, and I can usually see new growth within 7-10 days.
Pro Tips for How Do I Keep Mums Blooming
- These little tweaks will help your mums stay vibrant and blooming for weeks instead of days.
- Precision Deadheading: When you're ready to deadhead in Step 1, use clean pruners and make your cut just above the next set of buds or leaves—about ½ inch below the bloom.
- Soil Moisture Test: In Step 2, when checking soil moisture, stick your finger 1-2 inches deep—this is where the roots are actively growing.
Frequently asked questions
about keeping mums blooming—because every gardener deserves a little extra help! Here are the answers to the most common questions.How often should I deadhead mums to keep them blooming?
Deadhead spent blooms daily or every other day during peak bloom (late summer to early fall). This encourages new flowers to form. Once frost hits, stop deadheading—mums need time to harden off for next season. Pro tip: Use sharp pruners or just pinch blooms with your fingers for a quick fix!
Can I cut back mums after they stop blooming?
Yes! After blooming ends (or when frost threatens), cut back stems by 1/3 to promote bushier growth next year. Avoid heavy pruning in late fall—wait until early spring if your climate is cold. Troubleshooting: If stems look woody, trim just above a leaf node for fresh regrowth.
What if my mums aren’t blooming at all?
Check these fixes:
- Light: Mums need 6+ hours of sun daily—move to a sunnier spot.
- Water: Overwatering causes root rot; underwatering stresses plants. Aim for 1 inch of water weekly.
- Fertilizer: Feed with balanced, low-nitrogen fertilizer (like 10-10-10) every 4-6 weeks.
Can I save mums from year to year, or do I need to replant?
Mums are perennial in Zones 5–9 with proper care! To overwinter:
- Cut back stems to 2–3 inches.
- Mulch heavily (3–4 inches) with straw or leaves.
- Water occasionally in winter if drought occurs.
Are there any alternatives to deadheading for busy gardeners?
If deadheading feels tedious, try these low-maintenance tricks:
- Let a few blooms go to seed: This can extend the season slightly (though flowers may fade faster).
- Use a "shear" method: Trim all stems at once to 6 inches tall after blooming to encourage a fresh flush.
- Choose long-blooming varieties: Look for 'Autumn Joy' or 'Pink Beauty'—they bloom longer with less effort!
Wrapping up and next steps
Keeping your mums blooming beautifully is all about consistent care—deadheading spent blooms, providing the right nutrients, and giving them the perfect environment to thrive. With a little patience and these simple techniques, you’ll enjoy vibrant, long-lasting color all season long! 🌸
Ready to put your new skills into action? Start by grabbing your pruners today and give your mums the love they deserve—your garden will thank you with a stunning display! 🌿