
Blooming
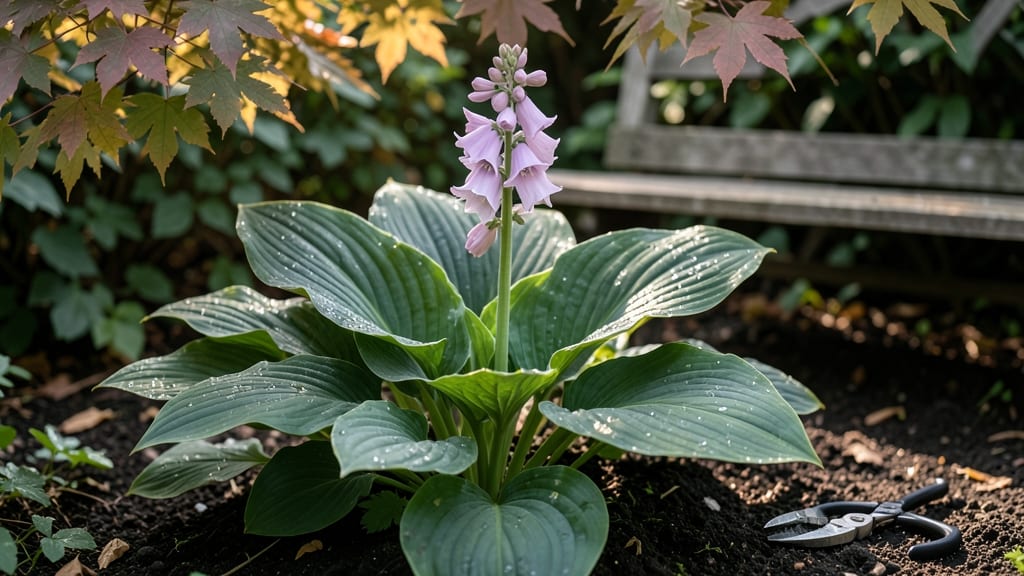
Transform your shade garden with a hosta plant in bloom, its lush leaves framing delicate flower spikes that steal the show—especially when positioned for peak seasonal impact. 🌿 I’ve designed entire garden beds around their ability to multiply naturally while creating dramatic focal points that last all summer.
The secret lies in pairing them with the right companions: tall ferns to frame their blooms, low-growing ajugas for contrast, or even delicate astilbes that echo their shade-loving nature. My favorite trick? Planting hostas in odd-numbered clusters—three or five plants create natural conversation pieces that draw the eye.
The blooms may be subtle, but their textural contrast with glossy foliage makes them impossible to ignore. By late spring, you’ll have velvety foliage transitioning into fragrant flower spikes that attract pollinators. The best part? They spread effortlessly, filling in gaps while keeping maintenance low.
Think of them as living jewelry—each plant a jewel-toned centerpiece that multiplies its own impact over time. This works for woodland gardens, foundation plantings, or even container arrangements. Let’s turn your shady spots into the most talked-about part of the yard!
📚 In This Guide
- What you need
- Instructions
- Tips and common mistakes
- Wrapping up and next steps
What you need
- ● Hosta plants: Seeds (if starting from scratch) – 10-20 seeds per variety (germination can be slow!)
- ● Nursery starts or divisions – 3-5 mature plants (for faster blooms and foliage impact)
- ● Well-draining potting mix or garden soil: 10-15 gallons (for in-ground planting) or 5-10 gallons (for containers)
- ○ Optional boost: Mix in 20-30% compost or perlite for improved drainage
- ● Shade-tolerant mulch: 2-3 cubic feet (e.g., shredded bark, wood chips, or pine straw)
- ● Garden trowel or transplant spade (for digging)
- ● Gloves (to protect hands from rough foliage)
- ● Watering can or hose with a gentle spray nozzle
- ● Pruners or shears (for trimming dead leaves or dividing clumps)
- ○ Optional but helpful: Soil pH tester (hostas thrive in 6.5-7.5 pH)
- ● Slow-release fertilizer (e.g., 10-10-10 or 5-10-10)
- ● Container pots (if growing in 10-15 gallon sizes)
- ● Shady spot: Partial to full shade (4+ hours of shade daily; morning sun is ideal)
- ● Moist, well-draining soil: Hostas hate soggy roots!
- ● Patience: Seeds may take 2-3 years to bloom; divisions or starts will flower faster
- ● Protection from pests: Slugs and deer love hostas—consider organic deterrents
How to care for hostas when they bloom
Nothing beats watching hostas transform your shady garden into a lush, textured paradise—here’s how to keep them thriving when those dramatic blooms appear.
🌱 Step 1: Observe and Identify Your Hosta’s Bloom Stage
Hostas bloom in late spring to early summer, with flower spikes emerging from the center of mature leaves. The blooms—often lavender, white, or purple—attract pollinators but aren’t the plant’s main attraction. Watch for buds forming on upright stems (usually 3-4 feet tall depending on variety), signaling it’s time to adjust care slightly. I always make a note of bloom time because it tells me when to expect new pups forming at the base.
If your hosta hasn’t bloomed yet, don’t panic—some varieties focus energy on foliage first. Wait until you see flower buds swelling before adjusting water or fertilizer routines. This is also the perfect time to check for pests like slugs, which love tender new growth. A quick inspection now prevents future damage.
☀️ Step 2: Adjust Light and Water for Peak Bloom Performance
While hostas tolerate shade, they need dappled light or 3-4 hours of morning sun to produce strong blooms. If your plants are in deep shade, move them closer to a light source—even just a few inches makes a difference. You’ll see taller flower spikes and more buds when they get this extra light, especially in varieties like ‘Blue Angel’ or ‘Halcyon.’
Increase water slightly during bloom season—hostas need 1-1.5 inches of water weekly, but more if your area is dry. Water at the base in the morning to reduce fungal risks. I avoid overhead watering when blooms are open because wet flowers attract slugs and snails. If the soil feels dry 1 inch below the surface, it’s time to water again.
✂️ Step 3: Deadhead and Prune After Blooming
Once flowers fade (usually 6-8 weeks after blooming), cut back the spent flower stalks to 1 inch above the crown. This redirects energy to the roots and encourages stronger foliage next year. I use clean, sharp pruners to avoid damaging the leaves. Never remove more than 1/3 of the plant at once—hostas store energy in their leaves, and aggressive pruning weakens them.
This is also the best time to divide mature clumps if they’ve overcrowded. Look for new shoots (pups) forming at the base—these are ready to transplant. Dividing every 3-4 years keeps hostas healthy and prevents flower production from declining. Just make sure each new section has at least 1-2 healthy leaves.
🪴 Step 4: Fertilize and Mulch for Next Year’s Blooms
After deadheading, feed hostas with a balanced, slow-release fertilizer (10-10-10) to support root and foliage growth. I apply it in early fall so nutrients are available when new growth starts in spring. Avoid high-nitrogen fertilizers—they encourage leafy growth at the expense of blooms. A light layer of compost or aged manure works too, adding organic matter without burning roots.
Top with 2-3 inches of mulch (shredded bark or leaves) to retain moisture and regulate soil temperature. Mulch also suppresses weeds, which compete with hostas for nutrients. Replenish mulch annually in early spring—this simple step ensures your hostas bloom bigger and more reliably each year.
⏰ Step 5: Monitor for Pests and Diseases
Blooming hostas attract aphids, slugs, and snails, so stay vigilant. Check the undersides of leaves and flower stalks for sticky residue (aphids) or chewed edges (slugs). I use a strong spray of water to dislodge aphids and set out beer traps for slugs. If you see yellowing leaves with brown spots, it could be fungal leaf spot—remove affected leaves immediately and improve air circulation.
This is also the time to watch for crown rot, which thrives in soggy soil. If your hosta’s leaves yellow and wilt despite proper watering, it might be overwatered. Let the soil dry slightly between waterings, and ensure pots or garden beds have good drainage. A healthy blooming hosta should have deep green, firm leaves with no signs of stress.
Tips & tricks for perfect hosta bloom care
These simple adjustments will help your hostas put on their best floral show year after year.
Lighting Strategy: The 3-4 hours of morning sun mentioned in Step 2 is crucial for strong blooms, but timing matters just as much as duration. Position your hostas to receive this light in the morning rather than afternoon—afternoon sun can stress the plants, especially in hot climates. I've noticed that varieties like 'Halcyon' actually produce more buds when given this morning light pattern, even if total sun exposure remains the same.
Watering Wisdom: When checking soil moisture in Step 2, use your finger to test the dryness. Press about 1 inch down—if it feels like a dry sponge, it's time to water. I've found that morning watering is best because it allows the foliage to dry completely by evening, reducing fungal risks. If you notice the soil staying damp longer than usual, your hostas might be overcrowded—this is your cue to plan that division mentioned in Step 3.
Pruning Precision: That 1-inch cut above the crown in Step 3 might seem arbitrary, but it's actually a perfect balance. Cutting too low can damage the crown, while cutting too high leaves the plant vulnerable to pests. I always use sterilized pruners and make clean cuts at a slight angle to prevent water from pooling on the stub. This small detail keeps your hostas healthier through their next growing season.
Fertilizer Timing: Applying the 10-10-10 fertilizer in early fall (as mentioned in Step 4) gives your hostas a head start for next year's blooms. But here's what nobody tells you—if you notice new growth starting in late summer, hold off on fertilizing until fall. The plant will focus energy on leaves rather than storing it for future blooms, and you'll end up with fewer flowers next season.
Pro Tips for Hosta Plant In Bloom
- These simple adjustments will help your hostas put on their best floral show year after year.
- Lighting Strategy: The 3-4 hours of morning sun mentioned in Step 2 is crucial for strong blooms, but timing matters just as much as duration.
- Watering Wisdom: When checking soil moisture in Step 2, use your finger to test the dryness.
Frequently asked questions
Got questions about your hosta plant in bloom? You’re not alone!
Whether you’re curious about timing, care, or troubleshooting, here are the answers you need to keep your shade garden thriving.
When do hosta plants typically bloom?
Hostas usually bloom in late spring to early summer (May–June in most regions), though timing depends on your climate. Look for lavender, purple, or white flowers on tall stalks—don’t worry if they’re short-lived! The real show is their foliage.
How long do hosta flowers last?
Hosta blooms last 2–4 weeks, but they’re not the star—their leaves are! After flowering, you can snip the spent stalks (but leave the leaves) to redirect energy to root growth. Pro tip: Deadheading encourages future blooms!
Why isn’t my hosta blooming?
No flowers? Don’t panic! Hostas prioritize foliage over blooms, especially in young plants or shady spots. Boost blooms by:
- Ensuring 6+ hours of shade (too much sun stresses them).
- Adding balanced fertilizer in early spring.
- Avoiding overcrowding—give roots space to thrive.
Can I propagate hostas from their blooms?
Nope! Hostas don’t reproduce from flowers—they multiply via dividing clumps or offspring tubers (pups). Focus on splitting mature plants in early spring or fall for new growth. Pro tip: Share pups with fellow gardeners!
What pests target hosta blooms?
While blooms are rarely the main target, watch for:
- Slugs/snails (munch leaves and flowers—use beer traps!).
- Aphids (tiny pests on flower stalks—spray with soapy water).
- Deer (avoid with repellents or fencing).
Most pests focus on leaves, so prioritize leaf protection first.
Wrapping up and next steps
Watching your hosta plants in bloom is like uncovering a secret treasure in your shade garden—each velvety leaf and delicate flower is a reward for your care! 🌿 These hardy beauties don’t just thrive; they multiply naturally, turning your garden into a lush, ever-expanding oasis with minimal effort.
Whether you’re a seasoned gardener or just starting, hosting these shade-loving stars is a joy that keeps giving.
Ready to expand your hosta collection? Start by dividing your mature plants this fall or spring—it’s the easiest way to share the love (and free plants!) with fellow gardeners. Happy planting! 🌱