
Blooming
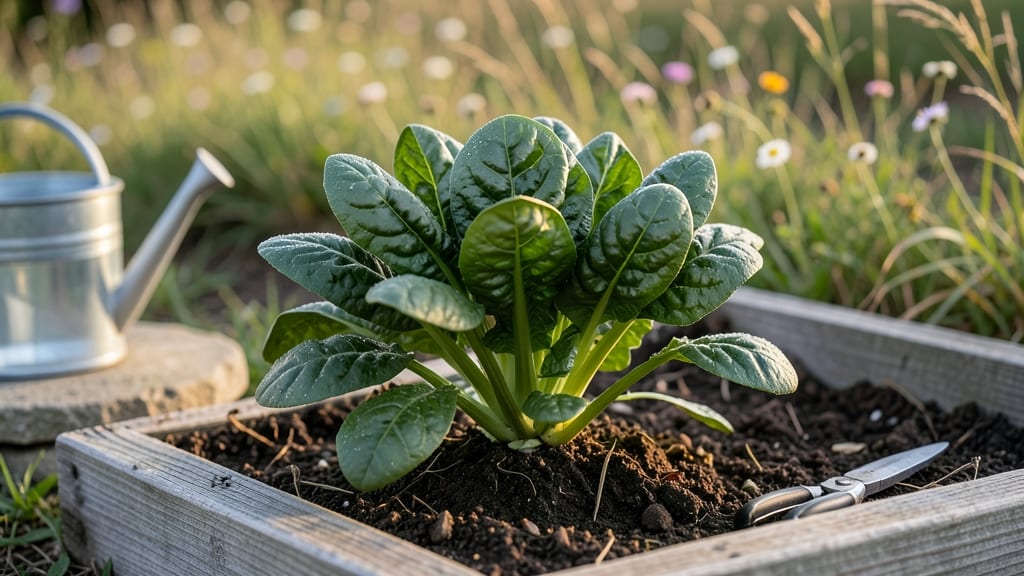
Growing Bloomsdale spinach delivers crisp, sweet leaves in just 30 days from seed—no greenhouse needed. 🌱 This cold-hardy variety thrives when most greens bolt, making it my go-to for early spring and fall harvests.
The secret lies in timing, soil prep, and a few simple care tricks that keep plants productive for weeks.
Start seeds 4-6 weeks before your last frost in well-drained soil with 3-4 inches of compost mixed in. Bloomsdale prefers cooler temps (40-70°F) and partial shade in hot climates, but it’s surprisingly adaptable once you nail the spacing—12-18 inches apart in rows 12 inches apart prevents overcrowding and disease.
A light mulch (straw or grass clippings) retains moisture and keeps leaves clean.
You’ll harvest young leaves in 30 days and full-size plants in 40-45 days, with a steady supply for 6-8 weeks if you pick outer leaves first. The flavor? Richer than store-bought, with a slightly sweet, earthy taste that holds up in salads, sautés, or raw dishes.
Just avoid letting it bolt—hot weather or crowded plants trigger flowering, and the leaves turn bitter.
For year-round success, stagger plantings every 2 weeks in spring and fall. In warm climates, use shade cloth to prevent bolting. Troubleshoot pests (like aphids) with neem oil or soapy water sprays, and rotate crops yearly to prevent soil-borne diseases.
With these steps, you’ll have bold, homegrown greens long after store-bought spinach wilts on the shelf.
📚 In This Guide
- What you need
- Instructions
- Tips and common mistakes
- Wrapping up and next steps
What you need
- ● Bloomsdale spinach seeds – 1 packet (approx. 500 seeds). Look for organic, non-GMO seeds for the best flavor and growth.
- ● Seed-starting soil or potting mix – 1 small tray (10"x20") or 4-inch pots. Use a light, well-draining mix with compost for nutrients.
- ● Garden bed or containers – 10"–12" deep. Bloomsdale thrives in raised beds, pots, or in-ground soil with good drainage.
- ● Compost or organic fertilizer – 1 cup per 10 sq ft. Rich in nitrogen to fuel leafy growth.
- ● Watering can or hose with a gentle spray nozzle – Keep soil consistently moist but not soggy.
- ● Garden gloves – Protect your hands from soil and thorns (yes, spinach has tiny ones!).
- ● Hand trowel or transplanting tool – For sowing seeds and moving seedlings.
- ○ Row cover or shade cloth (optional) – 30–50% shade if growing in hot climates to prevent bolting.
- ● Organic mulch (straw or grass clippings) – 1–2 inches thick to retain moisture and suppress weeds.
- ● Cool-season climate – Ideal temps: 45–75°F (7–24°C). Avoid planting when temps exceed 80°F (27°C).
- ● Full sun to partial shade – 4–6 hours of sunlight daily. Morning sun + afternoon shade works best in hot areas.
- ● Well-draining soil with pH 6.5–7.0 – Test your soil or amend with lime if needed.
Step-by-step instructions for growing Bloomsdale spinach from seed
Here's how I get crisp, vibrant Bloomsdale spinach ready in just 30 days—no shortcuts, just reliable results.
🌱 Step 1: Prepare Containers and Seed Starting Mix
Fill 4-inch deep containers with sterile seed-starting mix—never garden soil, as it compacts and suffocates young roots. I like to add 1 tablespoon of compost per container to boost nutrients without risking disease. Press the mix down lightly until it's firm but still crumbly, then water until it feels evenly moist to the touch—like a damp sponge.
Bloomsdale seeds are tiny, so I use a toothpick to create small divots ¼ inch deep (about the width of the seed). Place 2-3 seeds per hole—this accounts for uneven germination. Cover lightly with a sprinkle of additional mix, then mist gently with water until the surface looks uniformly damp. Here's the thing—overwatering now causes seeds to rot before sprouting.
💧 Step 2: Provide Warmth and Monitor Germination
Cover the containers with a clear plastic dome or plastic wrap to retain warmth and humidity. Spinach germinates best at 65-75°F, so place them on a seedling heat mat if your home runs cooler. You'll see first sprouts in 5-10 days—watch for tiny green hooks pushing through the soil.
Once 50% of seeds have sprouted, remove the dome immediately. Trapped moisture after germination invites damping-off, a fungal disease that collapses seedlings overnight. Water from the bottom now—place containers in a tray of ½ inch of water for 10 minutes daily to encourage strong root development without disturbing the soil.
☀️ Step 3: Provide Light and Thin Seedlings
Move seedlings to a south-facing window or under grow lights providing 12-14 hours of light daily. Without enough light, spinach grows leggy and pale—stems stretch toward the light while leaves stay small. You'll know light is sufficient when seedlings develop bold green color and compact spacing between leaves (about 1 inch apart).
When seedlings reach 2 inches tall, thin to the strongest plant per container. Use scissors to snip weak stems at soil level—this prevents disturbing roots of remaining plants. The reason we thin early is that crowded spinach develops tougher leaves and bolts prematurely when stressed.
🪴 Step 4: Harden Off and Transplant
Two weeks before your last frost date, begin hardening off by placing seedlings outside in partial shade for 1-2 hours the first day. Gradually increase time over 7-10 days, ending with a full day in morning sun. Spinach bolts (goes to seed) quickly when exposed to consistent temperatures above 75°F, so avoid transplanting in summer heat.
Transplant on a cool, cloudy afternoon when soil is 60-65°F. Dig holes slightly deeper than the root ball and space plants 4-6 inches apart in rows 12 inches apart. Water deeply at the base to settle soil around roots—you'll see new leaves emerge within 3-5 days, signaling successful establishment.
⏰ Step 5: Maintain Through Harvest
Keep soil consistently moist—spinach hates drying out. Water early in the morning to reduce fungal risks, and aim for 1 inch of water per week. Apply a balanced fertilizer (like 5-5-5) at half-strength when plants are 4 inches tall to encourage leaf production. You'll notice larger, more tender leaves within a week of fertilizing.
Harvest outer leaves first when they reach 4-6 inches long, cutting just above the next set of leaves. This encourages continuous growth. Bloomsdale spinach is ready in 30-40 days from seed—you'll know it's time when leaves are deep green, crisp, and fully unfurled. Avoid harvesting more than ⅓ of the plant at once to prevent bolting.
Tips & tricks for growing vibrant Bloomsdale spinach
A few key insights will help you cultivate spinach that's crisp, flavorful, and ready in just 30 days.
Seed Starting Precision: The tiny size of Bloomsdale seeds means accuracy matters. I've found that using a toothpick to create divots exactly ¼ inch deep (about the width of the seed) ensures proper placement without burying them too deeply. Planting 2-3 seeds per hole accounts for uneven germination rates—you'll likely end up with one strong seedling per container, but this insurance prevents gaps in your harvest.
Germination Environment: Spinach thrives in warmth during germination, but many home setups struggle to maintain the ideal 65-75°F range. I recommend using a seedling heat mat under your containers, especially if your home tends to run cooler. The moment you see 50% germination, remove the plastic dome immediately—this critical step prevents damping-off, a fungal disease that can wipe out seedlings overnight. Bottom-watering with ½ inch of water for 10 minutes daily after germination encourages strong root development without disturbing delicate seedlings.
Light Management: The 12-14 hours of daily light requirement isn't just about duration—it's about quality. Without sufficient light, spinach becomes leggy and pale, with stems stretching toward any available light source. I've seen spinach growers make the mistake of assuming natural light is enough, only to end up with weak plants. If using windows, rotate containers daily for even exposure. For grow lights, maintain them 6 inches above seedlings and adjust height as plants grow to prevent burning.
Transplant Timing: The 7-10 day hardening off period is your best defense against transplant shock. Start with just 1-2 hours in partial shade, then gradually increase exposure. I've learned this the hard way—rushing the process leads to stressed plants that bolt prematurely. For transplanting, choose a cool, cloudy afternoon when soil temperatures are between 60-65°F. The deeper planting (slightly deeper than the root ball) helps establish strong roots before the plant faces outdoor conditions.
Pro Tips for Growing Bloomsdale Spinach
- A few key insights will help you cultivate spinach that's crisp, flavorful, and ready in just 30 days.
- Seed Starting Precision: The tiny size of Bloomsdale seeds means accuracy matters.
- Germination Environment: Spinach thrives in warmth during germination, but many home setups struggle to maintain the ideal 65-75°F range.
Frequently asked questions
How long does it take for Bloomsdale spinach to mature?
Bloomsdale spinach typically matures in 30–40 days from seed, making it one of the fastest-growing leafy greens. You can start harvesting baby leaves as early as 25 days for tender, delicate greens. For full-sized leaves, wait until they’re about 4–6 inches tall.
Can Bloomsdale spinach survive frost?
In fact, Bloomsdale spinach thrives in cool weather and can tolerate light frosts down to 20°F (-7°C). It even sweeten in response to cold, making it perfect for early spring or fall harvests. Just avoid heavy freezes or prolonged sub-zero temps.
What’s the best way to harvest Bloomsdale spinach?
Harvest leaves by pinching or cutting individual outer leaves to avoid damaging the center. For baby spinach, snip entire plants 1–2 inches above the soil—they’ll often regrow! Avoid pulling leaves, as this can uproot the plant. Harvest in the morning for the freshest, crispest taste.
How do I prevent pests from eating my spinach?
Spinach attracts pests like aphids, slugs, and flea beetles, but you can prevent damage with these tips:
- Row covers deter flying insects.
- Handpick slugs at night (they’re most active then!).
- Plant marigolds or nasturtiums nearby as natural repellents.
- Water in the morning to reduce slug activity.
Can I grow Bloomsdale spinach in containers?
Yes! Bloomsdale spinach grows well in containers at least 6–12 inches deep with drainage holes. Use a well-draining potting mix and place pots in full sun to partial shade. Water consistently—containers dry out faster than garden beds—and fertilize lightly every 2–3 weeks.
What can I plant after spinach in the same spot?
Spinach is a light feeder, so it won’t deplete soil nutrients much. Follow it with:
- Root crops like carrots or beets (they break up compacted soil).
- Alliums like garlic or onions (they deter pests).
- Fast-growing greens like lettuce or arugula (same family, but different pests).
Wrapping up and next steps
Growing Bloomsdale spinach is a rewarding journey that brings fresh, nutrient-packed greens straight to your plate in just 30 days! With the right soil, sunlight, and care, you’ll enjoy a thriving harvest—perfect for salads, sautés, or smoothies. You’ve got this!
Ready to dive in? Start by gathering your seeds and supplies, then follow the steps to nurture your spinach from seed to harvest. Next up: Plant those seeds and watch your garden bloom with vibrant, homegrown goodness! 🌱✨