
Blooming
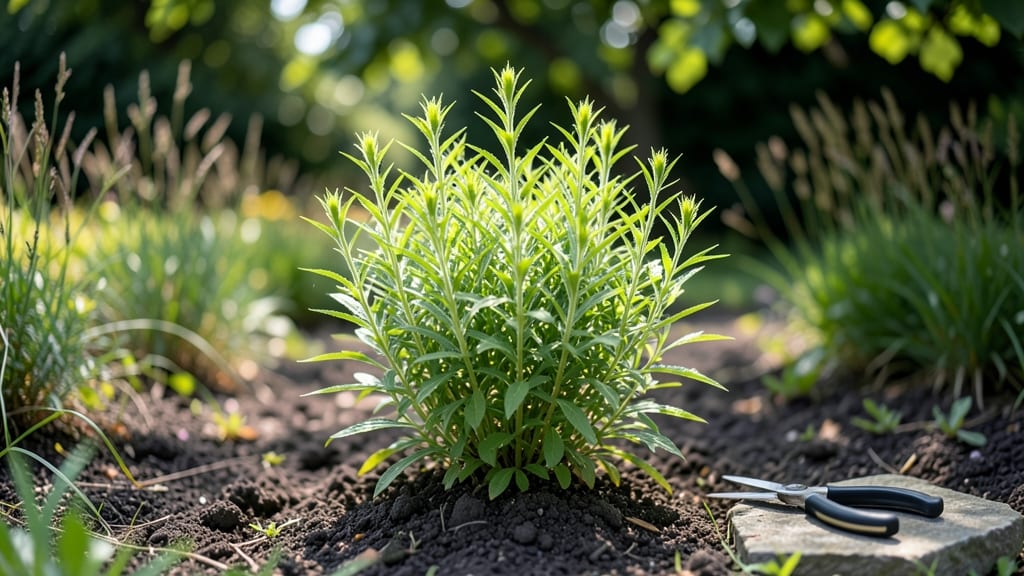
Goldenrod thrives before blooming when planted in early spring or fall—its secret weapon against drought. 🌱 I’ve watched clumps of this hardy perennial spread effortlessly across my dry, sunny patch, proving it’s one of nature’s most reliable workhorses. The key?
Getting it in the ground when soil is cool but not frozen, and giving those first rosettes of leaves just enough water to establish roots. The pre-bloom stage is all about patience and prep: loosen the soil, mix in compost, and space plants 18-24 inches apart for that natural spread.
Water deeply once a week until roots take hold—after that, goldenrod’s drought tolerance kicks in. You’ll spot the difference in just a few weeks: lush, upright stems with those signature narrow leaves, ready to burst into golden blooms by late summer.
What you’ll end up with is a low-maintenance groundcover that outshines many perennials while demanding almost no care. The foliage stays vibrant even in heatwaves, and by mid-summer, your garden will be buzzing with pollinators drawn to its future flowers.
This is the plant that makes me forget I’m even gardening—it just works. Perfect for sunny borders, meadow-style gardens, or even as a living mulch. Here’s how to set it up for success before those iconic blooms even appear.
📚 In This Guide
- What you need
- Instructions
- Tips and common mistakes
- Wrapping up and next steps
What you need
- ● Goldenrod seeds or plants: Seeds: 10–20 seeds (or more for dense planting). Opt for Solidago spp. varieties like Solidago canadensis (Canada goldenrod) or Solidago virgaurea (European goldenrod).
- ● Plants: 3–5 nursery-grown goldenrod plants (1–2 gallons each) for faster results.
- ● Soil: Well-draining, slightly alkaline soil (pH 6.0–7.5). Mix in 1–2 inches of compost or aged manure for nutrients.
- ● Sunlight: Full sun (6+ hours daily) for optimal growth.
- ● Watering tools: Garden hose with adjustable nozzle or watering can.
- ○ Drip irrigation system (optional but helpful for drought-prone areas).
- ● Planting tools: Trowel or hand shovel for digging.
- ● Garden gloves (to protect hands from prickly stems).
- ● Mulch: Organic mulch (e.g., straw or shredded leaves) to retain moisture and suppress weeds.
- ● Fertilizer: Low-nitrogen, balanced fertilizer (e.g., 5-10-10) to support early growth.
- ● Pruners: Sharp bypass pruners for trimming spent blooms or shaping clumps.
- ● Pest deterrents: Neem oil or insecticidal soap (if aphids or spider mites appear).
- ● Staking: Small stakes for young plants in windy areas (goldenrod is generally self-supporting).
How to establish goldenrod before blooming for natural spread
This hardy perennial thrives with minimal fuss—just follow these steps to get it growing strong.
🌱 Step 1: Choose the Right Planting Site and Time
Goldenrod performs best in full sun with 6-8 hours of direct light daily. I always pick a spot with well-draining soil—it hates soggy roots. Spring or early fall planting gives roots time to establish before summer heat arrives. Avoid planting in late summer when blooming begins; you want roots growing, not flowers.
Test your soil's drainage by digging a 6-inch deep hole and filling it with water. If it drains in under an hour, your site is perfect. Amend heavy clay with 2-3 inches of compost mixed into the top 6 inches of soil. Goldenrod tolerates poor soil but spreads faster with organic matter.
🪴 Step 2: Prepare the Soil and Plant Correctly
Dig a hole twice as wide as the root ball but only as deep as the container's base. Goldenrod roots are shallow, so planting too deep suffocates them. Gently remove the plant from its container and loosen any circling roots with your fingers—this encourages outward growth instead of root-bound stress.
Place the plant in the hole and backfill with native soil, pressing lightly to eliminate air pockets. Water deeply until moisture reaches 6 inches down. The soil surface should feel damp but not saturated. I always add a 1-inch layer of mulch around the base (keeping it 2 inches away from the stem) to retain moisture and suppress weeds.
☀️ Step 3: Water Strategically for First-Year Establishment
Water newly planted goldenrod once weekly for the first 4-6 weeks, providing 1 inch of water per week. Check soil moisture by sticking your finger 2 inches deep—water when it feels dry. Overwatering causes root rot, and goldenrod is tough enough to handle occasional dry spells once established.
After the first year, goldenrod becomes drought-tolerant. You'll know it's thriving when new shoots appear in spring and the plant spreads naturally via underground rhizomes. Reduce watering to every 2-3 weeks unless your region experiences prolonged drought or extreme heat.
✂️ Step 4: Encourage Natural Spread Through Light Pruning
Goldenrod spreads aggressively through rhizomes, so I recommend dividing clumps every 3-4 years to control growth. Wait until spring before new growth appears—this is when the plant is most resilient. Dig up sections with roots intact and replant them in desired locations.
Avoid cutting back goldenrod until after it blooms in late summer. The seed heads provide winter interest and food for birds. If you must prune for tidiness, cut stems back to 6 inches tall in early spring. The plant recovers quickly and often produces even more vigorous growth the following year.
🌿 Step 5: Maintain for Long-Term Health and Spread
Fertilize goldenrod only if your soil is particularly poor. A light application of balanced 10-10-10 fertilizer in early spring gives a gentle boost without encouraging excessive leafy growth at the expense of flowering. I skip fertilizer entirely in average garden soil—goldenrod is low-maintenance by nature.
Watch for powdery mildew in humid climates, which appears as white powder on leaves. Improve airflow by spacing plants 18-24 inches apart and avoid overhead watering. If mildew appears, remove affected leaves immediately and improve site drainage. Goldenrod rarely suffers from pests, making it a carefree addition to any drought-tolerant garden.
Tips & tricks for perfect goldenrod establishment
Here's what I've learned after years of growing goldenrod without the usual struggles.
Sunlight Secret: While goldenrod thrives in full sun, I've found it actually handles 6-8 hours of direct light better than many perennials. If your site gets only morning sun, supplement with a few hours of afternoon light—this makes all the difference in preventing leggy growth. The key is consistent light exposure rather than intense midday rays.
Drainage Test: The 6-inch deep drainage test is non-negotiable for goldenrod. I've seen soggy soil turn what should be a thriving plant into a sad, yellowing mess. If your soil drains slowly, create a raised bed or amend with 2-3 inches of compost mixed into the top 6 inches—this mimics its natural habitat perfectly.
Root Care: Goldenrod's shallow roots need space to breathe. When planting, loosen any circling roots gently with your fingers—this encourages outward growth instead of root-bound stress. I've seen plants double in size within a season when properly rooted. The 1-inch layer of mulch around the base (kept 2 inches away from the stem) helps retain moisture while preventing root suffocation.
Watering Wisdom: The 1 inch of water per week guideline works perfectly in most climates, but I've learned to check soil moisture at 2 inches deep—this is where the roots actually need hydration. Overwatering is the #1 killer of goldenrod, so let the top inch dry out between waterings. After the first year, you'll notice the plant's natural drought tolerance kick in.
Pro Tips for Goldenrod Before Blooming
- Here's what I've learned after years of growing goldenrod without the usual struggles.
- Sunlight Secret: While goldenrod thrives in full sun, I've found it actually handles 6-8 hours of direct light better...
- Drainage Test: The 6-inch deep drainage test is non-negotiable for goldenrod. I've seen soggy soil turn what should b...
Frequently asked questions
Got questions about goldenrod before it blooms?
Here are some of the most common ones—and their answers—to help you get the most out of this hardy, drought-loving perennial.
When is the best time to plant goldenrod for optimal growth?
Plant goldenrod in early spring or early fall for the best results. This gives roots time to establish before summer heat or winter frost. Avoid planting in late summer—it may struggle to root before dormancy. If transplanting, water deeply for the first two weeks to reduce shock.
How much water does goldenrod need before it blooms?
Goldenrod is drought-tolerant but benefits from moderate watering (about 1 inch per week) during its first growing season. Once established, it thrives on rainfall alone. Overwatering can lead to root rot, so let the soil dry slightly between waterings—especially in clay-heavy soils.
Why isn’t my goldenrod growing well before blooming?
Slow growth before blooming is often due to poor soil drainage, overcrowding, or lack of sunlight. Ensure it’s in full sun (6+ hours/day) and amend heavy soil with compost. If leaves look yellow or wilted, check for pests (like aphids) or fungal issues (e.g., powdery mildew).
Can I prune goldenrod before it blooms to encourage bushier growth?
Yes! Lightly trim back 1/3 of the plant’s height in early spring to promote denser foliage. Avoid heavy pruning—goldenrod relies on its leaves for energy before blooming. Deadhead spent flowers after blooming to redirect nutrients to next year’s growth.
What are some low-maintenance alternatives to goldenrod?
If goldenrod isn’t your style, try these drought-resistant perennials:
- Black-eyed Susan – Bright yellow blooms, similar care.
- Russian sage – Silvery foliage, purple spikes, thrives in poor soil.
- Coneflower (Echinacea) – Long-lasting blooms, attracts pollinators.
- Sedum (Stonecrop) – Succulent-like, nearly zero water needs.
Wrapping up and next steps
Goldenrod before blooming is a low-maintenance, drought-resistant powerhouse that brings effortless beauty to gardens while supporting pollinators. Its natural spreading habit means fewer chores for you—just enjoy the vibrant late-summer display and the joy of a thriving, self-sustaining landscape.
Ready to embrace the ease? Start by planting a few clumps this season and watch them transform your outdoor space into a resilient, pollinator-friendly oasis!
Next step: Pick your favorite variety, grab some plants, and let nature do the rest! 🌱🐝