
Blooming
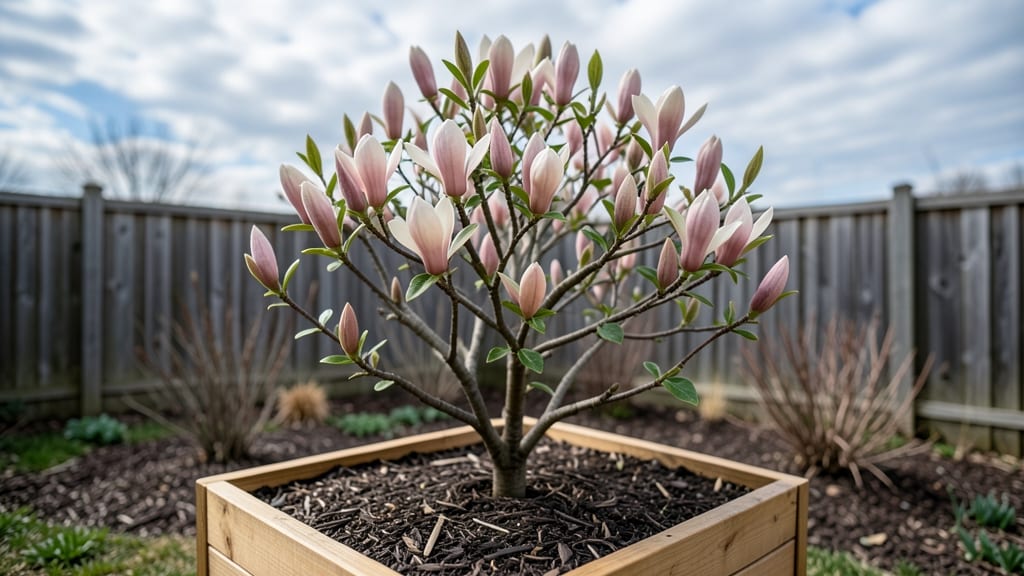
When your flowers start blooming too early, it’s usually a cry for help—not a sign of success. 🌸 I’ve watched roses, petunias, and even my prized dahlias send out buds before they’re ready, only to wilt by midday.
The problem? Stress from heat, drought, or nutrient imbalance forces plants to bloom prematurely, leaving them weak and short-lived.
Most gardeners fix this by adjusting watering, adding balanced fertilizer, or providing afternoon shade during heatwaves. The key is understanding what triggers early blooming—whether it’s inconsistent moisture, overcrowding, or too much nitrogen.
Once you spot the signs (small buds forming too soon, leggy stems, or yellowing leaves), you can correct course before the plant exhausts itself.
What you’ll end up with are stronger stems, longer-lasting blooms, and plants that keep producing flowers all season. The secret is patience—letting foliage mature first so the plant has energy to support big, vibrant blooms. Think of it like teaching a runner to build endurance before sprinting.
This works for annuals, perennials, and even houseplants struggling with indoor conditions. The same principles apply whether you’re dealing with a sun-stressed impatiens or a heat-exhausted hydrangea. Let’s get those plants back on track for show-stopping blooms.
📚 In This Guide
- What you need
- Instructions
- Tips and common mistakes
- Wrapping up and next steps
What you need
- ● Healthy pre-bloom plants: Choose young, non-flowering plants (e.g., roses, peonies, dahlias) with 3–5 mature leaves and no visible pests.
- ● High-quality potting mix: 1–2 gallons of well-draining, organic mix (e.g., 50% peat moss, 30% perlite, 20% compost).
- ● Slow-release fertilizer: 1 tbsp of 10-10-10 NPK or a balanced bloom booster (e.g., fish emulsion).
- ● Watering can or hose: With a fine-mist nozzle for gentle hydration.
- ● Pruning shears: Sharp, sterilized shears (or small scissors) for trimming.
- ● Gloves: Heavy-duty gardening gloves to protect from thorns or soil.
- ○ Plant supports: Optional stakes or cages for tall stems (e.g., 5–6 ft bamboo stakes).
- ● Mulch: 1–2 inches of straw or shredded bark to retain moisture.
- ● pH test kit: To check soil acidity (ideal range: 6.0–7.0 for most blooms).
- ● Grow lights (indoor setups): 12–16 hours/day of full-spectrum LED for seedlings.
How to recognize and support pre-bloom stages for vibrant flowers
Understanding these early stages transforms your garden—longer blooms and stronger stems start here.
🌱 Step 1: Identify the Vegetative Growth Phase
The first clue you're in the pre-bloom stage is rapid leaf and stem elongation—watch for new leaves emerging every 3-5 days with vibrant green color. This vegetative phase builds the plant's energy reserves, which later fuel flower production. I always check for strong, upright stems rather than weak, sprawling growth, as this indicates healthy photosynthesis.
Run your fingers along the stem—you'll feel small bud scales forming at the leaf nodes, often hidden beneath the foliage. These tiny bumps are where flower buds will develop. If your plants are leggy with sparse leaves, they're not storing enough energy. Move them to a sunnier spot immediately—they need 6-8 hours of direct light to support this critical growth phase.
☀️ Step 2: Adjust Light and Nutrients for Bud Formation
Once you spot those bud scales, it's time to shift strategies. Reduce nitrogen-heavy fertilizers—too much promotes leafy growth at the expense of flowers. Switch to a balanced 10-10-10 or phosphorus-rich 5-10-5 formula to encourage root and flower development. I apply this at half-strength every 2 weeks during this transition period.
Increase light exposure gradually—if your plants are indoors or in partial shade, move them to full sun (or supplement with 12-14 hours of grow light). Watch for stems thickening slightly and leaves developing a deeper green hue. This signals the plant is shifting from vegetative to reproductive growth. If leaves start yellowing, you're overdoing the phosphorus—cut back to half the recommended dose.
💧 Step 3: Monitor Moisture Without Overwatering
The pre-bloom stage demands consistent moisture but not soggy soil. Stick your finger 1 inch deep into the soil—water when it feels dry to the touch. Overwatering now causes bud blast, where flowers fail to open properly. I water deeply in the morning, aiming for 1-1.5 gallons per plant depending on pot size, and let excess drain completely.
Look for small, firm buds forming at the stem tips—these should feel slightly resistant when gently pressed. If buds appear soft or mushy, you're overwatering. Reduce frequency and let the top 2 inches of soil dry out between waterings. Mulch with 1-2 inches of organic material to retain moisture while preventing root rot.
✂️ Step 4: Prune Strategically to Direct Energy
Remove any yellow or diseased leaves immediately—they drain energy the plant could use for bud development. Pinch back the top 2-3 inches of leggy stems to encourage branching and more flower sites. I always use clean, sharp scissors to avoid tearing tissue, which invites infections.
Watch for side shoots forming at leaf nodes—these are where future blooms will appear. If a stem grows too long without buds, trim it back to the nearest leaf node. This redirecting of energy often results in fuller, more abundant blooms later. Avoid heavy pruning now; focus on light shaping to maintain the plant's energy balance.
🌿 Step 5: Recognize the Transition to Blooming
The final pre-bloom stage is marked by buds swelling visibly and developing color. You'll see petals beginning to unfold at the edges of the bud, often in shades of pale pink, yellow, or white before full color appears. This is your cue to reduce water slightly—too much moisture now causes buds to split open prematurely.
At this point, I switch to a low-nitrogen, high-potassium fertilizer to support the final push of energy into blooms. Keep the plant in bright, indirect light if possible—direct sun can stress newly opening flowers. Within 5-7 days, you'll see the first full blooms emerge, signaling the plant has successfully transitioned from pre-bloom to full flowering.
Tips & tricks for supporting pre-bloom stages
These subtle adjustments make all the difference between modest blooms and garden showstoppers.
Light Exposure Secret: The 6-8 hours of direct light in Step 1 is non-negotiable, but here's the trick: place your plants on the east-facing window first to acclimate them. After 3-5 days, gradually move them to full south-facing light. This prevents sunburn on tender leaves while building their light tolerance. For indoor growers, position lights 18-24 inches above plants during the 12-14 hour light cycle—closer than most guides suggest.
Nutrient Transition Insight: When switching to that half-strength 10-10-10 fertilizer in Step 2, I add a handful of crushed eggshells to the soil. The calcium prevents bud blast while supporting cell wall development. For container plants, mix the fertilizer directly into the top inch of soil rather than applying it to the surface—this ensures the roots get immediate access to phosphorus during this critical transition.
Moisture Monitoring Hack: The 1-inch soil check in Step 3 works, but I've found a more precise method: use a wooden chopstick instead of your finger. Push it into the soil and pull it out—if it comes out clean, water immediately. If it has soil clinging to it, wait another day. This method gives you a more consistent moisture gauge than using your fingers, which can vary in sensitivity from day to day.
Pruning Precision: In Step 4, when pinching back those leggy stems, focus on removing growth that's older than 4-5 leaves from the base. This preserves the plant's energy reserves while still encouraging branching. I always make cuts at a 45-degree angle just above a leaf node—this prevents water from pooling on the cut surface, which can lead to fungal infections. For large plants, use sterilized pruning shears rather than scissors to avoid spreading disease between cuts.
Pro Tips for Flower Before Bloom
- These subtle adjustments make all the difference between modest blooms and garden showstoppers.
- Light Exposure Secret: The 6-8 hours of direct light in Step 1 is non-negotiable, but here's the trick: place your plants on the east-facing window first to acclimate them.
- Nutrient Transition Insight: When switching to that half-strength 10-10-10 fertilizer in Step 2, I add a handful of crushed eggshells to the soil.
Frequently asked questions
Got questions about the flower before bloom stage? You’re not alone!
Here are some of the most common queries—plus clear, actionable answers to help you nurture stronger, showier blooms down the line.
What does "flower before bloom" even mean?
The flower before bloom stage refers to the early development phase of a flower bud—when it’s still tight, green, or just beginning to show color. This is the prime time to assess health, remove damaged buds, or even prune strategically to redirect energy for longer-lasting, hardier blooms later. Think of it as a "bloom boot camp" for your plants!
When is the best time to check for flower buds before they bloom?
Timing depends on your plant, but generally, inspect buds 3–7 days before they’re expected to open. For example:
- Annuals (like petunias or zinnias): Check 5–7 days pre-bloom.
- Perennials (like roses or peonies): Monitor 7–10 days out.
- Vegetables (tomatoes, peppers): Look for swelling buds 10–14 days before harvest.
What should I do if my flower buds look sick or deformed before blooming?
Don’t panic! Act fast with these steps:
- Remove damaged buds (snip with clean shears) to prevent disease spread.
- Check for pests (aphids, spider mites) and treat with neem oil or insecticidal soap.
- Adjust care: Overwatering or nutrient imbalances (too much nitrogen) can cause issues. Let soil dry slightly between waterings.
Can I prune or trim buds before they bloom to encourage bigger flowers?
Strategic pruning can boost bloom quality, but timing and technique matter:
- Deadhead spent blooms (even pre-bloom buds) to redirect energy to healthier buds.
- Avoid heavy pruning on young plants—focus on removing only weak or crowded buds.
- For veggies (like tomatoes): Pinch off suckers (side shoots) to prioritize fruit size over quantity.
Are there any flowers that shouldn’t be pruned before blooming?
Yes! Some plants rely on all their buds to set flowers, so avoid pruning:
- Single-bloom perennials (like peonies or dahlias)—they produce one spectacular flower per stem.
- Vegetables with edible buds (broccoli, cauliflower)—trimming can reduce harvest.
- Orchids or rare hybrids—their blooming cycles are delicate; prune only dead or diseased growth.
Wrapping up and next steps
Understanding the flower before bloom stages is your secret to cultivating vibrant, resilient blooms that stand the test of time. From nurturing strong roots to mastering light and nutrients, each step plays a pivotal role in unlocking your plants' full potential. 🌱
Now that you’re armed with the knowledge, take action! Start by assessing your plants’ current stage—are they still in the bud formation phase or ready for the pre-bloom burst? Experiment with the tips shared, and don’t forget to keep a gardening journal to track progress.
Every small adjustment brings you closer to those show-stopping blooms you’ve been dreaming of. Happy growing!