
Blooming
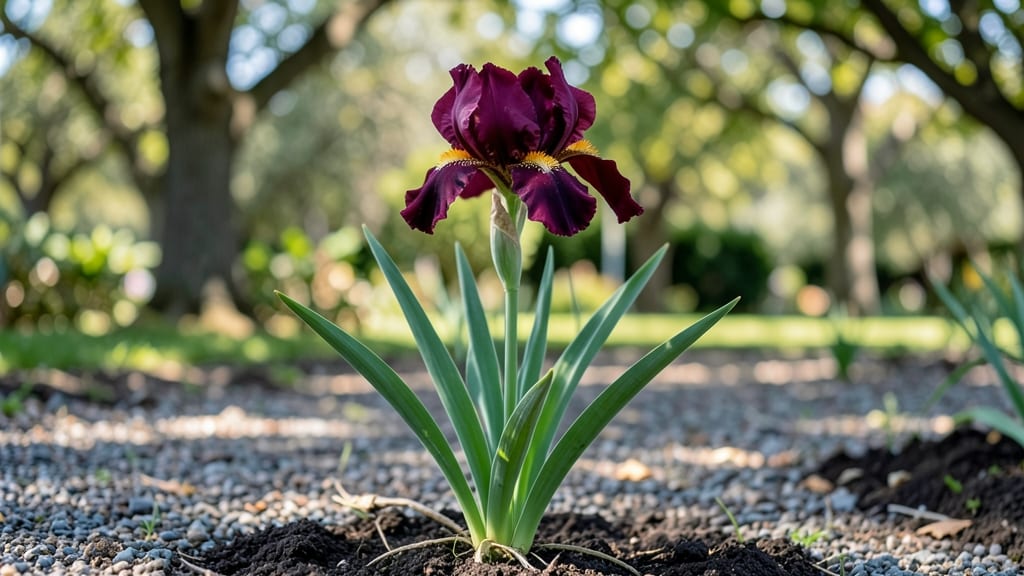
Fall-blooming iris thrives where spring varieties fail—its late-season drama turns your garden into a jewel-toned sanctuary when most perennials fade. 🌿 Unlike its spring cousins, this iris blooms in September and October, when cooler temps and shorter days trigger its vibrant displays of purple, white, and deep magenta.
The best part? These clumps spread reliably, creating natural ground cover while demanding minimal care.
Plant them in well-draining soil with 6-8 hours of sunlight daily, and water deeply but infrequently—they despise soggy roots. Mulch with 2-3 inches of organic matter in early fall to insulate rhizomes from frost while keeping moisture locked in.
Unlike spring iris, fall varieties handle drought better once established, making them perfect for low-maintenance gardens or water-restricted zones.
You’ll see blooms emerge in late summer if planted correctly, with each clump multiplying annually. Pair them with ornamental grasses or sedum for texture contrast, or let them naturalize under deciduous trees where spring bloomers would scorch.
The secret to extending their season? Deadhead spent blooms to encourage a second flush in early winter—just before the first hard frost.
These iris multiply so aggressively they’ll fill gaps in your garden within 3-4 years, outcompeting weeds without chemicals. For best results, divide clumps every 4-5 years in early spring to prevent overcrowding.
The trade-off? Fewer blooms per stem, but more vibrant color overall—a small price for a garden that stays stunning when others sleep.
📚 In This Guide
- What you need
- Instructions
- Tips and common mistakes
- Wrapping up and next steps
What you need
- ● Fall-blooming iris rhizomes: Choose healthy, firm rhizomes (about 1–2 inches wide) from a trusted nursery. Aim for 5–10 rhizomes depending on your garden size.
- ● Well-draining soil: A mix of 50% native soil, 30% compost, and 20% coarse sand or perlite (to prevent rot). Test soil pH—ideal range is 6.0–7.0.
- ● Sunlight exposure: A spot with full sun (6+ hours/day) or partial shade (4–6 hours) in hotter climates.
- ● Watering can or hose: With a gentle spray nozzle for hydration without damaging rhizomes.
- ● Garden fork or trowel: For digging trenches (depth: 2–3 inches) and planting.
- ○ Mulch (optional): 2–3 inches of shredded bark or gravel to retain moisture and suppress weeds (avoid organic mulch close to rhizomes).
- ○ Fertilizer (optional): A low-nitrogen, phosphorus-rich fertilizer (5-10-10 ratio) for blooms. Apply once in early spring.
- ○ Drip irrigation (optional): For automated, drought-resistant watering.
Step-by-Step instructions for planting fall-blooming iris
Here’s how to establish these drought-resistant beauties so they multiply naturally and reward you with vibrant fall blooms for years.
🌱 Step 1: Choose and Prepare the Planting Site
Fall iris thrives in full sun—select a spot receiving at least 6-8 hours of direct sunlight daily. These perennials despise soggy soil, so avoid low-lying areas where water pools. Amend heavy clay with 2-3 inches of coarse sand or grit to improve drainage, or plant on a slight mound if your soil naturally compacts.
I like to test soil moisture by digging a 6-inch hole—if water doesn’t drain within 1-2 hours, the site needs more organic matter. Work in 2-3 inches of compost to enrich the soil without creating a nitrogen-rich environment, which encourages leafy growth at the expense of blooms.
🪴 Step 2: Divide and Plant Rhizomes Correctly
Purchase healthy, firm rhizomes with fan-shaped leaves and visible bloom stalks from the previous season. Plant in early spring or late summer when temperatures are mild. Dig holes 2-3 inches deep—these rhizomes must sit partially exposed to sunlight, which prevents rot. Space them 12-18 inches apart in rows for optimal air circulation.
Position the rhizome so the top third remains above soil level. Press the edges lightly into the soil but avoid burying them completely. This exposure mimics their natural habitat and ensures strong root development. Water immediately after planting to settle the soil around the roots—1 gallon per rhizome is ideal.
☀️ Step 3: Establish Watering and Fertilizing Routine
Water deeply once weekly during the first growing season to encourage root establishment. After the first year, these drought-resistant perennials need minimal watering—only during prolonged dry spells. Overwatering is the fastest way to kill iris; you’ll know moisture is right when the soil feels dry 2 inches below the surface before watering again.
Fertilize lightly in early spring with a low-nitrogen, high-phosphorus formula (like 5-10-10) to promote blooming. Skip summer fertilizing—it stimulates leaf growth at the expense of fall flowers. I’ve found that a thin layer of compost worked into the soil in spring provides enough nutrients without risk of overfeeding.
✂️ Step 4: Prune and Maintain for Natural Multiplication
Deadhead spent blooms by cutting back the flower stalks to the base once they fade. This redirects the plant’s energy toward next year’s blooms and prevents self-seeding, which can clutter your garden. Leave the fan-shaped leaves intact until they turn brown in late winter—they store energy for next season’s growth.
Divide clumps in early spring when new shoots appear. Dig up mature rhizomes and separate them into 3-5 inch sections, ensuring each piece has at least one fan of leaves. Replant immediately or store in a cool, dry place until planting time. This natural propagation ensures a fresh supply of blooms every fall.
🌿 Step 5: Protect and Encourage Fall Blooms
As summer progresses, reduce watering to every 2-3 weeks unless your area experiences extreme heat. Stress from mild drought actually intensifies fall color in iris. Watch for Japanese beetles or iris borers—handpick pests early or apply neem oil as a preventive spray to avoid chemical damage.
By late summer, you’ll notice bloom stalks emerging from the center of the rhizome. These stalks grow quickly—6-12 inches tall—and produce 3-5 vibrant flowers per stalk. Stake taller varieties if needed, but avoid heavy supports that can damage delicate stems. Enjoy the show, then let the foliage remain until spring for natural winter protection.
Tips & tricks for perfect fall blooming iris planting
These game-changing strategies will help your drought-resistant iris thrive and multiply naturally for stunning fall displays.
Site Selection Wisdom: The 6-8 hours of daily sunlight requirement is non-negotiable—these beauties won't tolerate shade. I've planted mine near the house where they get morning sun and afternoon shade from a nearby tree, but even then, the afternoon sun exposure is critical. For clay-heavy soils, create raised beds with 2-3 inches of coarse sand mixed in—this improves drainage dramatically and prevents the rhizomes from rotting. Think of it as giving your iris a natural, well-draining habitat that mimics their wild origins.
Rhizome Positioning Secret: When planting those 2-3 inch deep holes in Step 2, resist the urge to bury the rhizomes completely. The top third must remain exposed—this is what prevents rot and encourages strong root development. I like to use a small trowel to create a shallow depression just deep enough to cradle the rhizome while keeping that vital top portion visible. Water immediately after planting with 1 gallon per rhizome to ensure good soil contact without displacing them.
Watering Strategy: The once-weekly watering during the first growing season is perfect for establishing roots, but here's the trick: water deeply in the morning so the soil has time to dry out before evening. After the first year, let the soil dry completely between waterings—you'll know it's time when the top 2 inches feel dry to the touch. This drought resistance is what makes these perennials so low-maintenance once established. I've seen mine go weeks without water during summer heatwaves and still produce vibrant fall blooms.
Pest Prevention: Japanese beetles and iris borers are the main threats to your fall blooms. I've found that a preventive spray of neem oil every 2 weeks during peak pest season (late summer) works wonders without harming beneficial insects. For borers, I make a habit of inspecting the base of the leaves in early summer—early detection means you can handpick larvae before they cause damage. Think of this as giving your iris a natural armor against the most common threats.
Pro Tips for Fall Blooming Iris
- These game-changing strategies will help your drought-resistant iris thrive and multiply naturally for stunning fall displays.
- Site Selection Wisdom: The 6-8 hours of daily sunlight requirement is non-negotiable—these beauties won't tolerate shade.
- Rhizome Positioning Secret: When planting those 2-3 inch deep holes in Step 2, resist the urge to bury the rhizomes completely.
Frequently asked questions
Got questions about fall-blooming irises? You’re not alone!
Here are answers to the most common queries to help you grow these stunning, low-maintenance perennials with confidence.
When do fall-blooming irises actually flower?
Fall-blooming irises typically burst into color from late August to November, depending on your climate. In cooler regions, they may bloom earlier (late summer), while warmer zones can enjoy them into early winter. Planting in well-draining soil and giving them full sun ensures the best timing!
How do I tell if my iris is a fall bloomer?
Look for thin, grass-like foliage and smaller, more delicate blooms compared to spring irises. Fall varieties often have aromatic flowers (like Iris germanica or Iris xiphium) and may rebloom in spring. Check the rhizome size—fall bloomers are usually smaller and more compact than their spring counterparts.
Can I plant fall-blooming irises in containers?
Use large, shallow containers with drainage holes and a mix of sandy loam and perlite to mimic their native, well-draining soil. Repot every 2–3 years to refresh the soil. Just avoid overwatering—they’re drought-resistant but hate soggy roots!
Why aren’t my fall irises multiplying like they should?
Fall-blooming irises spread naturally, but slow growth often means poor soil, overcrowding, or lack of sunlight. Divide rhizomes every 3–4 years in early spring. Ensure they get 6+ hours of sun and avoid heavy, clay soil. A light balanced fertilizer in early spring can also boost vigor!
What’s a great alternative if I want color but less maintenance?
Try bearded iris hybrids (spring bloomers) or Crocosmia for bold fall color with minimal care. For fragrance, Dutch iris (Iris xiphium) is a top pick—it thrives in containers and spreads easily. Just ensure they get well-draining soil to prevent rot!
Wrapping up and next steps
Fall-blooming irises are a gardener’s dream—low-maintenance, drought-resistant, and stunningly beautiful—while their natural multiplication means your garden will only get more vibrant over time. Whether you’re a seasoned green thumb or a beginner, these perennials bring effortless charm to any outdoor space. 🌸
Ready to transform your garden? Start by selecting the right variety, prepping your soil, and giving them the care they thrive on. Plant a few this season, and watch your yard become a showstopper next fall!