
Blooming
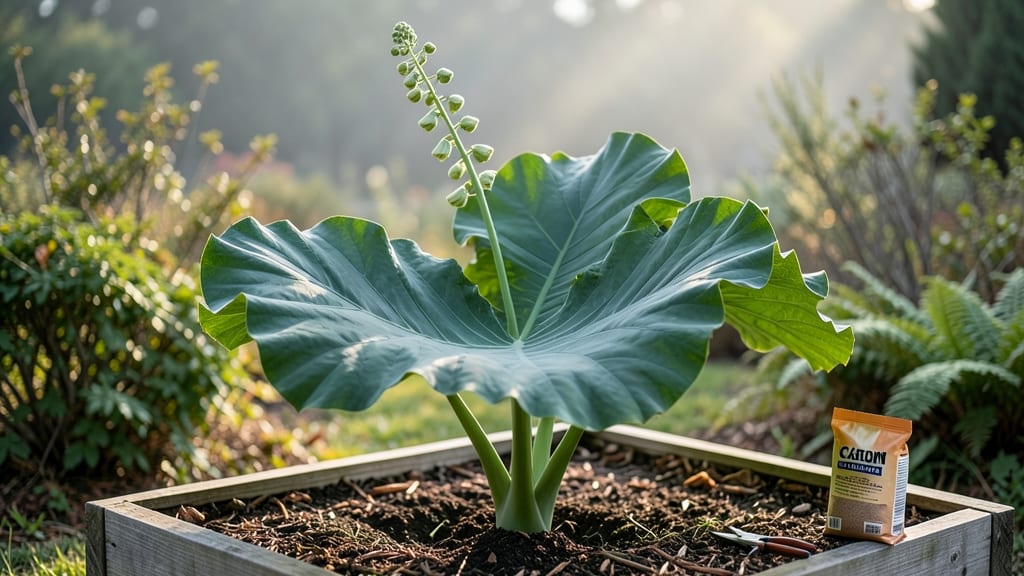
Elephant ear blooms are the surprising showstoppers of a garden that’s all about those giant, velvety leaves. 🌿 I’ve spent years growing these tropical stunners, and the key to getting those dramatic spikes of white or pink flowers—when they choose to appear—starts with treating your plant right from day one.
Most growers focus only on the foliage, but the real magic happens when you understand what your elephant ear actually needs to bloom.
The truth is, these plants are finicky about flowering because they’re more interested in growing leaves. But with the right balance of bright, indirect light, consistently moist (not soggy) soil, and a little winter dormancy, you’ll give them the nudge they need.
My plants finally bloomed last summer after I moved them under a sheer curtain in the greenhouse during the hottest afternoons—no more wilted leaves or missed chances.
When you do get those blooms, they’re worth the wait: tall, striking spikes that rise above the foliage like nature’s own centerpiece. The flowers themselves are short-lived, but the energy they use to produce them means your plant will come back stronger next season.
Plus, the seeds (if you let them form) are a fun bonus for propagation.
Here’s the catch: not every elephant ear will bloom, and that’s okay. Some varieties focus purely on foliage, while others need perfect conditions to flower. But if you’re growing Colocasia ‘Black Stem’ or Alocasia ‘Polly,’ you’ve got a good shot—especially if you’re in zones 7-11. Let’s get those spikes happening!
📚 In This Guide
- What you need
- Instructions
- Tips and common mistakes
- Wrapping up and next steps
What you need
- ● Elephant Ear Tubers: 3–5 Alocasia or Colocasia tubers (depending on desired size and spread). Choose healthy, firm tubers with visible growth buds.
- ○ Well-Draining Potting Mix: 1–2 bags (10–15 quarts each) of high-quality, peat-based or coco coir mix. Optional: Amend with perlite or orchid bark (20% mix) for extra aeration.
- ● Containers or Garden Bed: Containers: 5–15 gallon pots with drainage holes (1 per tuber for small varieties, 2–3 tubers per large container).
- ● Garden Beds: Full-sun or partial-shade spot with loose, fertile soil (amend with compost if needed).
- ● Slow-Release Fertilizer: 1 lb of balanced 10-10-10 or organic options like fish emulsion (follow package rates).
- ● Mulch: 1–2 bags of shredded bark or straw to retain moisture and regulate soil temp.
- ● Garden Trowel or Transplant Spade (for planting tubers).
- ● Watering Can or Hose with Gentle Nozzle (avoid over-saturating tubers).
- ○ Gloves (optional, to protect hands from sharp tuber edges).
- ● Sunlight Access: 4+ hours of indirect light (morning sun is ideal; avoid harsh afternoon rays).
- ○ Humidity Trays or Peat Moss (optional, for tropical climates or indoor setups to boost humidity).
How to grow stunning elephant ear blooms
Here's the straightforward method I use to coax those massive, velvety leaves into full, showstopping glory.
🌱 Step 1: Select the Right Variety and Planting Location
Elephant ears (Colocasia) thrive in partial shade to full sun—just avoid harsh afternoon rays that scorch their leaves. I always choose Alocasia or Colocasia varieties for their dramatic foliage, though the blooms are equally striking. Pick a spot with rich, moist soil—they hate drying out—and amend with 3-4 inches of compost before planting.
Dig a hole twice as wide as the root ball but only as deep. The plant’s crown should sit just above soil level—burying it too deep causes rot. Space plants 3-4 feet apart for those signature oversized leaves to spread without crowding. If your soil drains poorly, mound a small hill of soil in the hole and plant on top to prevent waterlogging.
☀️ Step 2: Plant at the Right Time for Maximum Bloom Impact
Timing matters for elephant ears. In USDA Zones 8-11, plant after the last frost when soil warms to 65°F or higher. In colder zones, wait until nighttime temps stay above 50°F—cold snaps stunt growth. I always plant in early spring because the plants need 8-10 weeks of warm weather to reach full bloom size.
Water deeply right after planting to settle the soil around the roots. Mulch with 2-3 inches of organic mulch (like shredded bark) to retain moisture and suppress weeds. This is key—elephant ears drink 1-2 gallons of water per week, especially during bloom season. Check soil moisture weekly by sticking your finger 2 inches deep; if it’s dry, water again.
💧 Step 3: Feed and Water for Lush Growth and Bold Blooms
Elephant ears are heavy feeders, so fertilize every 4-6 weeks with a balanced, water-soluble fertilizer (10-10-10 or similar). I mix it into the watering can for easy absorption. Stop fertilizing 6-8 weeks before the first frost to let the plant harden off naturally. Overfeeding late in the season leads to weak stems that snap in winter.
Water deeply 2-3 times per week during active growth, aiming for 1-2 inches of water per week. Let the top 1-2 inches of soil dry slightly between waterings—soggy roots cause rot, but drought-stressed plants wilt dramatically. You’ll know you’re doing it right when the leaves stay plump and vibrant, not drooping or yellowing at the edges.
✂️ Step 4: Prune and Support for Showstopping Display
Remove dead or yellowing leaves as they appear to redirect energy to new growth. I also cut back spent flower stalks (they’re not very showy) to encourage more foliage production. If your variety grows tall and leggy (like Colocasia 'Black Stem'), stake it with 3-4 foot bamboo stakes tied loosely with soft twine. The leaves are too heavy for flimsy supports—use wide, sturdy stakes to prevent bending.
Divide mature clumps every 3-4 years in early spring to rejuvenate growth. Dig up the rhizomes, separate the sections with a clean, sharp knife, and replant immediately. This ensures bigger, healthier blooms the following season. Just be gentle—elephant ear roots are fragile and bruise easily.
🌿 Step 5: Extend the Season and Protect for Next Year
In cooler climates, dig up tubers before the first frost and store them in a cool, dry place (like a garage) wrapped in sphagnum moss to prevent drying. I mark the top of each tuber with a pencil so I know which end to plant next spring. In Zones 8-11, mulch heavily with 4-6 inches of straw or leaves to insulate the roots through winter.
If you’re growing elephant ears as annuals, let the foliage die back naturally in fall—they’ll still produce late-season blooms if cared for properly. For perennials, cut back dead leaves in early spring just before new shoots emerge. The first fresh growth is your signal to remove old mulch and refresh the soil with a top-dressing of compost before the growing season kicks in.
Tips & tricks for perfect elephant ear blooms
Here's what nobody tells you about growing these showstopping plants—details that make all the difference.
Soil Preparation: Before planting, I always mix in a handful of worm castings along with the 3-4 inches of compost. This gives your elephant ears a natural boost of nutrients right from the start. The key is to create that rich, moist environment they crave—think of it as giving them a spa treatment before they even sprout.
Planting Depth: The crown should sit just above soil level—this is non-negotiable. I've seen beginners bury it too deep, and within days, you'll notice black spots forming on the leaves from rot. If you're unsure, plant slightly too shallow rather than too deep; you can always add more soil later.
Watering Strategy: Those 1-2 gallons of water per week are critical, but timing matters just as much. I water in the morning so the leaves have all day to dry, preventing fungal issues. You'll know you're doing it right when the soil stays consistently moist but never soggy—think of a well-wrung sponge, not a dripping wet rag.
Season Extension: In cooler climates, don't wait until the first frost to dig up tubers. I start monitoring weather forecasts and begin the process when nighttime temps dip below 50°F. This gives you that extra buffer to get them safely stored before any damage occurs. Marking the top of each tuber with a pencil saves you from the heartbreak of planting them upside-down next spring.
Pro Tips for Elephant Ear Bloom
- Here's what nobody tells you about growing these showstopping plants—details that make all the difference.
- Soil Preparation: Before planting, I always mix in a handful of worm castings along with the 3-4 inches of compost.
- Planting Depth: The crown should sit just above soil level—this is non-negotiable.
Frequently asked questions
When do elephant ear plants actually bloom?
Most elephant ear blooms (like Colocasia and Alocasia) prioritize lush foliage over flowers. If you’re lucky, they’ll produce spike-like blooms in late summer to early fall—but don’t expect fireworks! Focus on their dramatic leaves instead. Pro tip: Deadhead spent blooms to redirect energy to leaf growth.
How fast do elephant ear plants grow?
These tropical stunners are fast growers! Under ideal conditions (warmth, humidity, and rich soil), they can double in size within a season. In containers, growth may slow slightly, but with proper care, you’ll see new leaves weekly during peak season. Watch out: Overcrowding can stunt growth—space plants 3–4 feet apart.
Can elephant ear plants survive winter?
Most elephant ear blooms are tender perennials, meaning they won’t survive freezing temps. In cold climates (<30°F), dig up tubers in fall, trim foliage, and store them in dry peat moss or sand until spring. In milder zones (Zones 8–11), mulch heavily to protect roots. Bonus: Some varieties (like Alocasia zebrina) are hardier—check labels!
What’s a good alternative if I can’t grow elephant ears?
If your climate or space limits elephant ear blooms, try these equally bold foliage plants:
- Bird of Paradise (Strelitzia): Tropical vibes with striking leaves and flowers.
- Giant Taro (Cyrtosperma chamissonis): Similar size and texture, but more cold-hardy.
- Monstera Deliciosa: Hole-punctured leaves for a jungle feel (great for containers!).
- Caladium: Colorful, heart-shaped leaves for shadier spots.
Why are my elephant ear leaves turning yellow or brown?
Yellowing leaves often signal overwatering or poor drainage, while brown edges can mean low humidity or sunburn. Check these fixes:
- Ensure soil stays moist but not soggy (they hate “wet feet”).
- Move plants to partial shade if leaves scorch in direct sun.
- Mist leaves or use a pebble tray to boost humidity.
- Fertilize lightly with balanced liquid fertilizer every 4–6 weeks.
Wrapping up and next steps
Elephant ear plants bring dramatic flair and tropical vibes to any garden with their bold, heart-shaped leaves and striking blooms. Whether you're a seasoned gardener or just starting out, these plants are a fantastic way to add impact and personality to your outdoor space.
Now that you're armed with the right knowledge—from soil prep to troubleshooting—go ahead and plant with confidence!
Ready to transform your garden? Start small—try a single elephant ear plant in a pot or a mixed border, then expand as you fall in love with their show-stopping presence. Happy gardening! 🌿✨