
Blooming
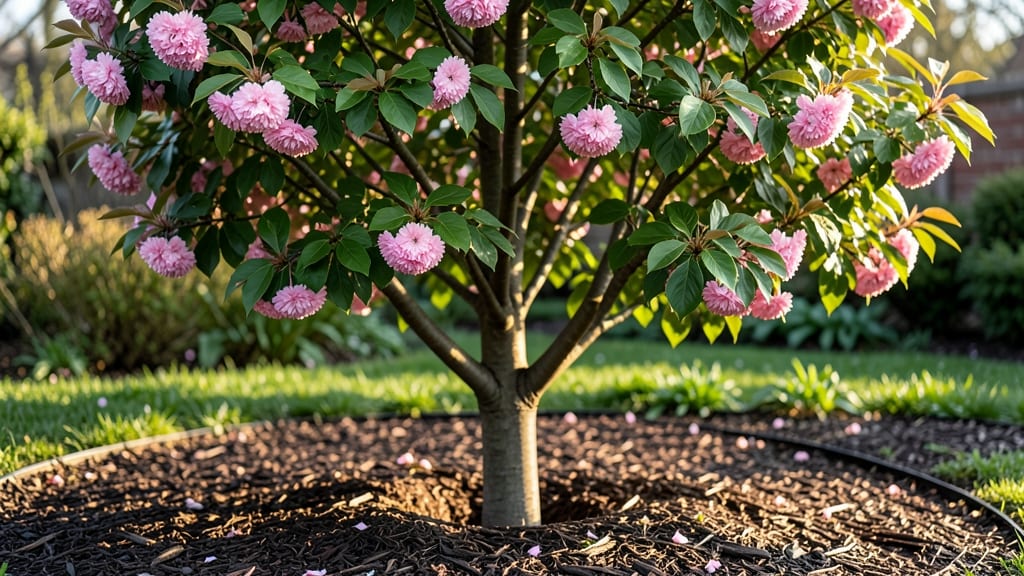
Nothing beats the sight of early blooming spring trees bursting into color before the first frost even thinks about returning. 🌸 I've planted my share of these showstoppers, and the secret to their dramatic arrival comes down to timing, soil prep, and choosing the right varieties for your zone.
Most early bloomers—think cherry blossoms, magnolias, or serviceberry—need well-draining soil and at least 6 hours of sunlight daily. Plant in late fall or early winter when the ground is workable but not frozen, giving roots time to establish before spring's growth surge.
Mulch heavily to protect roots from temperature swings.
By mid-March, you'll see buds swelling and branches heavy with blossoms. The key is consistent watering—especially during dry spells—and avoiding heavy pruning until after flowering. These trees reward patience with weeks of vibrant color when others are still bare.
Perfect for lawns, parks, or even large containers. Just match the variety to your climate—some, like Yoshino cherry, thrive in zones 5-8, while Southern magnolias prefer zones 7-9. Start small with one or two trees for maximum impact.
📚 In This Guide
- What you need
- Instructions
- Tips and common mistakes
- Wrapping up and next steps
What you need
- ● Early blooming tree varieties: 1–3 plants (e.g., Magnolia stellata, Prunus serrulata ‘Kanzan’, or Cercis canadensis ‘Avondale’). Choose based on your climate zone (USDA 5–9 for most).
- ● High-quality potting soil: 5–10 bags (sterile, well-draining mix with compost). Avoid garden soil—it’s too dense!
- ● Containers (if potted): 1–3 pots (15–25 gallons each, with drainage holes). Use fabric grow bags for flexibility.
- ● Mulch: 2–3 cubic feet (shredded bark or pine straw). Keep 3–4 inches away from the trunk.
- ● Slow-release fertilizer: 1–2 bags (10-10-10 or organic options like bone meal). Follow label rates for new plants.
- ● Watering can or hose with nozzle: 1 (for gentle, deep watering). Aim for 1–2 gallons per tree, 2–3 times per week.
- ● Garden trowel or spade: 1 (for digging holes 2–3x wider than the root ball).
- ● Pruning shears: 1 (sterilized, sharp blades for shaping or removing dead blooms post-season).
- ● Gloves: 1 pair (gardening gloves to protect from thorns or sap).
- ● Measuring tape: 1 (to ensure proper spacing—6–10 feet apart for mature trees).
- ○ Stakes & twine (optional): 2–4 stakes + twine (for young trees in windy areas).
- ○ Tree guard (optional): 1–2 (plastic or metal collars to protect trunks from critters).
- ● Know your zone: Check the blank">USDA Plant Hardiness Zone Map—early bloomers like cherry blossoms need chill hours (300–1,000, depending on the species).
- ● Timing is key: Plant bare-root trees in late fall or early spring (before buds swell). Container-grown trees can go in year-round (except winter).
- ● Sunlight audit: Most early bloomers crave full sun (6+ hours/day). Test your yard with a blank">sun path analyzer if unsure.
- ○ Soil test (optional but wise): A $20–$50 test kit from your local extension office ensures pH (6.0–7.0 ideal) and nutrient balance.
How to select and plant early blooming spring trees
Here's my method for choosing and establishing trees that burst into color before spring's last frost.
🌱 Step 1: Choose the Right Species for Your Climate
Early bloomers like redbud, magnolia, and cherry trees thrive in USDA zones 4-8, but verify your specific zone—some varieties (like Yoshino cherry) only handle zones 5-9. I always check the chill hour requirements on the tag, as some trees need 200-600 hours below 45°F to bloom reliably. For colder climates, opt for serviceberry or dogwood—they're hardier and bloom later, avoiding late frosts.
Look for disease-resistant cultivars (like 'Autumn Royal' redbud) to skip years of chemical treatments. I avoid weeping varieties in windy areas—they'll flop dramatically. Instead, I select upright forms like 'Royal Purple' smoketree for structural integrity. Always buy from reputable nurseries that offer container-grown trees—they transplant better than bare-root stock.
🪴 Step 2: Prepare the Planting Site
Dig a hole twice as wide as the root ball but only as deep—planting too deep suffocates roots. Amend the native soil with 3 inches of compost mixed into the bottom of the hole, but never use garden soil or fertilizer directly on roots. Early bloomers hate competition, so clear 6-8 feet around the base of any grass or weeds. I use a landscape fabric barrier buried 2 inches deep to block future invaders.
For well-draining soil, add 1-2 inches of coarse sand to the bottom of the hole if your area has heavy clay. Test drainage by filling a hole with water—if it doesn't drain within 2 hours, improve the site before planting. The goal is moist but never soggy soil, as waterlogged roots rot before the tree even breaks dormancy.
☀️ Step 3: Plant at the Right Time and Depth
Plant bare-root trees in early spring (as soon as soil is workable) or fall (6-8 weeks before frost). Container-grown trees can go in anytime the ground isn't frozen. Set the tree so the top of the root flare sits 1-2 inches above grade—burying it too deep strangles the tree. I use a level to ensure the tree isn't tilted, which causes uneven growth.
Backfill with the native soil (not amended mix) and tamp gently to remove air pockets. Water deeply to settle the soil, then create a 2-inch-high berm around the perimeter to direct water toward the roots. Mulch with 3 inches of shredded bark, keeping it 6 inches away from the trunk to prevent rot. This mulch ring insulates roots during late frosts and retains moisture.
💧 Step 4: Water and Protect Newly Planted Trees
Water deeply every 5-7 days for the first year, aiming for 1-2 gallons per week depending on rainfall. You'll know it's enough when water drains 6-8 inches deep—stick a screwdriver into the soil to check. Overwatering is just as deadly as drought for new roots. I use a soaker hose buried 2 inches deep to deliver water slowly without disturbing the soil.
Install tree guards (or make your own from wire mesh) to protect young trunks from voles and deer. Wrap the trunk with tree wrap (not plastic) to prevent sunscald, especially on light-barked species like cherry. Prune only to remove dead or crossing branches—never "thin" a newly planted tree. The goal is minimal stress while roots establish.
⏰ Step 5: Monitor and Encourage First Bloom
Watch for new leaf growth in spring—this means roots have taken hold. If buds form but don't open, a late frost (below 28°F) may have damaged them. I cover vulnerable trees with frost cloth when forecasts predict 32°F or lower, securing it loosely to allow airflow. Remove the cloth by 10 AM to prevent overheating.
Fertilize only if leaves show yellowing between veins (chlorosis), using a balanced 10-10-10 formula at half strength in early spring. Over-fertilizing encourages leafy growth over flowers. By year three, most early bloomers establish enough to handle normal seasonal care—just water during droughts and prune after flowering to shape the tree.
Tips & tricks for perfect early spring bloomers
Real talk: The difference between a tree that thrives and one that struggles often comes down to these small but critical details—details I learned after watching several early bloomers fail.
Climate Matching: When selecting your tree, cross-reference the chill hour requirements with your local winter temperatures. For example, a Yoshino cherry needs 600 hours below 45°F to bloom reliably—if you're in a milder zone, you'll end up with a tree that just sits there looking disappointed. I always check my local weather records for the coldest winter months to ensure a perfect match. This is especially important for magnolia varieties, which can be picky about their winter chill.
Root Ball Inspection: Before planting, gently loosen the roots of container-grown trees to encourage outward growth. For bare-root trees, soak the roots in water for 1-2 hours before planting to revive them—this makes all the difference in transplant shock. I've seen trees with perfectly healthy-looking tops fail because their roots were dry or damaged during handling. This simple step gives them a fighting chance right from the start.
Drainage Test: That 2-hour drainage test in Step 2 isn't just about heavy clay—it's your insurance policy against root rot. If water pools after 2 hours, you're not dealing with clay but with compacted soil. In this case, consider amending the entire planting area with 1 part sand to 3 parts native soil mixed into the top 12 inches of soil. This creates a porous zone that prevents waterlogging while still holding enough moisture for new roots.
Frost Protection Strategy: When covering trees with frost cloth (as mentioned in Step 5), make sure to secure it with bricks or stakes—a flapping cloth can actually damage tender buds. I also recommend removing the cloth by 10 AM to prevent overheating during the day. The goal is to protect without smothering. For extra insurance, I've had success with string lights wrapped around the tree—they emit just enough heat to create a microclimate that raises temperatures by 2-3°F.
Pro Tips for Early Blooming Spring Trees
- Real talk: The difference between a tree that thrives and one that struggles often comes down to these small but critical details—details I learned after watching several early bloomers fail.
- Climate Matching: When selecting your tree, cross-reference the chill hour requirements with your local winter temperatures.
- Root Ball Inspection: Before planting, gently loosen the roots of container-grown trees to encourage outward growth.
Frequently asked questions
Got questions about early blooming spring trees? You’re not alone!
Whether you’re planning your garden, troubleshooting a late bloom, or just curious about these vibrant showstoppers, we’ve got answers. Dive into the most common queries below to make the most of your early spring color.
When do early blooming spring trees typically flower?
Early bloomers like red maple, dogwood, and serviceberry usually burst into color between late winter and early spring, often as early as February in warmer climates (Zone 7+) or March-April in cooler regions (Zone 4-6). Timing depends on your hardiness zone, winter chill hours, and weather patterns—warmer winters can delay blooms, while a cold snap might trigger earlier flowering.
Will a late frost damage early blooming trees?
Yes! Early bloomers are highly frost-sensitive because their buds open before leaves form to protect them. A late frost (below 28°F) can kill blossoms or even young leaves. To mitigate risks, plant frost-hardy varieties like serviceberry or crabapple, or use frost cloth if frost warnings are frequent. Pro tip: Choose trees native to your region—they’re adapted to local frost cycles!
Can I prune early blooming trees in late winter?
Pruning in late winter (before buds swell) is ideal for most early bloomers, as it encourages robust spring growth. However, avoid heavy pruning on trees like magnolia or cherry—they bloom on old wood, so prune after flowering. For safety, stick to light shaping or deadwood removal in late winter, and save major pruning for summer.
What are some low-maintenance early blooming trees?
If you want stunning color with minimal fuss, try these resilient picks:
No flowers? Don’t panic—common culprits include:
All three are native to North America, so they’re eco-friendly and pest-resistant!
Why did my early blooming tree not flower this year?
Check for yellowing leaves or sawdust-like frass (signs of pests), and adjust watering or soil amendments. Patience helps—some trees take 3–5 years to mature and bloom!
Wrapping up and next steps
Early blooming spring trees bring vibrant color and life to your landscape before summer even arrives! Whether you’re planting for beauty, pollinators, or early shade, these trees prove that spring’s magic starts now. 🌸
Ready to transform your yard? Start small—research a single variety, check your hardiness zone, and take the first step toward a show-stopping season. Your future self (and local bees!) will thank you.
Next up: Grab your gloves and dive into planting—your garden’s springtime masterpiece awaits! 🌿