
Blooming
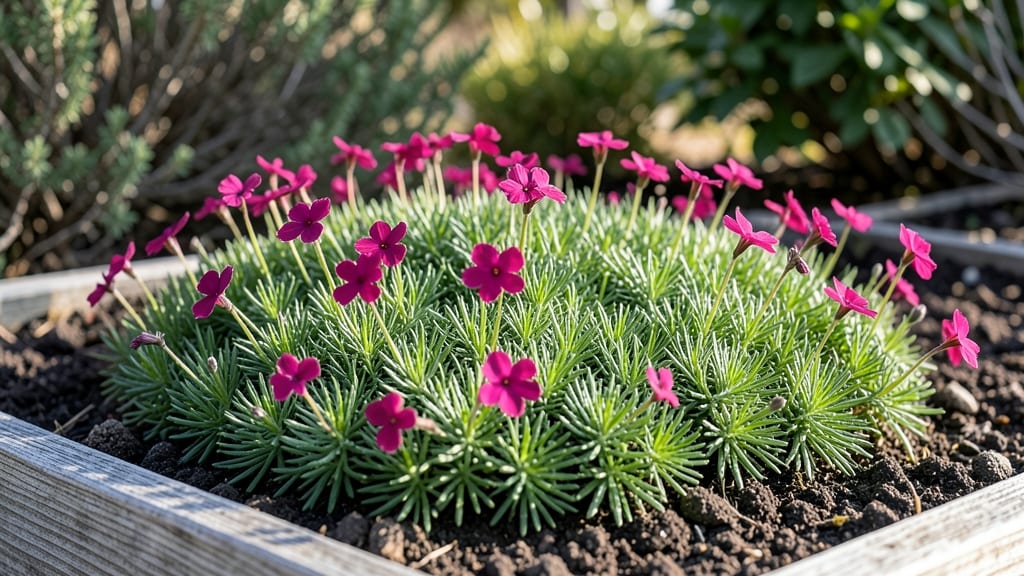
Early blooming phlox bursts into fragrant clusters by April, outshining most spring flowers with its vibrant colors and intoxicating scent. 🌸 I’ve grown these delicate blooms for years, and they’ve become my garden’s first showstopper—luring bees before many other plants even think about waking up.
The secret lies in timing: planting in early spring or late summer, when temperatures cooperate, and giving them the right care to coax those early blooms.
These hardy perennials thrive in cool to moderate climates, making them perfect for spring gardens in zones 3-8. Start seeds indoors 8-10 weeks before your last frost, or transplant established plants in early spring while the soil is still cool.
A well-draining, slightly acidic soil mix (pH 6.0-7.0) ensures strong roots, while morning sun and afternoon shade prevent wilting while keeping blooms vibrant.
With the right care, your phlox will reward you with weeks of fragrant blooms—think clusters of pink, purple, or white that fill the air with sweetness.
Prune back spent flowers in early summer to encourage a second flush of blooms, and fertilize lightly with a balanced 10-10-10 mix in early spring. The key is consistency: water deeply once a week and mulch to retain moisture, especially in hotter months.
Whether you’re planting in full sun or partial shade, early blooming phlox adapts beautifully to garden edges, borders, or even containers. Their resilience and early-season charm make them a foolproof way to brighten up spring. Once established, they’ll return year after year, becoming a staple in your garden’s seasonal rotation.
📚 In This Guide
- What you need
- Instructions
- Tips and common mistakes
- Wrapping up and next steps
What you need
- ● Early blooming phlox plants: 3–5 nursery-grown plants (e.g., Phlox subulata or Phlox stolonifera)
- ● Pro tip: Choose varieties like ‘Scarlet Flame’ or ‘Sherwood Purple’ for vibrant color! 🎯
- ● Well-draining potting mix: 1 bag (50 lbs) of peat-free garden soil or cactus/succulent mix
- ○ Optional: Add perlite or coarse sand (1–2 cups) for extra drainage.
- ● Containers or garden bed: For containers: 1–2 gallon pots (with drainage holes) per plant
- ● For in-ground: A sunny spot with 6+ hours of light and loose, rocky soil.
- ● Garden trowel or small shovel (for transplanting)
- ● Watering can or hose with gentle spray nozzle
- ● Organic mulch: 1–2 inches of pine straw or shredded bark (to retain moisture)
- ○ Balanced fertilizer (optional): 10-10-10 or fish emulsion (1 tbsp per plant, applied in early spring)
- ● Pruning shears (for deadheading spent blooms in late summer)
- ○ Gloves (optional) – Because no one likes prickly stems! 😉
How to plant early blooming phlox for April color
Here's my foolproof method for coaxing fragrant phlox blooms weeks ahead of schedule—no fancy tricks, just smart timing and care.
🌱 Step 1: Choose the Right Variety and Planting Time
Early blooming phlox thrives when planted in late summer or early fall—this gives roots time to establish before winter. Look for varieties labeled "early blooming" or "April blooms" at your local nursery. I always pick Phlox subulata (moss phlox) for its compact habit and spring fragrance, or Phlox paniculata 'Early Dawn' for taller clusters.
Planting too early means weak roots before winter; too late and you'll miss the spring bloom window. Aim for 6-8 weeks before your first frost date—this ensures roots have time to develop but aren't overstressed by summer heat. Check your zone's frost date and count backward.
🪴 Step 2: Prepare the Soil and Planting Site
Phlox loves well-draining, slightly acidic soil with a pH between 6.0-7.0. Work in 2-3 inches of compost into the top 12 inches of soil to improve fertility and drainage. I avoid heavy clay by mixing in sand or perlite if my soil feels dense when squeezed—it should crumble between your fingers, not stick together.
The planting site should get full sun to partial shade (at least 4-6 hours of morning sun). Too much afternoon sun in hot climates can scorch blooms, so I always plant on the north or east side of borders. Mark the spot with a stake so you don't accidentally disturb the area before planting.
🌿 Step 3: Plant Bare-Root or Container-Grown Phlox Correctly
For bare-root phlox, soak the roots in lukewarm water for 1 hour before planting to rehydrate them. Dig a hole twice as wide as the root ball but only as deep—the crown (where roots meet stems) should sit just above soil level. Burying too deep suffocates the plant; too shallow exposes roots to drying winds.
If using container-grown plants, gently loosen the roots at the edges of the pot to encourage outward growth. Space plants 12-18 inches apart for moss phlox or 24-36 inches apart for taller varieties. Backfill with native soil, then water deeply until moisture reaches 6 inches down. You'll know it's right when water pools briefly but drains within 15 minutes.
☀️ Step 4: Water and Mulch for Winter Protection
Water newly planted phlox once a week for the first 2 months, giving 1 inch of water total each time. After that, reduce to every 10-14 days unless your area experiences dry spells longer than 3 weeks. I always water in the early morning to prevent fungal diseases—wet leaves overnight invite trouble.
Apply 2-3 inches of mulch (like shredded bark or pine needles) around the base, keeping it 2 inches away from stems. This insulates roots in winter and retains moisture in summer. In Zone 5 or colder, add an extra 4-6 inches of mulch after the first hard frost to protect tender roots.
✂️ Step 5: Prune and Fertilize for Early Blooms
In early spring, cut back last year's stems to 2-3 inches above the ground. This encourages fresh growth and prevents disease buildup. I use clean, sharp pruners and sterilize them with rubbing alcohol between cuts—this keeps your plants healthy season after season.
Fertilize in early spring with a balanced 10-10-10 formula or slow-release granules. Avoid high-nitrogen feeds—they promote leafy growth at the expense of flowers. After blooming, switch to a low-nitrogen, high-phosphorus feed (like 5-10-10) to encourage next year's buds. Stop fertilizing by mid-summer to let plants harden off for winter.
Tips & tricks for perfect early blooming phlox
These simple tricks will help you get vibrant, fragrant phlox blooms that arrive right on schedule every spring.
Variety Selection: When choosing your early blooming phlox, look for labels that mention "April blooms" or "early season" varieties. I've found that Phlox subulata (moss phlox) and Phlox paniculata 'Early Dawn' are the most reliable for consistent early blooms. These varieties have been bred specifically to push their blooming window forward—don't settle for regular phlox varieties that might bloom later in the season.
Soil Preparation: The key to early blooms starts with soil preparation in Step 2. After amending your soil with 2-3 inches of compost, take it a step further by testing your soil's pH. Phlox thrives in slightly acidic soil (pH 6.0-7.0), and you can adjust with lime to raise pH or sulfur to lower it if needed. I always do this test in early summer so I'm ready when planting time comes around in late summer or early fall.
Planting Depth: Getting the planting depth right in Step 3 is absolutely critical. The crown (where roots meet stems) should sit just above soil level—this prevents rot from sitting too deep while protecting from drying winds if planted too shallow. To check, imagine the soil line should be at the base of the plant's neck, not covering it like a blanket. This simple adjustment makes all the difference in winter survival and spring blooming.
Mulching Strategy: When applying your 2-3 inches of mulch in Step 4, consider using a mix of materials. I like to combine shredded bark with pine needles—the bark provides insulation while the pine needles add acidity that phlox loves. In colder zones (Zone 5 or below), don't wait until after the first frost to add extra mulch. Instead, apply the additional 4-6 inches right after your initial planting to create immediate winter protection.
Pro Tips for Early Blooming Phlox
- These simple tricks will help you get vibrant, fragrant phlox blooms that arrive right on schedule every spring.
- Variety Selection: When choosing your early blooming phlox, look for labels that mention "April blooms" or "early sea...
- Soil Preparation: The key to early blooms starts with soil preparation in Step 2. After amending your soil with 2-3 i...
Frequently asked questions
Got questions about growing early blooming phlox? You’re not alone! Here are answers to the most common queries to help you cultivate fragrant, bee-friendly blooms with confidence.
When should I plant early blooming phlox for spring blooms?
Plant early blooming phlox in early fall (4–6 weeks before frost) or early spring (as soon as the soil is workable). Fall planting gives roots time to establish, while spring planting ensures blooms by April. For container gardening, plant in late winter to kickstart growth.
Why aren’t my phlox attracting bees like they should?
Bees love phlox, but poor pollinator turnout often stems from timing, pesticides, or lack of diversity. Ensure blooms are fully open (they’re most fragrant then!) and avoid neonicotinoid pesticides. Plant near other early spring bloomers (like crocus or lungwort) to create a "bee buffet." Pro tip: Deadhead spent blooms to encourage more flowers!
Can early blooming phlox survive harsh winters?
Most early blooming phlox varieties (like Phlox subulata) are hardy to USDA Zones 3–8 and thrive in winter. Mulch with 2–3 inches of straw or shredded leaves after the first frost to protect roots. In Zone 9+, provide light shade in summer to prevent heat stress.
How do I revive leggy or overgrown phlox?
Leggy phlox often needs a rejuvenating prune. After blooming, cut back 1/3 of the oldest stems to encourage new growth. For severely overgrown plants, divide in early spring—dig up clumps, separate into smaller sections, and replant. Overcrowding = fewer flowers, so space plants 12–18 inches apart!
What’s a good alternative if I can’t grow phlox?
If your climate or soil isn’t ideal for phlox, try these early spring bee magnets:
- Crocus – Tiny but hardy, blooms under snow!
- Pulsatilla (Pasque Flower) – Fuzzy, drought-tolerant blooms.
- Dwarf Iris (Iris reticulata) – Fragrant and cold-resistant.
- Hepatica – Woodland native with delicate flowers.
All thrive in similar conditions but offer different textures and colors!
Wrapping up and next steps
Early blooming phlox is a fantastic choice for adding vibrant color and fragrance to your garden while supporting pollinators like bees. With the right care—well-draining soil, partial shade, and consistent moisture—you’ll enjoy stunning clusters of blooms from April onward. 🌸
Ready to transform your garden? Grab your gloves, pick your phlox varieties, and get planting! Start small with a few plants, then expand as you see your garden buzz with life. Happy gardening! 🐝