
Blooming
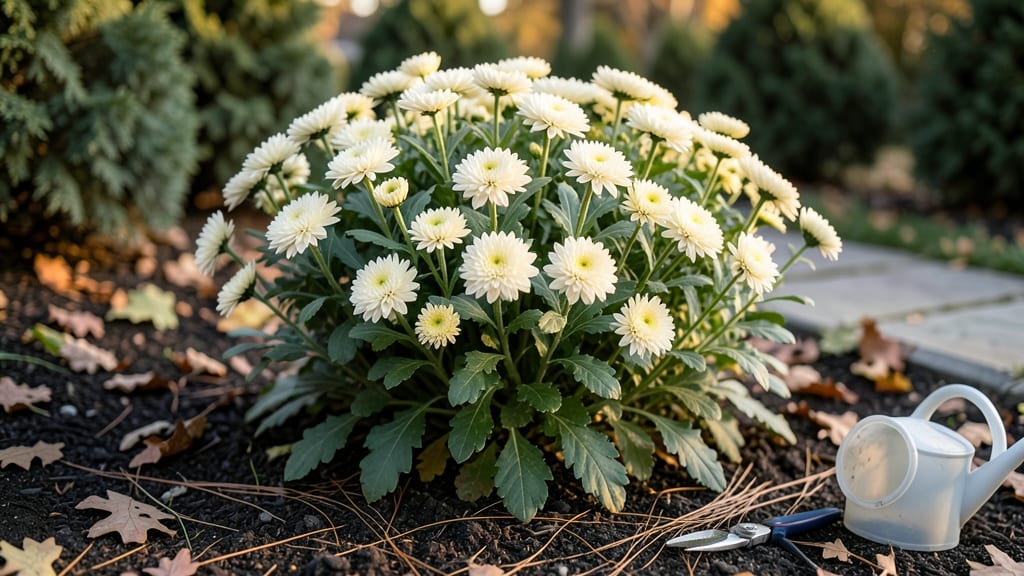
Your garden could burst into bold fall color by early September with the right early blooming mums—no more waiting until October for that classic autumn display. 🌸 These varieties defy the season's timing, offering vibrant blooms weeks ahead of traditional types, and with proper care, they'll keep flowering straight through frost.
The secret lies in selecting the right cultivars and giving them the precise light, water, and feeding schedule they crave at this critical time of year.
Start with varieties like 'Autumn Fiesta' or 'Pactola,' bred specifically for early flowering. These mums thrive in zones 5-9 when planted in late spring to early summer, giving their roots time to establish before the first cool snaps trigger blooming.
Unlike their late-season counterparts, early bloomers need consistent moisture but hate soggy soil—think of it as keeping their roots in a cozy, damp sweater, not a raincoat. A balanced fertilizer in early summer jumpstarts their growth, while a final feeding of phosphorus-rich blend in late summer ensures those showstopping blooms.
What you'll end up with is a garden that looks like it's been staged for a fall photoshoot—deep reds, fiery oranges, and creamy whites all opening at once. The flowers stay fresh longer, too, because early bloomers develop stronger stems that hold up against wind and rain.
Plus, you extend your seasonal interest by weeks, giving you more time to enjoy them before winter sets in. These aren't just plants; they're the centerpiece of your autumn garden.
This approach works equally well in containers on patios, as border plants, or even in window boxes for urban gardens. The key is starting early—literally—and giving these mums the right conditions to perform their seasonal magic. Once you've mastered the timing, you'll never settle for late bloomers again.
📚 In This Guide
- What you need
- Instructions
- Tips and common mistakes
- Wrapping up and next steps
What you need
- ● Early-blooming mum plants: Choose 3-5 varieties (e.g., 'Autumn Joy,' 'Pembroke,' or 'Moulin Rouge') for color diversity.
- ● Opt for healthy, disease-resistant nursery-grown plants (check for firm stems and buds).
- ● Potting mix or garden soil: Use well-draining potting mix (for containers) or loamy garden soil (for in-ground planting).
- ● Amend with compost (1 part compost to 3 parts soil) for nutrients.
- ● Fertilizer: Slow-release balanced fertilizer (10-10-10 or 20-20-20) for planting.
- ● Liquid bloom booster (e.g., fish emulsion or tomato feed) for mid-season feeding.
- ○ Containers (optional): Choose 5-7 gallon pots with drainage holes (1 plant per pot for best results).
- ● Garden trowel or hand shovel (for transplanting).
- ● Pruning shears (for deadheading and shaping).
- ● Watering can or hose with gentle nozzle (avoid blasting stems!).
- ○ Mulch (optional): Shredded bark or straw to retain moisture and suppress weeds.
- ● Sunlight: Full sun (6+ hours daily) for optimal blooms.
- ● Patience & consistency! Mums thrive with regular care—watering, feeding, and deadheading.
Step-by-step guide to growing early blooming mums
Here's how I get vibrant, reblooming chrysanthemums all season long—no fancy tricks, just smart timing and care.
🌱 Step 1: Choose the Right Variety and Plant at the Correct Time
Select early blooming mum varieties like 'Early Snow,' 'Bonanza,' or 'Dynasity'—these are bred to flower in late summer to fall rather than waiting until frost. Plant 4-6 weeks before your first fall frost date for best results. I always check my local frost chart to time it perfectly.
Dig holes twice as wide as the root ball but only as deep as the container's base. This prevents burying the crown too deep, which can rot stems. Space plants 18-24 inches apart for full, bushy growth. The wider spacing gives roots room to spread, which means more flowers.
☀️ Step 2: Plant in Full Sun and Well-Draining Soil
Mums need 6+ hours of direct sun daily—no exceptions. A south or west-facing spot delivers the best color intensity. I've tried shade spots, and while they survive, the blooms turn pale and sparse. Amend heavy clay soil with 2-3 inches of compost before planting to improve drainage.
After placing the plant in the hole, backfill with soil and water deeply to settle everything. The soil should feel moist but not soggy—you want roots to establish without sitting in water. A light mulch of 2 inches of shredded bark helps retain moisture and keeps roots cool.
💧 Step 3: Water Consistently and Fertilize for Reblooming
Water 1-2 times per week until the soil feels 2-3 inches dry. Deep watering encourages strong root growth, which translates to more blooms. I use a soaker hose to avoid wetting leaves, which prevents fungal diseases like powdery mildew.
Feed with a balanced 10-10-10 fertilizer every 4-6 weeks starting when new growth appears in spring. Switch to a low-phosphorus fertilizer (like 5-10-5) once buds form to promote flowering, not leafy growth. Over-fertilizing now leads to lush foliage but fewer blooms.
✂️ Step 4: Deadhead and Prune for Continuous Blooms
Deadhead spent blooms weekly by pinching off flowers just above the next set of leaves. This redirects energy to new buds instead of seed production. I do this every Sunday morning—it takes 10 minutes and keeps the plant flowering nonstop.
After the first flush of blooms, cut back stems by half their height to encourage a second round of flowers. Do this in early July for a fall rebloom. Avoid heavy pruning later in the season, or you'll delay flowering until frost.
🪴 Step 5: Overwinter Mums for Next Year's Blooms
In colder climates, cut back stems to 2-3 inches tall after the first frost. Mulch heavily with 4-6 inches of straw or leaves to protect roots from freezing. I always mark the spot with a stake so I don’t accidentally dig them up in spring.
In mild climates, leave stems intact and mulch lightly. Next spring, remove old mulch and fertilize lightly to jumpstart new growth. You'll see fresh shoots in 3-4 weeks—that's your signal to start pinching back tips to shape the plant.
Tips & tricks for perfect early blooming mums
Took me years of trial and error to perfect these vibrant, reblooming chrysanthemums—here's what actually makes the difference.
Variety Selection: Not all mums rebloom! Stick to proven varieties like 'Early Snow' or 'Bonanza'—these are specifically bred to flower twice in one season. I've tried cheaper varieties, and while they might bloom once, they rarely produce that second flush of color. Look for tags that say "reblooming" or "autumn joy" types.
Planting Depth: The crown (where stems meet roots) should sit just above soil level—never buried. I learned this the hard way when my first batch rotted from being planted too deep. Use your finger to check: the top of the root ball should be level with the surrounding soil after backfilling. This ensures healthy growth right from the start.
Sunlight Strategy: While 6+ hours of sun is ideal, mums in partial shade still produce blooms—but they'll be pale and sparse. For maximum color intensity, position your plants where they get morning sun and afternoon shade if you're in a hot climate. I've seen stunning deep reds and purples from this simple adjustment.
Pruning Timing: That early July pruning is non-negotiable for fall reblooms. The key is cutting back stems by half their height—this might sound drastic, but it forces the plant to put energy into new growth rather than maintaining old stems. I always do this right after the first big bloom wave, and within weeks, you'll see fresh buds forming.
Pro Tips for Early Blooming Mums
- Took me years of trial and error to perfect these vibrant, reblooming chrysanthemums—here's what actually makes the difference.
- Variety Selection: Not all mums rebloom!
- Planting Depth: The crown (where stems meet roots) should sit just above soil level—never buried.
Frequently asked questions
Got questions about early blooming mums?
You’re not alone—these vibrant flowers can be tricky to time and care for! Here are answers to the most common queries to help you grow stunning, long-lasting blooms.
What does "early blooming" mean for mums?
Early blooming mums (like Chrysanthemum 'Early Snow' or 'Bonanza') start flowering 6–8 weeks earlier than traditional varieties, often in late summer or early fall. They’re bred to beat the first frost, giving you months of color! Look for tags labeled "early" or "reblooming" for the best results.
How do I time planting for early blooms?
For spring planting (most common for early bloomers), sow seeds or transplant seedlings 8–10 weeks before your last frost date. If buying starts, check the label—they’re often marked for "early bloom" timing. Pro tip: Use a frost calculator to avoid rushing or delaying!
Why aren’t my early mums reblooming?
Reblooming mums need consistent care to produce multiple flushes. Common culprits:
- Overcrowding: Thin plants to 12–18" apart for airflow.
- Poor light: Mums need 6+ hours of sun daily.
- Deadheading: Snip spent blooms below the next set of leaves to encourage regrowth.
- Fertilizer: Use a balanced, low-nitrogen feed (like 10-10-10) every 3–4 weeks.
Can I grow early blooming mums in containers?
Containers work great for early mums—just choose large pots (12"+ diameter) with drainage holes. Use a well-draining potting mix and fertilize regularly. Variegated or dwarf varieties (like 'Little Albert') thrive in pots and bloom earlier than standard types.
What’s a good alternative if I miss the early bloom window?
If timing slips, try:
- Fall-planted mums: Transplant 4–6 weeks before frost for a late-season burst.
- Spring-blooming annuals: Zinnias or marigolds offer quick color.
- Perennial mums: Some varieties (like 'Molly' series) bloom earlier in spring if left in the ground.
Wrapping up and next steps
Early blooming mums are your ticket to a vibrant, long-lasting garden—no waiting required! 🌸 Whether you're a seasoned gardener or just starting out, these cheerful flowers bring instant color and joy. With the right care, they’ll keep reblooming all season, turning your outdoor space into a lively masterpiece.
Ready to dive in? Start by gathering your supplies, then follow the steps to plant and nurture your mums. Next, share your blooming success with fellow gardeners—tag us in your photos! Happy gardening! 🌿