
Blooming
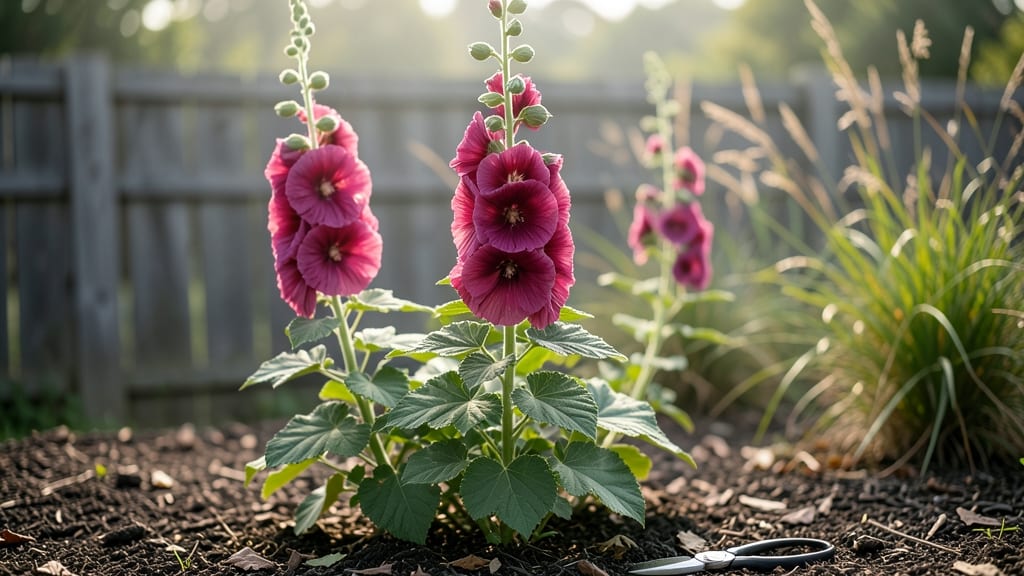
Double-bloom hollyhocks transform your garden into a towering floral display that keeps giving all season. 🌸 I learned the hard way that these beauties need the right soil, spacing, and care to deliver their signature second flush—but once you nail it, you’ll have vibrant spikes from early summer through fall.
The secret lies in their biennial nature: plant seeds in spring or fall, let them establish roots their first year, then watch them explode with two rounds of blooms the following season.
They thrive in full sun and well-draining soil, but the real magic happens when you deadhead spent flowers at the right time—keeping those stems strong for a second show. You’ll end up with taller, fuller plants than single-bloom varieties, plus resistance to flopping.
The key is consistent watering (especially during their first year) and proper spacing—crowded plants mean fewer blooms. With these tricks, your hollyhocks will be the star of your garden for years. Works in cottage gardens, cottage-style beds, or even as a dramatic backdrop.
Let’s get those seeds in the ground!
📚 In This Guide
- What you need
- Instructions
- Tips and common mistakes
- Wrapping up and next steps
What you need
- ● Double bloom hollyhock seeds: Choose a variety like ‘Peach Blush’ or ‘Black Prince’ for stunning blooms. Plant 3–5 seeds per location (they germinate best in clusters).
- ● Well-draining potting mix or garden soil: A blend of 50% topsoil, 30% compost, and 20% perlite or sand works best. Hollyhocks thrive in slightly alkaline soil (pH 6.5–7.5).
- ● Organic fertilizer: A balanced 10-10-10 or 5-10-10 NPK ratio (apply at planting and mid-season). Fish emulsion or compost tea are great organic options!
- ● Watering can or hose with a gentle spray nozzle: Hollyhocks need 1–1.5 inches of water per week, but avoid soggy soil.
- ● Garden trowel or transplanting spade: For digging holes 1/4 inch deep and spacing seeds 12–18 inches apart.
- ○ Gloves (optional but recommended): Hollyhock leaves can be prickly!
- ○ Stakes or tomato cages (optional): Tall varieties (4–6 ft) may need support. Use 3–4 ft stakes per plant.
- ○ Mulch (optional): 2–3 inches of straw or shredded leaves to retain moisture and suppress weeds.
- ● Sunlight: Full sun (6–8 hours daily) is a must for robust blooms.
- ● Spacious planting area: Hollyhocks need 18–24 inches of space to mature without crowding.
- ● Patience: Germination takes 10–21 days, and full blooms appear in 90–120 days.
How to grow double bloom hollyhocks for stunning yearly returns
Hollyhocks bring old-fashioned charm to the garden, and double-bloom varieties are the showstoppers. Here's how I cultivate them for thick, repeat-flowering spikes that return reliably every season.
🌱 Step 1: Choose the Right Location and Prepare the Soil
Hollyhocks thrive in full sun to partial shade, but for maximum blooms, give them at least 6 hours of direct sunlight daily. I plant mine where they'll receive morning sun and afternoon shade in hotter climates—this prevents the blooms from scorching. The soil should be well-draining but moisture-retentive, so I mix in 2-3 inches of compost into the top 12 inches of soil before planting.
Test your soil's pH—hollyhocks prefer 6.0-7.0. If your soil is too alkaline, add sulfur or peat moss to lower the pH gradually. Avoid heavy clay soil; amending with sand or perlite improves drainage. The key is soil that stays moist but never soggy—hollyhocks hate wet feet.
🪴 Step 2: Plant Seeds or Transplants at the Right Time and Depth
For direct sowing, plant seeds 1/4 inch deep in early spring, about 2-3 weeks before your last frost date. Hollyhock seeds germinate best in cool soil, so don’t rush planting in warm weather. Space seeds 12-18 inches apart in rows 18-24 inches apart—they’ll grow tall and need room to avoid crowding.
If using transplants, dig holes slightly wider than the root ball and plant at the same depth as they were in their nursery pots. Water deeply after planting to settle the soil around the roots. I always add a 1-inch layer of mulch around the base to retain moisture and suppress weeds, but keep it 3 inches away from the stems to prevent rot.
☀️ Step 3: Provide Consistent Watering and Fertilization
Hollyhocks need regular watering, especially during their first growing season. Water deeply once a week until the soil is 6 inches deep and evenly moist. After establishment, they’re drought-tolerant but will produce fewer blooms if stressed. I check moisture by sticking my finger into the soil—if it feels dry 2 inches down, it’s time to water.
Feed with a balanced, slow-release fertilizer (10-10-10) at planting time, then again in early summer. Avoid high-nitrogen fertilizers—they encourage leafy growth at the expense of flowers. I also side-dress with compost tea every 4-6 weeks to boost blooms naturally. Deadhead spent blooms regularly to encourage more flowers and prevent self-seeding where you don’t want it.
✂️ Step 4: Prune and Support for Healthy Growth
Hollyhocks grow 4-6 feet tall, so they need sturdy support. Install 3-4 foot tall stakes or a trellis at planting and gently tie the stems to them as they grow. Use soft plant ties or old fabric strips—hollyhock stems are brittle and can snap if tied too tightly.
Prune in early spring to remove any dead or damaged stems. After the first flush of blooms fades, cut back the spent flower spikes to 6 inches above the ground. This encourages a second round of blooms in late summer or early fall. I also remove any weak or leggy stems to redirect the plant’s energy into stronger growth. Avoid heavy pruning in fall—hollyhocks are perennial and need foliage to store energy for next year.
⏰ Step 5: Overwinter and Prepare for Next Season
Hollyhocks are hardy perennials in USDA zones 3-9, but they benefit from winter protection in colder climates. After the first hard frost, cut back the stems to 4-6 inches tall and mulch heavily with 4-6 inches of straw or shredded leaves. This insulates the roots and prevents heaving during freeze-thaw cycles.
In early spring, remove the mulch and check for signs of pests like hollyhock rust or aphids. Treat any issues immediately with neem oil or insecticidal soap. I also divide clumps every 3-4 years in early spring to rejuvenate the plants. Dig up the entire plant, separate the roots into sections, and replant them with fresh soil and compost. This keeps them vigorous and flowering prolifically for years.
Tips & tricks for perfect double bloom hollyhocks
These insider secrets will help you coax the most vibrant, repeat-blooming hollyhocks from your garden.
Sunlight Strategy: In Step 1, when selecting your location, prioritize morning sun exposure—this is where the magic happens for double blooms. Hollyhocks need that intense morning light to develop strong stems and abundant flowers. If your garden only gets afternoon sun, consider using a reflective surface like white gravel or a light-colored wall to bounce extra light onto your plants. The goal is to mimic the ideal 6 hours of direct sunlight, but quality matters more than quantity—bright, indirect light throughout the day works better than harsh midday sun.
Soil Science: The soil preparation in Step 1 is where most gardeners fall short. Don't just amend the top 2-3 inches with compost—work that compost down into the top 12 inches of soil. This creates a deep, fertile zone that supports root growth and nutrient uptake. For clay-heavy soils, mix in sand or perlite to improve drainage while maintaining moisture retention. I've found that adding a handful of worm castings to the planting hole gives an extra boost of beneficial microbes that help hollyhocks establish quickly.
Planting Precision: When planting seeds in Step 2, resist the urge to plant too deeply. The 1/4-inch depth recommendation is crucial—seeds planted too deeply may fail to emerge. For transplants, maintain the same depth as their nursery pots to avoid stressing the roots. I've discovered that planting seeds in small pots first and then transplanting them when they're 2-3 inches tall gives them a better chance of survival and leads to stronger plants. This two-step process also lets you thin seedlings and give them more space before they compete for resources in the garden.
Pruning Payoff: The pruning instructions in Step 4 are where you'll see the biggest difference in repeat blooming. When you cut back spent flower spikes to 6 inches above the ground, you're not just cleaning up—you're encouraging the plant to redirect its energy into producing new flower buds. I've noticed that hollyhocks respond particularly well to this treatment in late summer, often producing a second flush of blooms that lasts well into fall. Just be patient—they need time to recover and set new buds after this pruning.
Pro Tips for Double Bloom Hollyhocks
- These insider secrets will help you coax the most vibrant, repeat-blooming hollyhocks from your garden.
- Sunlight Strategy: In Step 1, when selecting your location, prioritize morning sun exposure—this is where the magic h...
- Soil Science: The soil preparation in Step 1 is where most gardeners fall short. Don't just amend the top 2-3 inches ...
Frequently asked questions
Got questions about growing double bloom hollyhocks? You’re not alone!
Here are answers to the most common queries—whether you’re a first-time gardener or a seasoned green thumb looking to troubleshoot.
What’s the best time to plant double bloom hollyhocks?
Plant them in early spring (after the last frost) or late summer (6–8 weeks before the first frost). Hollyhocks thrive in cooler weather, so avoid planting in scorching heat. For container gardening, use well-draining pots and plant in spring to give roots time to establish before winter.
How long do double bloom hollyhocks take to flower?
With proper care, expect the first blooms 60–90 days after planting. Double bloom varieties often produce two flushes of flowers per season—one in early summer and another in late summer or early fall. Deadhead spent blooms to encourage more flowers and extend the season!
Why aren’t my hollyhocks blooming?
Common culprits include overcrowding (space them 18–24 inches apart), poor soil (amend with compost for nutrients), or lack of sunlight (they need 6+ hours of full sun daily). If they’re leafy but flowerless, check for rust fungus (remove affected leaves) or over-fertilizing (stick to balanced fertilizer).
Can I grow double bloom hollyhocks in containers?
Choose large containers (at least 12–14 inches deep) with drainage holes. Use a well-draining potting mix and a trellis or stake for support (their tall spikes can topple!). Water consistently—containers dry out faster than garden beds. Dwarf varieties like ‘Black Prince’ are ideal for pots!
Are double bloom hollyhocks perennial or annual?
They’re short-lived perennials (typically 2–3 years) in USDA Zones 3–9. In warmer climates (Zones 9–10), they may act as annuals due to heat stress. Save seeds or divide clumps every 2–3 years to keep them thriving. Some gardeners treat them as biennials—planting seeds one year, blooming the next!
Pro Tip:
For longer vase life, harvest blooms in the morning when stems are hydrated. Trim stems at an angle and change water every 2 days to prevent bacterial growth. Add a splash of bleach (1 tsp per gallon) to keep cut flowers fresh!
Wrapping up and next steps
Double bloom hollyhocks are a gardener’s dream—bold, colorful, and reliably stunning year after year! Their double blooms and easy-care nature make them a must-have for cottage gardens, borders, or even containers.
Whether you’re a seasoned green thumb or just starting out, these hardy beauties reward patience with vibrant spikes of color that keep coming back stronger.
Ready to bring some drama to your garden? Start small—plant a few seeds or cuttings this season and watch your space transform! 🌸 For even more inspiration, explore companion plants like lavender or marigolds to create a showstopping display.