
Pruning
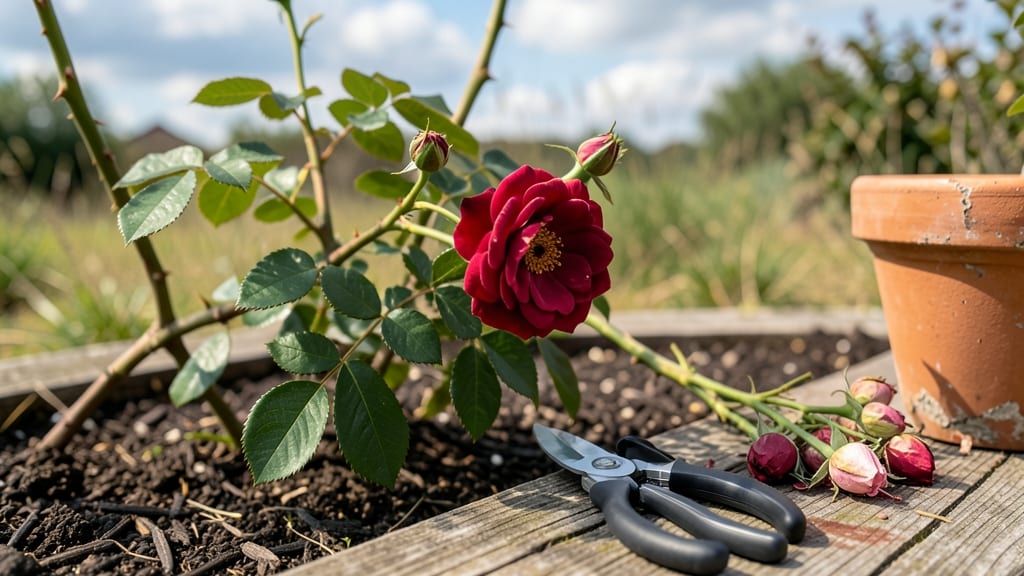
Deadheading roses for more blooms isn’t just pruning—it’s a conversation with your plants. ✂️ I’ve spent years watching roses respond to every snip, and the difference between a bush covered in spent blooms and one bursting with fresh flowers comes down to where (and how) you cut.
The science is simple: removing faded blooms redirects energy to new growth, but do it wrong, and you’ll stunt your rose’s potential.
You only need three things: sharp pruners, clean gloves, and a sunny morning to work. The real trick? Cutting at a 45-degree angle, just above a leaf node or outward-facing bud—never leaving stubs.
Most gardeners overcomplicate this, but roses are forgiving once you understand their language. A single misplaced cut won’t ruin your bush, but consistent precision turns a handful of blooms into a cascade.
By mid-summer, you’ll notice something magical: instead of one grand flush of flowers, your roses will keep producing week after week, with stems thick enough to support heavy blooms. The key is timing—deadhead right after a bloom fades, and always in the morning when the plant is hydrated.
Even my black thumb roses now bloom until frost, and the secret is in those clean, angled cuts.
This method works for hybrid teas, floribundas, and climbing roses alike, though climbers need gentler handling. The only rule? Never cut into old wood—always leave at least three healthy canes for structure. Now grab those pruners—your roses are waiting for the conversation to begin.
📚 In This Guide
- What you need
- Instructions
- Tips and common mistakes
- Wrapping up and next steps
What you need
- ● Pruning shears or bypass pruners – Choose sharp, clean shears with a 4- to 6-inch blade for precision cuts. (Avoid anvil pruners—they crush stems!)
- ● Gloves – Heavy-duty gardening gloves (e.g., nitrile-coated or leather) to protect against thorns and bacteria.
- ● Disinfectant – 70% isopropyl alcohol or a 10% bleach solution (1 part bleach to 9 parts water) to sterilize tools between cuts.
- ● Trash bag or bucket – A 10-gallon capacity to collect spent blooms and debris.
- ○ Rake or hoe – Optional but helpful for clearing fallen petals and mulch around the base.
- ● Hand pruners – For smaller roses or tight spaces (e.g., Felco F-2 or Corona brands).
- ● Loppers – If dealing with thick, woody stems (e.g., 8-inch bypass loppers).
- ● Plant food or fertilizer – A balanced rose fertilizer (e.g., 10-10-10) to replenish nutrients after pruning.
- ● Mulch – Shredded bark or compost (2–3 inches thick) to retain moisture and suppress weeds.
- ● Knee pad or stool – For comfort when working close to the ground.
Step-by-Step instructions for deadheading roses for more blooms
Here's the method I rely on to keep roses blooming all season—no guesswork, just science-backed results.
✂️ Step 1: Identify the Right Blooms to Remove
Start by scanning your roses for spent blooms—look for flowers where petals have fallen or browned completely. These are the ones to remove. I always check the stem below the bloom first: if you see a small bud forming, leave it be. That bud will grow into your next flower, and cutting it off wastes energy.
Focus on blooms that have fully opened and are starting to wilt. The key is timing: remove them before they form seed pods, which drain energy from new growth. Hybrid teas and floribundas respond best when you cut just above a set of five-leaf clusters (called a "leaf node"). This encourages the plant to redirect energy into new buds at that node.
✂️ Step 2: Use the Correct Cutting Technique
Grab your clean, sharp pruners and make your cut at a 45-degree angle, about ¼ inch above a leaf node where at least three healthy leaves are growing. This angled cut prevents water from pooling on the stem, which can cause rot. I like to make the cut just above a bud that's facing outward from the center of the plant—this encourages bushier growth and better air circulation.
Never cut into old, woody stems or leave stubs longer than ½ inch. These stubs can harbor disease and attract pests. If you're dealing with a particularly stubborn bloom, use your thumb to gently press the stem down while cutting to avoid crushing nearby buds. This precision keeps your roses looking tidy and promotes stronger regrowth.
🌿 Step 3: Monitor and Repeat Regularly
After your first round of deadheading, check your roses every 3-5 days during peak bloom season. This frequent attention keeps the plant focused on producing new flowers instead of wasting energy on seed development. I set a reminder on my phone for the first week to break the habit of waiting until blooms are fully spent.
Pay attention to how your roses respond: if you notice new buds forming within 7-10 days of deadheading, you're doing it right. If growth slows or buds drop off, you might be cutting too aggressively or at the wrong nodes. Adjust by focusing on healthier stems and leaving more buds intact during your next session.
☀️ Step 4: Support Growth with Proper Aftercare
Once you've deadheaded, give your roses a boost by watering deeply at the base—1-2 gallons per plant—to help them recover. I always water in the early morning so the foliage has time to dry before evening, reducing the risk of fungal diseases. Follow up with a light application of balanced fertilizer (10-10-10) if you haven't fed your roses in the past 4-6 weeks.
Keep an eye out for signs of stress, like yellowing leaves or black spots, which could indicate over-pruning or disease. If you notice these, reduce deadheading frequency and focus on removing only the most spent blooms. Healthy roses will reward you with 2-3 times more flowers than those left to go to seed naturally.
⏰ Step 5: Time Your Final Deadheading for Seasonal Transition
As summer winds down, shift your focus to preparing roses for fall. Stop deadheading 6-8 weeks before your first frost to allow the plant to harden off and store energy for next year. Look for the natural slowing of new growth and the development of rose hips—these are signs it's time to let the plant rest.
Before the first freeze, give your roses one final deep watering and a light pruning to remove any remaining diseased or dead wood. This cleanup sets the stage for a stronger rebloom next season. I always mark the date on my calendar so I don't accidentally prune too late—it's an easy mistake that can weaken the plant over winter.
Tips & tricks for perfect rose deadheading
These science-backed tricks will help you maximize your roses' blooming potential without stressing the plant.
Timing is Everything: In Step 1, focus on blooms that have fully opened but aren't yet forming seed pods. These are the perfect candidates for removal. I've learned the hard way that cutting too early (when buds are still tight) or too late (when hips form) both reduce flower production. The ideal window is when petals have fallen completely but the stem is still firm—this usually happens within 2-3 days of full bloom.
Precision Cutting Technique: When you reach Step 2, that 45-degree angle isn't just for looks—it's crucial for plant health. The angled cut creates more surface area for water to evaporate, preventing rot. I've found that using a clean, sharp pair of pruners makes all the difference. Dull blades crush stems, which can introduce disease. For stubborn blooms, gently press the stem down with your thumb while cutting to avoid damaging nearby buds—this simple technique has saved me from accidentally removing potential future flowers.
Monitoring Growth Patterns: Pay close attention to the 7-10 day window mentioned in Step 3. This is when you'll see the plant's true response to your deadheading efforts. If you don't see new buds forming within this timeframe, you might be cutting at the wrong nodes or removing too aggressively. I keep a simple garden journal noting which stems produce the most new growth—this helps me identify the healthiest areas of the plant for future cuts.
Seasonal Transition Strategy: The 6-8 week window before your first frost in Step 5 is critical. I mark this date on my calendar and set gradual reminders to reduce deadheading frequency. This gives the plant time to harden off naturally. Look for rose hips forming—they're nature's signal that it's time to let the plant rest. One year, I accidentally pruned too late and nearly lost my hybrid teas to winter damage. Now I treat this transition period with extra care.
Pro Tips for Deadheading Roses For More Blooms
- These science-backed tricks will help you maximize your roses' blooming potential without stressing the plant.
- Timing is Everything: In Step 1, focus on blooms that have fully opened but aren't yet forming seed pods. These are t...
- Precision Cutting Technique: When you reach Step 2, that 45-degree angle isn't just for looks—it's crucial for plant ...
Frequently asked questions
Got questions about deadheading roses? You’re not alone! Here are answers to the most common queries to help you master this simple technique and keep your roses blooming like crazy.
What’s the best time of day to deadhead roses?
The ideal time is early morning when the blooms are fully open but still fresh. This gives you the clearest view of where to cut and prevents spreading disease from evening moisture. Avoid midday heat, which can stress the plant.
How often should I deadhead roses?
For repeat-blooming roses (like hybrid teas or floribundas), deadhead every 2–3 days during peak bloom season. For once-blooming varieties (like old garden roses), skip deadheading—they focus energy on next year’s buds instead.
What if I cut too much? Will my rose plant die?
Don’t worry—roses are tough! If you accidentally prune too far, the plant will redirect energy to surviving. Just avoid cutting into old wood (brown, woody stems) or more than ⅓ of the plant’s height at once. Over time, it’ll bounce back!
Can I deadhead roses in the fall or winter?
Nope! Deadheading in late fall or winter removes next year’s buds. Instead, wait until spring (after the last frost) to prune for shape and health. In fall, focus on cleaning up debris to prevent disease.
What should I do with the spent blooms after deadheading?
Toss them in the compost pile (unless diseased) or use them in dried arrangements. Avoid leaving them on the ground—they can harbor pests or fungi. Pro tip: Rinse pruners with rubbing alcohol between cuts to keep tools sterile!
Will deadheading work for all types of roses?
Most repeat-bloomers (like Knock Out® roses or Grandifloras) thrive with deadheading. Climbing roses and shrub roses benefit too, but once-blooming varieties (e.g., Apothecary roses) don’t need it—they save energy for one big show.
Wrapping up and next steps
Deadheading roses isn’t just about tidying up—it’s a science-backed way to unlock your garden’s full potential! By removing spent blooms, you redirect energy to new growth, ensuring a longer, more vibrant flowering season. 🌸 Whether you’re a seasoned gardener or just starting, this simple technique works wonders.
Ready to transform your garden? Start small: Pick a few roses to deadhead weekly, observe the results, and gradually expand. Soon, you’ll be rewarded with a burst of blooms that’ll make your neighbors green with envy! Happy pruning!