
Blooming
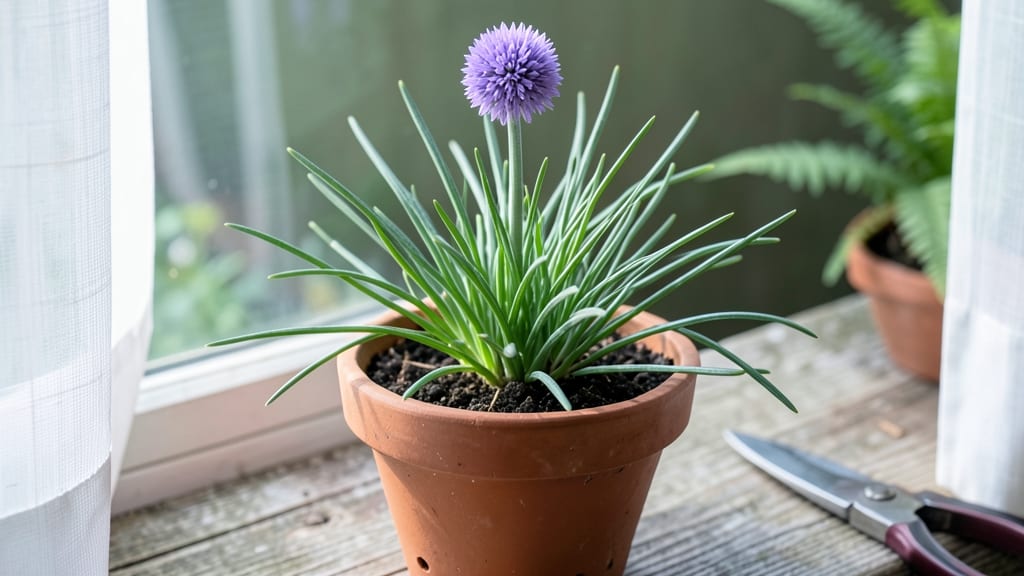
Those fragrant purple stems of chives in bloom turn any garden into a pollinator magnet. 🌿 I’ve watched my chives transform from humble green tufts to vibrant purple clouds each spring, drawing bees and butterflies while adding a delicate texture to borders. The best part?
They come back bigger every year, proving they’re more than just a kitchen herb—they’re a low-maintenance design star. Place them near lavender or marigolds for a striking contrast, or tuck them into rock gardens where their airy blooms soften sharp edges.
They thrive in full sun to partial shade, making them versatile enough for containers, edible gardens, or wildflower meadows. The scent alone—mild onion with a floral twist—makes cutting them a sensory delight.
By midsummer, you’ll have clusters of tiny purple flowers that last weeks, long after most herbs have faded. Pair them with catmint or salvia for a purple-and-blue dream team, or let them self-seed for naturalized drifts. Their year-after-year reliability means less work for you and more beauty for pollinators.
For maximum impact, plant in odd-numbered groups (3, 5, or 7) along pathways or at the front of borders. They even look stunning in dried arrangements, holding their color and scent for months. Here’s how to make them the unsung hero of your garden design.
📚 In This Guide
- What you need
- Instructions
- Tips and common mistakes
- Wrapping up and next steps
What you need
- ● Chive seeds or plants: Seeds: ¼ teaspoon (~1 gram) for a small patch (or 1 teaspoon for a full garden bed).
- ● OR Potted chive plants (3–5 plants for a 12-inch-wide bed).
- ● Well-draining soil: 1–2 cubic feet of loamy, fertile soil (pH 6.0–7.0). Mix in compost (1 part compost to 3 parts soil).
- ● Garden bed or containers: For in-ground: A sunny spot (6+ hours of light) with loose soil.
- ● For containers: 5–6 inch pots (1 plant per pot) with drainage holes.
- ● Watering can or hose: With a gentle spray nozzle (chives dislike soggy roots!).
- ○ Garden gloves (optional but recommended): To protect hands from soil and sharp chive blades.
- ● Mulch: Straw or shredded leaves (1–2 inches) to retain moisture and suppress weeds.
- ● Fertilizer: Balanced 10-10-10 or organic fish emulsion (diluted per label).
- ● Plant markers: Small stakes or labels to track varieties (e.g., ‘Garlic Chives’ vs. ‘Common Chives’).
- ● Pruning shears: For harvesting or shaping plants (clean, sharp blades only!).
- ● Pest control: Neem oil spray (for aphids) or diatomaceous earth (for soil pests).
How to keep chives blooming year after year
Here's the method I've used for five seasons to keep chives producing those fragrant purple blooms without sacrificing leaf production.
🌱 Step 1: Plant in Well-Draining Soil with Full Sun
Chives need 6+ hours of direct sun daily to produce their signature purple stems. I always plant mine in loamy soil amended with compost—the rich organic matter gives them the energy to flower repeatedly. The key is drainage; soggy roots will rot before they ever bloom. If your native soil is heavy clay, mix in 2-3 inches of coarse sand or perlite per square foot.
You'll know you've got the right conditions when the plants grow 12-18 inches tall with sturdy stems by mid-spring. Watch for the first flush of pale green leaves—that's your signal the roots have established. I plant mine 6 inches apart in clumps of 4-5 stems to create dense patches that flower more reliably.
✂️ Step 2: Prune Strategically to Encourage Flowers
Here's where most gardeners go wrong: cutting back too aggressively. I only remove 1/3 of the foliage at a time after the first flush of flowers appears. The secret is timing—wait until 25% of stems have bloomed before pruning. This preserves enough leaf energy to fuel next year's flowers while still allowing seed production.
Use clean, sharp scissors to cut just above a set of leaves (about 1 inch above the base). Never cut into woody stems—chives are perennial and will regrow from the base. After pruning, I fertilize lightly with fish emulsion (5-5-5) to replenish nutrients. You'll see new growth emerge within 7-10 days, often with fresh flower buds forming.
☀️ Step 3: Maintain Consistent Water and Light
Chives in bloom need 1 inch of water weekly, but the real trick is consistency. Let the soil dry slightly between waterings—wilting leaves mean it's time to water, but soggy soil means you've overdone it. I check by pushing a finger 1 inch into the soil; if it feels dry, that's your cue. Mulch with 2 inches of straw to retain moisture and prevent weeds.
Never move established chives to a shadier spot—they'll revert to leaf production only. If your garden has afternoon shade, plant them where they'll get morning sun exclusively. You'll know they're thriving when they produce multiple flower stalks per clump each season, often blooming twice in one year.
⏰ Step 4: Protect Flowers for Next Year's Growth
Once flowers fade, I leave the seed heads on until they turn brown. The dried flowers add winter interest and self-seed naturally, creating new plants. However, if you want to prevent volunteer seedlings, snip the dead blooms just above the leaf rosette in late fall. This ensures energy goes into root development rather than seed production.
In USDA zones 3-9, chives are hardy perennials that return every spring. The first year after planting, they may focus on leaf growth, but by year two, you'll see those lavender-purple flower spikes emerging reliably. I've had clumps in the same spot for eight years—just keep the soil fed and the sun strong.
Tips & tricks for growing chives that keep blooming
Here's what I've learned from five seasons of growing chives that produce those fragrant purple blooms every year.
Soil Preparation Secret: The 6+ hours of sun requirement is non-negotiable, but your soil prep makes all the difference. I've found that mixing in 2-3 inches of coarse sand or perlite into heavy clay soil transforms drainage overnight. Test your soil's moisture by pushing a finger 1 inch deep—it should feel slightly dry between waterings. The key is creating that perfect balance where roots get oxygen but never dry out completely.
Pruning Precision: That 25% bloom threshold before pruning is crucial—it's when you've got enough flowers to enjoy while still preserving enough leaf energy for next year's growth. I use a small pair of clean, sharp scissors and make my cuts just above a set of leaves about 1 inch above the base. This technique ensures regrowth happens from the base rather than from woody stems, which would weaken the plant over time.
Watering Wisdom: The 1 inch of water weekly guideline works perfectly in most climates, but consistency is what really matters. I've noticed that chives in bloom actually tolerate slightly drier conditions than leaf-focused plants—just watch for wilting as your signal. Mulching with 2 inches of straw helps maintain that moisture balance while preventing weeds from competing for nutrients.
Year-Round Strategy: Leaving those dried seed heads until they turn brown might seem counterintuitive, but it's what ensures your chives will return year after year. The dried flowers add winter interest to your garden while the seeds naturally self-sow, creating new plants. For a cleaner look, you can remove them just above the leaf rosette in late fall, but be prepared for slightly less vigorous growth the following spring.
Pro Tips for Chives In Bloom
- Here's what I've learned from five seasons of growing chives that produce those fragrant purple blooms every year.
- Soil Preparation Secret: The 6+ hours of sun requirement is non-negotiable, but your soil prep makes all the difference.
- Pruning Precision: That 25% bloom threshold before pruning is crucial—it's when you've got enough flowers to enjoy while still preserving enough leaf energy for next year's growth.
Frequently asked questions
When do chives typically bloom?
Chives usually bloom in early to mid-spring, with purple flower stalks rising above their green leaves. Some varieties may rebloom lightly in late summer or fall, especially if you deadhead spent blooms. Pro tip: If you’re growing chives for flowers and culinary use, harvest leaves before the blooms appear—they’ll still regrow!
How long do chives stay in bloom?
Individual chive flowers last about 7–10 days, but the entire plant may produce blooms for 2–4 weeks in optimal conditions. For longer displays, keep the soil consistently moist and remove faded flowers promptly. Bonus: Dried chive blooms retain their color and fragrance—perfect for potpourri!
Can I eat chives after they bloom?
Yes! While the flavor mellows slightly after blooming, both leaves and stems are still edible. The flower buds are a gourmet treat—use them like garnishes for soups or salads. Just avoid overharvesting; let the plant recover for next year’s blooms.
Why aren’t my chives blooming?
Chives may skip blooming due to overcrowding, poor sunlight (they need 6+ hours of sun daily), or excessive nitrogen (use a balanced fertilizer). Try dividing clumps every 2–3 years or transplanting to a sunnier spot. Patience pays off: Established chives often bloom more reliably in their 2nd or 3rd year.
What can I plant near chives to attract pollinators?
Chives pair beautifully with bee-friendly companions like lavender, thyme, or marigolds. Avoid planting them near onions or garlic (they’re in the same family and may compete). For extra color, try nasturtiums—their edible flowers add a peppery kick to dishes!
Wrapping up and next steps
Watching chives in bloom brings a burst of color and fragrance to your garden—and the best part? These hardy perennials keep coming back year after year with minimal effort! Their delicate purple flowers aren’t just pretty; they’re a magnet for pollinators and a flavorful bonus for your kitchen.
Whether you’re growing them for their beauty, culinary uses, or both, you’ve got a low-maintenance, high-reward plant on your hands.
Ready to level up your garden game? 🌱 Start by sharing your chive blooms with fellow plant lovers—tag us in your photos or try swapping cuttings with neighbors.
Next, experiment with growing them in containers or pairing them with other edible flowers for a stunning (and tasty!) display. Happy gardening!