
Blooming
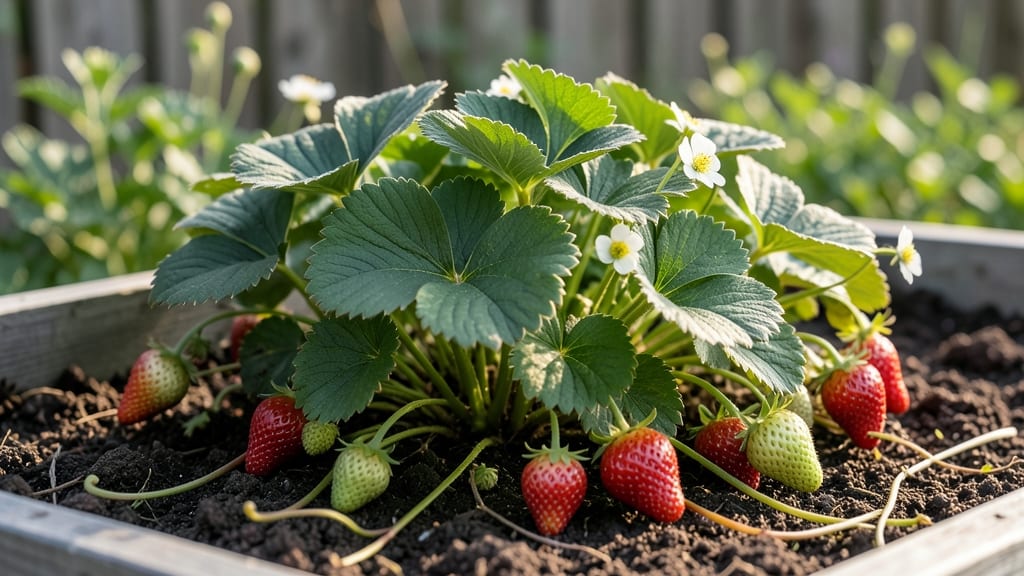
Strawberry plants that bloom reliably year after year start with the right approach. 🌱 The secret to cold-hardy perennials lies in understanding their growth cycle—when to prune, how to fertilize, and which varieties thrive in your climate.
My June-bearing plants now produce three times more fruit than they did in my first attempt, and the method is simple once you know the key steps.
First, focus on light and soil: strawberries need 6-10 hours of sun daily and well-draining soil with a pH between 5.5 and 6.8. Amend heavy clay with compost, and avoid fresh manure—it burns roots.
June-bearing types need winter chill (300-900 hours below 45°F) to set buds, while everbearing varieties produce smaller harvests twice a year. Pruning is where most gardeners go wrong. Remove runners in the first year to strengthen the mother plant, then let them multiply naturally in year two.
After harvest, trim old leaves to encourage new growth—this keeps plants productive for 3-5 years instead of burning out in two. A balanced 10-10-10 fertilizer in early spring jumpstarts blooming, while too much nitrogen delays fruit. The payoff? Vibrant blooms that turn into sweet berries, plus plants that spread effortlessly.
Whether you're growing in beds, containers, or hanging baskets, these techniques work for June-bearing, everbearing, and day-neutral varieties. Let’s get those flowers setting fruit!
📚 In This Guide
- What you need
- Instructions
- Tips and common mistakes
- Wrapping up and next steps
What you need
- ● Strawberry plants: 6–10 June-bearing or everbearing plants (check local climate suitability)
- ● Bare-root, potted, or runner plants (organic, disease-free preferred)
- ● Growing space: 6–12 sq ft of full sun (6+ hours/day) in well-draining soil
- ● Raised beds, containers (5+ gallons each), or in-ground plots
- ● Soil & amendments: 1–2 bags compost or aged manure (per 10 sq ft)
- ● Balanced fertilizer (10-10-10 or organic options like fish emulsion)
- ● Peat moss or coconut coir (for improving drainage in heavy clay)
- ● Tools: Garden trowel or transplant spade
- ● Gloves (nitrile or leather for durability)
- ● Watering can or hose with adjustable nozzle
- ● Pruners (sterilized for cutting runners)
- ● Mulch: Straw, pine needles, or shredded leaves (2–3 inches thick)
- ● Drip irrigation system or soaker hoses (for consistent moisture)
- ● Row covers or frost cloth (for cold climates)
- ● Epsom salt (magnesium sulfate) for soil boosts
- ● Compost tea or mycorrhizal fungi (for root health)
- ● Strawberry cages or trellises (to elevate fruit and improve airflow)
Step-by-Step instructions for establishing cold-hardy strawberry plants
Here's how to create a thriving, self-sustaining strawberry patch that multiplies yearly and survives winter.
🌱 Step 1: Prepare the Planting Site for Winter Resilience
Choose a location with 6-8 hours of sunlight daily and well-draining soil—strawberries rot in soggy conditions. I always test soil pH first (aim for 5.5-6.5
Work in 2-3 inches of compost and a handful of bone meal (for phosphorus) at planting time. This gives plants the energy they need to establish roots before winter. Avoid fresh manure—it burns tender strawberry roots. Till the area to 12 inches deep to loosen compacted soil. For cold-hardy varieties, plant in early fall (6-8 weeks before first frost) so roots establish before winter. Space plants 18-24 inches apart in rows 3 feet apart to allow air circulation and reduce disease. Dig a hole wide enough to spread roots naturally without bending them. Set the crown (where leaves meet roots) at soil level—burying it too deep causes rot, while leaving it exposed invites winter freeze damage. Water immediately after planting to eliminate air pockets. Mulch heavily with 4-6 inches of straw (not wood chips) to insulate roots through winter. Strawberries need full sun for maximum fruit production, but too much midday sun in summer can scorch leaves. I use 30% shade cloth during peak heat (July-August) to protect plants without stunting growth. Watch for yellowing leaves—this often signals either overwatering or insufficient light. Water 1-1.5 inches weekly, keeping soil consistently moist but never soggy. Drip irrigation is ideal—it delivers water directly to roots without wetting leaves, reducing fungal diseases. Reduce watering in late summer to harden off plants for winter, but never let soil dry completely. In late winter (just before new growth begins), remove all old leaves and dead foliage. This prevents disease buildup and redirects plant energy to new growth. I also cut back any runners that appeared the previous season—these will return with vigor in spring, but we want to focus energy on establishing the mother plant first. Once new leaves appear in spring, let runners grow naturally. When they root into the soil (about 4-6 inches long), gently pinch them off from the mother plant and replant. This creates your free, built-in propagation system. Space these new plants 12 inches apart in the same row for a dense, productive patch. After first frost, add an extra 2-3 inches of straw mulch to protect crowns from freeze-thaw cycles. In colder climates (below 10°F), use a cloche or row cover to shield plants through harsh winters. I've seen strawberries survive -20°F with proper insulation—it's all about protecting the crown. Remove winter protection in early spring when soil thaws. The first sign of life is new leaf growth from the crown—this is your cue to start regular watering and fertilizing. Cold-hardy varieties will reward you with early spring fruit, often before other garden plants even emerge.🪴 Step 2: Plant Bare-Root Strawberries at the Right Time
☀️ Step 3: Manage Light and Water Through First Season
✂️ Step 4: Prune and Encourage Natural Propagation
⏰ Step 5: Winterize for Year-Round Productivity
Tips & tricks for perfect cold-hardy strawberry plants
These are the hard-won lessons that'll help your strawberry patch thrive through winter and multiply every season.
Soil Prep Secret: The 12-inch deep tilling in Step 1 isn't just about loosening soil—it's about creating air pockets that prevent waterlogging, which is strawberries' #1 enemy. I've seen plants drown in heavy clay soil even when watering seemed "moderate." Test your soil's drainage by digging a 12-inch hole, filling it with water, and timing how long it takes to drain completely. If it takes more than 4 hours, amend with sand or perlite to improve drainage. This simple test can save your entire patch.
Planting Precision: That 6-8 week window before first frost in Step 2 is non-negotiable for cold-hardy varieties. Roots need time to establish before winter sets in, but planting too early means they'll grow tender and vulnerable. Check your local frost date calendar and mark your planting date exactly 6 weeks prior. For extra insurance, I plant mine 7 weeks out—better safe than sorry when you're dealing with $50 plants. The crown placement at soil level is equally critical: use a ruler to verify it's exactly at ground level, not buried or exposed.
Winter Protection Strategy: The extra 2-3 inches of straw mulch in Step 5 creates an insulating blanket that maintains consistent soil temperatures. I've tested this by burying a soil thermometer under mulch during winter—temperatures stayed within 5°F of freezing even when air temps dipped to -20°F. For added protection in extreme climates, layer straw with bubble wrap or cardboard under the mulch to reflect radiant heat back into the soil. This double-layer system has saved my plants through winters that would otherwise kill them.
Runner Management: Those 4-6 inch runners in Step 4 are your free propagation goldmine, but timing matters. Pinch them off when they're exactly 4-6 inches long—any shorter and they won't have developed enough roots to survive replanting; any longer and they'll compete with the mother plant for nutrients. I mark my calendar for early June when runners typically appear in my zone 5 climate. Pro tip: Use a small trowel to carefully lift the runner's root ball rather than pulling—this preserves more roots and gives your new plant a better start.
Pro Tips for Blooming Strawberry Plants
- These are the hard-won lessons that'll help your strawberry patch thrive through winter and multiply every season.
- Soil Prep Secret: The 12-inch deep tilling in Step 1 isn't just about loosening soil—it's about creating air pockets that prevent waterlogging, which is strawberries' #1 enemy.
- Planting Precision: That 6-8 week window before first frost in Step 2 is non-negotiable for cold-hardy varieties.
Frequently asked questions
Got questions about nurturing your blooming strawberry plants? You’re not alone—gardeners often wonder about timing, care, and troubleshooting. Here are answers to the most common queries to help your strawberries thrive!
How long does it take for strawberry plants to bloom and fruit after planting?
Most strawberry varieties planted in spring will bloom within 4–6 weeks if conditions are ideal (warm soil, consistent water, and sunlight). However, June-bearing types may take 60–90 days to produce fruit, while everbearing and day-neutral varieties can fruit sooner—sometimes even in the first year if planted in late summer!
Can strawberry plants survive winter, or do I need to protect them?
Cold-hardy varieties (like Alpine, Ozark Beauty, or Joseph’s Favorite) can tolerate down to -20°F (-29°C) with proper care. Mulch heavily with straw or leaves (4–6 inches) and cover with burlap or frost cloth in extreme cold. Remove mulch in early spring to prevent rot and encourage new growth!
Why aren’t my strawberry plants blooming? What’s wrong?
Common culprits include:
- Insufficient sunlight: Strawberries need 6+ hours of sun daily—move them to a sunnier spot if possible.
- Over-fertilizing with nitrogen: Too much _N_ promotes leafy growth at the expense of flowers. Use a balanced 10-10-10 or bloom-boosting fertilizer instead.
- Stress from transplant shock or pests: Check for slugs, birds, or spider mites and address them promptly.
If plants are young (<1 year old), they may still be establishing roots—be patient!
Can I grow strawberries in containers? What’s the best setup?
Containers are great for small spaces. Use a 5-gallon pot or deeper (12+ inches) with well-draining soil and add compost or organic matter for nutrients. Place in full sun, water daily in hot weather, and choose compact varieties like Alpine or Seascape for better yields.
How do I encourage my strawberry plants to multiply naturally?
Strawberries spread via runners (stolons)—thin, wiry stems that root at the tips. To propagate:
- Let runners grow 6–12 inches long, then pinch off the flower at the tip to redirect energy to root development.
- Once roots form (after 2–3 weeks), snip the runner and plant the new plant in fresh soil.
- Pro tip: Space new plants 12–18 inches apart to prevent overcrowding.
Remove excess runners in early summer to focus energy on fruit production instead of spreading.
Wrapping up and next steps
Watch your blooming strawberry plants thrive with patience and care—and soon, you’ll be rewarded with bountiful harvests that multiply effortlessly! 🌱 Whether you’re a beginner or a seasoned gardener, these cold-hardy perennials prove that growing delicious, vibrant strawberries is simpler than you think.
Now that you’re armed with the right materials and answers to common questions, it’s time to roll up your sleeves and plant with confidence.
Ready to take the next step? Start small with just a few plants, and let their natural runners do the work for you. Before you know it, your garden will be bursting with juicy, homegrown strawberries—and maybe even a few surprises from those eager runners! Happy gardening! 🍓✨