
Blooming
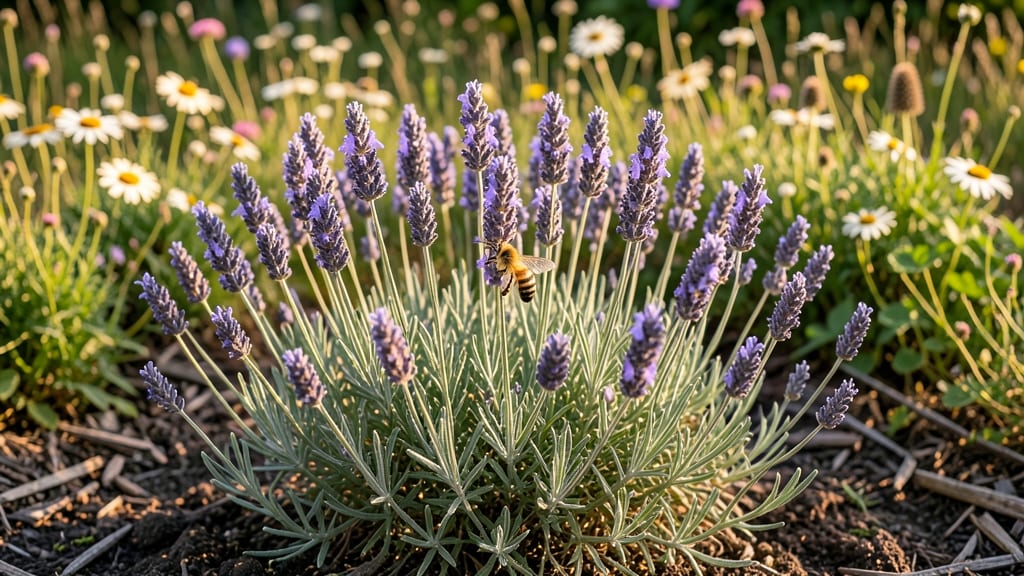
A year-round pollinator paradise starts with the right plants in the right places. 🌸 I designed my bloom-and-bee garden after watching bees struggle to find food during winter—now my yard hums with activity even in January, thanks to evergreens, early bloomers, and late-season favorites.
The secret isn't complicated: layer plants by bloom time, pair nectar-rich flowers with pollen sources, and leave some "messy" stems for overwintering insects. My go-to combos include lavender (spring-fall), coneflowers (summer-fall), and winter honeysuckle (late fall). Even a small patch—just 3x6 feet—can support hundreds of bees.
By late spring, you'll see swarms of bumblebees, mason bees, and honeybees working your garden. The air buzzes with life, and your plants thrive from better pollination. The best part? It looks stunning without extra effort—just let nature do the work.
Works in urban backyards, rural fields, or balcony containers. Here's how to start small and expand as you see what thrives in your space.
📚 In This Guide
- What you need
- Instructions
- Tips and common mistakes
- Wrapping up and next steps
What you need
- ● Native flowering plants (3–5 varieties): Perennials: Coneflower (Echinacea), Black-eyed Susan, or Milkweed (for monarchs)
- ● Annuals: Sunflower, Zinnias, or Cosmos (fast-growing and bee magnets)
- ● Pro tip: Choose plants with different bloom times (spring, summer, fall) for year-round interest!
- ● Well-draining soil mix: 1 part native soil + 1 part compost (or potting mix for containers)
- ● Watering can or hose with a gentle spray nozzle (1–2 gallons capacity)
- ● Organic mulch: Straw, wood chips, or shredded leaves (2–3 inches deep)
- ● Garden trowel or hand shovel (for planting)
- ○ Gloves (optional but recommended for prickly plants like thistles)
- ● Pruners or scissors (for trimming dead blooms)
- ○ Water retention crystals (optional): Helps reduce watering frequency in dry climates
- ○ Pollinator-friendly containers (optional): Hanging baskets, window boxes, or raised beds for small spaces
- ● A sunny spot (6+ hours of direct sunlight daily)
- ● Access to water (or a self-watering setup for vacations)
- ● Patience! Some plants take 1–2 seasons to fully establish.
How to design a pollinator-friendly garden that thrives year-round
Here's the simple approach I use to create a buzzing haven that keeps bees and butterflies visiting from spring through frost.
🌱 Step 1: Choose Native Perennials for Season-Long Color
Select plants that bloom consecutively from early spring to late fall. I focus on three-season performers like bee balm (summer-fall), purple coneflower (late summer), and black-eyed Susan (mid-to-late summer). These natives support local pollinators better than exotic varieties and require minimal care once established.
For winter interest, include evergreen shrubs like inkberry holly or winterberry—their berries provide food when little else is available. Arrange plants in odd-numbered clusters (3, 5, or 7) to create natural focal points that attract pollinators immediately upon planting.
☀️ Step 2: Create Sun and Shade Zones for Maximum Visitors
Pollinators need both sun and shade to thrive. Design your garden with at least 6 hours of direct sun for heat-loving species like butterfly weed and goldenrod, while placing shade-tolerant plants like wild columbine or Virginia bluebells under trees or along north-facing walls.
I always include a small water source—a shallow dish with pebbles or a pollinator-friendly fountain—to provide hydration. Place it near sunny, sheltered areas where bees can drink without becoming prey. Watch for constant activity around water features; this confirms your design is working.
💧 Step 3: Mulch and Water for Pollinator-Friendly Soil
Use 2-3 inches of organic mulch (like shredded bark or leaves) to retain moisture and regulate soil temperature. This prevents soil compaction and encourages beneficial ground-dwelling insects that pollinators rely on. Water deeply once a week during dry spells, aiming for 1 inch of water per session.
I avoid synthetic fertilizers—they can harm pollinators. Instead, I top-dress with compost in early spring and fall. The key is consistent moisture without soggy soil; pollinators prefer gardens where flowers stay vibrant but roots stay healthy.
✂️ Step 4: Prune Strategically to Encourage Continuous Blooms
Deadhead spent blooms only after seeds have formed—this gives pollinators a late-season food source. For perennials like coneflower, I cut back in early spring before new growth appears. This prevents disease buildup and encourages stronger, bushier plants that produce more flowers.
Leave some seed heads standing for overwintering insects. I save 10-15% of the garden as a "wild" area where native plants self-seed naturally. This creates year-round habitat and reduces maintenance while increasing biodiversity.
🪴 Step 5: Add Year-Round Structure with Evergreens and Berries
Incorporate evergreen shrubs like arborvitae or juniper to provide winter shelter for pollinators. These plants also break wind and create microclimates where bees can forage even in cold snaps. Pair them with berry-producing plants like serviceberry or highbush blueberry for late-season nectar.
I plant at least three types of evergreens in varying heights to create layered habitat. This mimics natural ecosystems and ensures pollinators have food and shelter no matter the season. The result? A garden that stays active and alive from spring through winter.
Tips & tricks for a thriving pollinator garden
Creating a buzzing ecosystem takes more than just planting flowers—it's about designing for pollinator needs. Here's what I've learned from years of watching bees and butterflies thrive in my garden.
Layered Planting Strategy: In Step 1, when selecting your three-season performers, think vertically too. Tall plants like purple coneflower (4-5 feet) should anchor the back, medium-height bee balm (2-3 feet) fill the middle, and low-growing black-eyed Susan (1-2 feet) cover the front. This creates a natural staircase for pollinators to navigate from ground level to high nectar sources. I've noticed bees systematically work their way up this vertical arrangement, maximizing their foraging efficiency.
Water Feature Placement: The placement of your water source in Step 2 is more critical than most realize. Position it 10-15 feet from flowering plants to give pollinators a safe drinking spot without having to fly through dense foliage. I've observed that bees prefer shallow dishes with pebbles—they land on the rocks to drink, avoiding drowning. Place it where morning sun warms the water slightly; bees are more active when temperatures rise above 55°F.
Mulch Depth Matters: While Step 3 mentions 2-3 inches of mulch, the type matters just as much. I use shredded hardwood mulch because it breaks down slowly and doesn't compact like pine straw. The key is to keep it 2 inches away from plant stems to prevent rot. This creates a perfect microclimate—moisture-retaining but not waterlogged—while discouraging weeds that compete with your pollinator plants.
Pruning Timing: The early spring pruning in Step 4 is crucial, but timing within that window makes all the difference. Aim to cut back coneflowers and bee balm when new shoots are 2-3 inches tall. This gives you the clean look while allowing enough foliage to protect emerging buds. I've found that pruning too early (before growth appears) can shock the plant, while waiting too long reduces flowering potential. The 10-15% wild area you leave is where the real magic happens—it's the pollinators' emergency food supply when your curated plants finish blooming.
Pro Tips for Bloom And Bee
- Creating a buzzing ecosystem takes more than just planting flowers—it's about designing for pollinator needs.
- Layered Planting Strategy: In Step 1, when selecting your three-season performers, think vertically too.
- Water Feature Placement: The placement of your water source in Step 2 is more critical than most realize.
Frequently asked questions
Got questions about creating a bloom and bee-friendly garden that thrives year-round? You’re not alone!
Here are answers to the most common queries—so you can skip the guesswork and dive right into planting.
What are the easiest pollinator-friendly plants for beginners?
Start with bee magnets like lavender, coneflowers, and sunflowers—they’re hardy, low-maintenance, and packed with nectar. Native wildflowers (check your region!) are also a great choice since they’re already adapted to local bees and butterflies. Pro tip: Mix perennials (like bee balm) with annuals (like cosmos) for continuous blooms.
How long does it take to see bees visiting my garden?
With the right plants, you might spot bees within 2–4 weeks! Fast-flowering annuals (e.g., marigolds) can attract them in as little as 10 days. Perennials may take a little longer (up to a season) to establish, but once they’re rooted, they’ll thrive and keep bees buzzing for years. Patience pays off—just keep watering and weeding!
Can I use containers or do I need a full yard?
A single large pot (12+ inches deep) with thyme, borage, or nasturtiums can support bees—just ensure it has drainage. For maximum impact, group 3–5 containers together to mimic a mini meadow. Bonus: Containers let you move plants to sunny spots as needed!
What pesticides should I avoid to keep bees safe?
Steer clear of neonicotinoids (common in many store-bought sprays) and pyrethroids, which are toxic to bees. Instead, opt for organic solutions like neem oil (for pests) or soapy water sprays. Prevention wins: Encourage natural predators (ladybugs, lacewings) by planting dill, fennel, or alyssum.
How do I keep my garden thriving in winter?
Focus on winter-hardy perennials (e.g., sedum, heather) and evergreen shrubs (like boxwood) for year-round interest. Leave seed heads (e.g., coneflowers) for food-scarce bees, and add mulch to protect roots. Pro move: Plant winter aconite—it blooms early and feeds bees when little else is out!
Wrapping up and next steps
Creating a Bloom and Bee Garden is all about embracing simplicity and celebrating nature’s beauty—no green thumb required! 🌸 With the right mix of low-maintenance plants, a welcoming setup, and a few thoughtful touches, you’ve got a thriving pollinator haven that blooms year-round.
The best part? Every bee, butterfly, and hummingbird that visits is a tiny thank-you for your effort.
Ready to take the next step? Start small—plant one new pollinator-friendly flower this week, or share your garden’s progress with fellow nature lovers. Your garden isn’t just a space; it’s a movement. Let’s keep the buzz going! 🐝✨