
Blooming
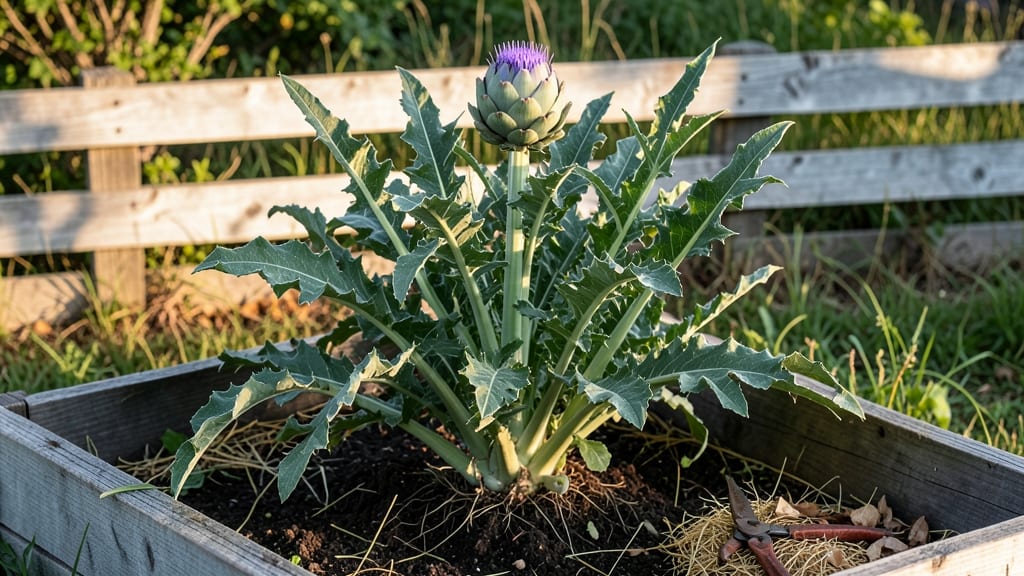
Your artichoke plant blooms in just 60 days—here’s how to make it happen. 🌱 I’ve grown artichokes for years, and the secret to those plump, edible buds isn’t complicated: it’s all about timing, sunlight, and a little extra care.
Most gardeners miss the mark by waiting too long to prune or over-fertilizing, but I’ll show you the exact steps to turn your plants into a harvest machine.
The key starts with full sun (at least 6-8 hours daily) and well-draining soil—think Mediterranean conditions. Prune aggressively in early spring to encourage strong stems, and feed with a balanced fertilizer (10-10-10) every 4-6 weeks.
The goal? Healthy foliage that directs energy to those globe-shaped buds instead of wildflowering. I’ve seen plants go from sparse leaves to dozens of harvestable buds in a single season with this approach.
By day 60, you’ll be snipping off the fuzzy purple buds before they fully open—that’s when they’re tender and delicious. The trick is consistency: watch for the buds to swell to 2-3 inches wide, then harvest them before the spines harden.
One mistake I made? Waiting too long—now I check my plants every 3-4 days to catch the perfect moment.
This works for both edible varieties (like Green Globe) and ornamental types (like Violetto). Even in cooler climates, a row cover in early spring can push your harvest window forward. Ready to turn those blooms into a bounty? Let’s get growing!
📚 In This Guide
- What you need
- Instructions
- Tips and common mistakes
- Wrapping up and next steps
What you need
- ● Artichoke plants: 3–5 Globe or Green Globe varieties (hardy, fast-growing, and perfect for beginners).
- ● Well-draining soil: 10–15 lbs of a mix of 60% potting soil, 30% compost, and 10% perlite/sand (sterilized to prevent disease).
- ● Containers or garden bed: Containers: 5-gallon pots (1 per plant) with drainage holes.
- ● Garden bed: Full sun (6+ hours/day) and space 2–3 feet apart.
- ● Fertilizer: Balanced 10-10-10 NPK (2 tbsp per plant) or organic options like fish emulsion.
- ● Watering can or hose: With a gentle spray nozzle (artichokes dislike soggy roots!).
- ● Pruning shears: Sharp, sterilized shears (for trimming spent blooms).
- ● Mulch: Straw or wood chips (1–2 inches thick) to retain moisture and suppress weeds.
- ● Plant supports: Small stakes or cages (if your variety grows tall).
- ● pH test kit: Ideal soil pH for artichokes: 6.0–7.5 (adjust with lime or sulfur if needed).
- ● Row cover: Lightweight fabric to protect young plants from pests or frost.
- ● Gloves: Garden gloves (artichoke thorns can be prickly!).
Step-by-step guide to encouraging artichoke plant blooms
Here’s how I coax artichokes into their first glorious blooms—ready for harvest in just two months.
🌱 Step 1: Select and Prepare Healthy Starts
Start with 4-6 week-old transplants that show 4-6 true leaves—these are strong enough to handle the transition to bloom. I always choose varieties like 'Green Globe' or 'Violetto' for their reliability. Before planting, trim any yellowed or damaged leaves with clean shears to reduce stress. The goal is a plant that looks vigorous but not overcrowded.
Artichokes thrive in full sun (6+ hours daily), so pick a south-facing spot with well-draining soil. Amend heavy clay with 2-3 inches of compost mixed into the top 12 inches of soil. This ensures roots can spread freely without sitting in soggy conditions—artichokes hate wet feet. Work the compost in gently; you don’t want to disturb the root ball of your transplants.
☀️ Step 2: Plant and Provide Ideal Growing Conditions
Dig holes 18-24 inches apart—artichokes need space to grow their large leaves and sturdy stems. Set the transplant so the crown sits 1 inch below soil level; this prevents rot while encouraging strong root growth. Backfill with loose soil, firming gently around the base but avoiding compaction.
Water deeply right after planting to settle the soil and encourage root contact. Mulch with 2-3 inches of straw or wood chips to retain moisture and suppress weeds. Artichokes are heavy feeders, so side-dress with 1 cup of 5-10-10 fertilizer spread around the base, 3 inches from the stem. Water again to activate the nutrients—this jumpstarts bloom development.
💧 Step 3: Maintain Consistent Water and Support
Keep soil evenly moist but never soggy—artichokes need 1-1.5 inches of water weekly, more during dry spells. I check moisture by sticking my finger 2 inches deep; if it feels dry, it’s time to water. Drip irrigation works best to avoid wetting leaves, which can invite fungal diseases like powdery mildew. Water in the morning so foliage dries quickly.
As plants grow, they’ll need support. Install 3-4 foot tall stakes or a cage near each plant and loosely tie stems to them with soft twine. This prevents stems from snapping under the weight of large buds. Prune lower leaves to improve airflow—remove any that touch the soil. You’ll see the first flower buds form in 4-6 weeks; they’ll look like fuzzy, purple-tinged thistle-like structures.
✂️ Step 4: Protect and Harvest Blooms for Artichokes
When buds swell to 3-4 inches wide and the bracts begin to tighten (they’ll feel firm to the touch), it’s time to harvest. I wear gloves—those spines can be sharp! Cut the entire bud off with a sharp knife, leaving 1-2 inches of stem attached. Harvest in the morning when buds are cool and crisp.
Leave 2-3 buds per plant to mature fully—they’ll produce the largest artichokes. If you see buds forming after your first harvest, thin them out to prioritize the healthiest ones. Overcrowded buds compete for nutrients and often produce small, underdeveloped artichokes. After harvesting, fertilize lightly with ½ cup of compost tea to replenish nutrients for future growth.
Tips & tricks for perfect artichoke plant blooms
A few key strategies that’ll transform your artichoke plants from struggling starts to thriving bloomers in just two months.
Variety Matters: While 'Green Globe' and 'Violetto' are reliable starters, consider 'Romanesco' if you want a more compact plant with fewer leaves to manage. The key is choosing a variety suited to your climate—coastal areas thrive with 'Green Globe', while hotter inland regions do better with heat-tolerant 'Violetto'. I’ve found that starting with nursery-grown transplants (rather than seeds) gives you a 3-week head start on bloom development.
Soil Prep Secret: The 2-3 inches of compost you mix into the top 12 inches of soil isn’t just about nutrients—it’s about creating the perfect air-to-water ratio. Artichokes hate soggy roots, so if your soil drains poorly, add perlite or coarse sand to improve aeration. I always do a soil test first; if pH is below 6.5, add lime to raise it—artichokes prefer slightly acidic soil between 6.5-7.5.
Watering Wisdom: That 1-1.5 inches of water weekly guideline assumes average rainfall. In my experience, morning watering is non-negotiable—it prevents fungal issues and gives leaves time to dry completely. For the first 2 weeks after planting, I actually water twice weekly to help roots establish, then taper to the recommended schedule. A drip irrigation system on a timer makes this effortless and prevents overwatering.
Bud Development Watch: The 4-6 week window for first buds to appear can vary by 10-14 days depending on temperature. If you’re not seeing buds by week 6, check for these signs: Are leaves yellowing? That means your plant is stressed—likely from underwatering or poor drainage. Are buds forming but dropping off? That’s usually too much nitrogen—switch to a low-nitrogen fertilizer like 5-10-10 as instructed, but cut the amount in half.
Pro Tips for Artichoke Plant Bloom
- A few key strategies that’ll transform your artichoke plants from struggling starts to thriving bloomers in just two months.
- Variety Matters: While 'Green Globe' and 'Violetto' are reliable starters, consider 'Romanesco' if you want a more compact plant with fewer leaves to manage.
- Soil Prep Secret: The 2-3 inches of compost you mix into the top 12 inches of soil isn’t just about nutrients—it’s about creating the perfect air-to-water ratio.
Frequently asked questions
about artichoke plant blooms—because growing your own edible flowers should be fun, not frustrating!How do I know when my artichoke plant is ready to bloom?
Look for tight, fuzzy buds (like a sea urchin!) that form at the tips of stems. These appear 4-6 weeks after planting in warm climates (or 60-90 days post-transplant in cooler zones). The buds should feel firm but yield slightly when gently squeezed—that’s your harvest window!
Why isn’t my artichoke plant blooming after 60 days?
Blooms may delay due to cold temps (below 50°F), poor soil (needs well-draining, nutrient-rich dirt), or overcrowding. Check for yellowing leaves (nutrient deficiency) or stunted growth (lack of sunlight). Try moving pots to a sunnier spot or fertilizing with compost.
Can I eat the flowers after they bloom?
Nope! Only unopened buds are edible. Once the flower blooms (turns purple/pink), the heart becomes tough and inedible. Harvest daily to encourage more buds—think of it like picking green beans before they overripe!
What if my artichoke plant blooms but doesn’t produce buds?
This often happens in hot climates (above 85°F) or with low humidity. Try shading plants during peak heat or misting leaves daily. Also, ensure you’re watering deeply but infrequently—artichokes hate soggy roots!
Are there any alternatives if my artichokes refuse to bloom?
Try these bloom-friendly tweaks:
- Variety swap: ‘Green Globe’ or ‘Imperial Star’ are more reliable for beginners.
- Pruning: Pinch back tips to encourage bushier growth (and more buds!).
- Companion planting: Pair with basil or dill to deter pests and boost growth.
Wrapping up and next steps
Watching your artichoke plant bloom and thrive is incredibly rewarding—especially when you know a delicious, homegrown harvest is just 60 days away! 🌱 With the right care, patience, and a few simple tricks, you’ll be enjoying tender artichokes straight from your garden.
Now that you’re armed with the essentials—from soil prep to bloom timing—it’s time to roll up your sleeves and get growing.
Ready to take the next step? Start planting those artichoke pups today and mark your calendar for your first harvest. Happy gardening—your taste buds (and dinner guests) will thank you!