
Blooming
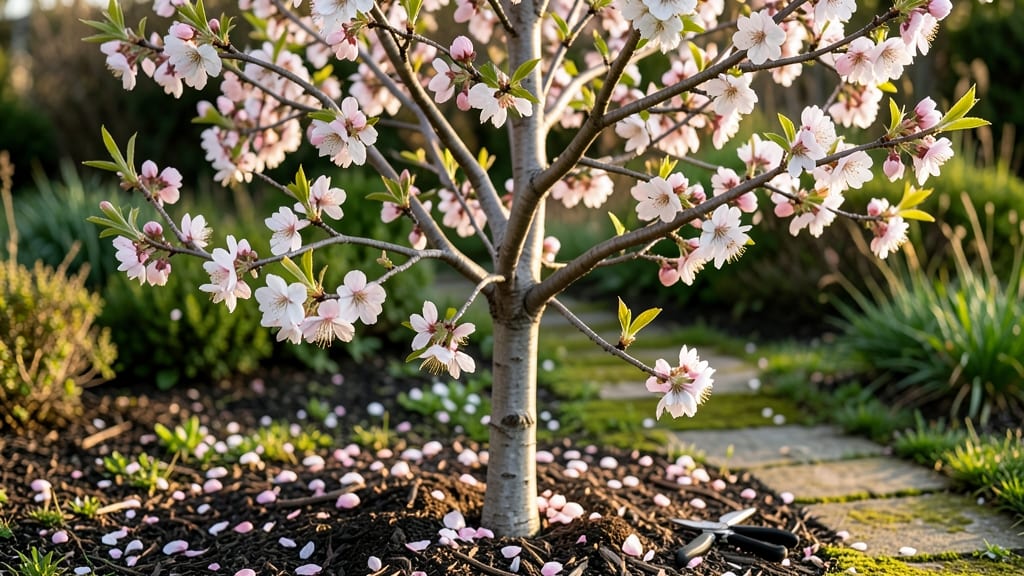
Forcing apricot tree blooms indoors reveals nature’s hidden magic—pink blossoms in 3 weeks when you follow the right steps. 🌸 I’ve watched bare branches transform into fragrant clusters by controlling light, temperature, and water, a process that works even in apartments.
The secret lies in mimicking spring conditions, not just waiting for outdoor warmth to trigger buds.
Your success hinges on dormant branches cut last fall, stored in a cool, dry place. Prune them to 12-inch lengths, remove leaves, and place stems in water with a floral preservative.
A south-facing window or grow light keeps them happy—60-70°F days and 50-55°F nights mirror ideal bloom triggers. Patience pays off: buds swell within 10 days, then burst into color.
What you’ll end up with is a showstopping centerpiece—fragile blossoms that last 7-10 days indoors. The fragrance alone makes it worth the effort, though fruit won’t develop (this is purely decorative).
For outdoor trees, timing matters: prune after blooms to shape growth, and protect young flowers from late frosts with row covers.
Works best in Zones 5-9, where apricots thrive outdoors. Northern gardeners can still force branches, while Southern growers should focus on seasonal pruning to boost next year’s blooms.
Whether you’re forcing branches or tending outdoor trees, these steps guarantee healthier flowers and better fruit—if you let nature take its course.
📚 In This Guide
- What you need
- Instructions
- Tips and common mistakes
- Wrapping up and next steps
What you need
- ● Dormant apricot tree branch(es) – 1-2 branches, 12-18 inches long, with buds (ensure they’re disease-free!).
- ● Pruning shears – Sharp, clean, and sterilized (rubbing alcohol wipe works!).
- ● Clear vase or jar – Tall and narrow (8-12 inches), like a mason jar or bud vase.
- ● Water – Room-temperature, filtered if possible (chlorine can harm buds!).
- ● Newspaper or paper towels – For wrapping branches to mimic dormancy.
- ○ Plastic wrap or clear bag – To create a mini greenhouse effect (optional but helpful!).
- ● Refrigerator or cool, dark space – For the initial 2-3 week "chilling" period.
- ● Floral preservative – A few drops to extend bloom life (like Floralife).
- ● Decorative pebbles or moss – For a pretty vase display.
- ● Grow lights (LED) – If your space lacks natural light (12-14 hours/day).
- ● Humidity tray – A shallow tray with water + pebbles to boost moisture.
How to force apricot tree blooms indoors in 3 weeks
Here's the method that reliably triggers blossoms on potted apricot trees—no greenhouse needed.
🌱 Step 1: Select and Prepare a Dormant Apricot Tree
Choose a 3-5 year old apricot tree with a trunk diameter of 1-2 inches—younger trees often lack the energy reserves needed for forced blooming. I always look for trees with healthy but dormant branches (no green leaves or new growth). Prune any dead or crossing branches first using clean, sharp pruners, cutting just outside the branch collar at a 45-degree angle. This ensures clean wounds that heal properly.
The key here is dormancy timing: Force blooms in late winter when the tree has been dormant for at least 6-8 weeks. If you start too early, the tree won't have enough stored energy. Place the tree in a cool, dark location (like a garage or basement) at 35-45°F for 8-12 weeks before forcing. This cold period mimics winter conditions and builds the energy needed for blossoming.
☀️ Step 2: Simulate Spring Conditions with Light and Temperature
Move the tree to a bright location with indirect light (like an east-facing window) and maintain temperatures between 55-65°F during the day. Night temperatures should stay above 45°F—any colder and buds may drop. I use a grow light on a 12-hour timer if natural light is insufficient, keeping it 12-18 inches above the tree to avoid leaf scorch.
Watch for bud swell—this is your first sign of success. It usually takes 2-3 weeks after moving to bright conditions. If buds remain tight and brown, the tree may need more warmth or higher humidity. A pebble tray with water under the pot helps maintain moisture without overwatering. Water deeply once a week, letting the top 2 inches of soil dry out between waterings to prevent root rot.
💧 Step 3: Encourage Blooming with Controlled Watering and Fertilizer
Once buds begin to swell, switch to lukewarm water for watering—cold water shocks the tree. I use a balanced 10-10-10 fertilizer (diluted to half strength) every 2 weeks to support bloom development. Avoid high-nitrogen fertilizers—they promote leaf growth at the expense of flowers. Instead, focus on phosphorus and potassium to encourage blossoming.
Here's the thing—don't overwater now. The tree is redirecting energy from roots to flowers, so let the soil dry slightly between waterings. Yellowing leaves at this stage usually mean overwatering or nutrient burn, not failure. If you see buds dropping, reduce water slightly and increase humidity with a light misting in the morning. Blooms typically appear in 3-4 weeks after bud swell begins.
⏰ Step 4: Maintain Conditions Until Full Bloom
Once flowers appear, keep the tree in bright, indirect light and maintain consistent moisture. Avoid moving the tree frequently—sudden changes stress it and can cause buds to drop. If flowers look dull or wilt quickly, the air is too dry. A small humidifier near the tree (not directly on it) helps preserve petals for 10-14 days of display.
This is the moment that matters: don't fertilize again until after blooming. The tree is already using its stored energy, and extra nutrients now can lead to leafy regrowth instead of fruit. Once flowers fade, prune spent blooms back to the nearest healthy bud to encourage new growth. After forcing, move the tree outside in spring for normal growth and potential fruit production.
Tips & tricks for perfect indoor apricot tree blooms
These practical insights will help you coax vibrant blossoms from your potted apricot tree without the guesswork.
Tree Selection Matters: The 3-5 year old age range is non-negotiable for successful forcing. Younger trees simply lack the stored energy reserves needed to support blossoming. Look for trees with a 1-2 inch trunk diameter—this indicates sufficient structural development. I've found that trees with plump, dormant buds along the branches respond best, as these contain the energy needed for spring awakening.
Cold Period Precision: That 8-12 week cold dormancy period at 35-45°F is the foundation of success. Place your tree in a garage or basement where temperatures stay consistently cool. A thermometer is worth its weight in gold here—fluctuations outside this range can confuse the tree's biological clock. I've seen trees fail when moved to forcing conditions too early, even if they've been in cold storage.
Light Transition Strategy: When moving your tree to bright, indirect light after the cold period, do it gradually over 3-5 days. Sudden exposure to strong light can shock the tree and cause bud drop. Start with 2-3 hours of morning sun, then increase daily. For grow lights, position them 12-18 inches above the tree—closer than this risks leaf scorch, while farther away won't provide sufficient intensity.
Humidity Hack: The pebble tray method works wonders for maintaining humidity without overwatering. Fill a shallow tray with pebbles and water, then place your tree's pot on top (ensure the pot isn't sitting directly in water). This creates a microclimate that prevents the soil from drying out too quickly while keeping buds from drying. For extra insurance, mist the tree lightly in the morning—just enough to create a fine mist, not soak the leaves.
Pro Tips for Apricot Tree Blooms
- These practical insights will help you coax vibrant blossoms from your potted apricot tree without the guesswork.
- Tree Selection Matters: The 3-5 year old age range is non-negotiable for successful forcing.
- Cold Period Precision: That 8-12 week cold dormancy period at 35-45°F is the foundation of success.
Frequently asked questions
Got questions about coaxing those stunning apricot tree blooms indoors? You’re not alone! Here are answers to the most common queries—from timing to troubleshooting—so you can grow confidently.
When is the best time to force apricot tree blooms indoors?
The ideal window is late winter (February–March), when trees naturally start waking from dormancy. Choose a branch with dormant buds (still firm but ready to swell) for the best results. Avoid forcing too early—buds need chilling first!
Do I need to chill the branches before forcing blooms?
Yes! Apricot trees require 6–8 weeks of cold (32–45°F) to break dormancy. Store branches in a fridge or unheated garage before forcing. Skipping this step? Buds may fail to open or look weak. Pro tip: Label branches with dates to track chilling time!
Can I use any apricot tree branch, or are there special tips?
Look for mature, healthy branches (1/4–1/2 inch thick) with plump, unopened buds. Avoid branches with mold, cracks, or dried-out ends. Cut at a 45° angle and trim leaves to reduce moisture loss. Bonus: Thinner branches bloom faster!
Why aren’t my apricot blooms opening after 3 weeks?
Common culprits:
- Insufficient light—Move to a brighter spot (south-facing window or grow lights).
- Low humidity—Mist buds daily or place the vase in a tray with pebbles and water.
- Overcrowded buds—Thin out buds to 2–3 inches apart for better air circulation.
- Improper cutting—Recut stems under water to refresh the cut.
Can I reuse apricot branches for multiple bloom cycles?
Unfortunately, no—once buds bloom, the branch’s energy is spent. However, you can root the cuttings! Place stems in water with rooting hormone, and once roots form (4–6 weeks), transplant to soil. With patience, your forced-bloom branch might grow into a new tree!
Wrapping up and next steps
Watching your apricot tree bloom indoors is a rewarding experience that brings a touch of spring to your home—no matter the season! 🌸 With the right materials, patience, and care, you can enjoy vibrant blossoms in just three weeks.
Whether you're a gardening enthusiast or a beginner, this project is a fun way to connect with nature and create something beautiful.
Now that you’re ready to start, grab your supplies and follow the steps with confidence. Share your progress or blooming masterpiece with fellow plant lovers—you might inspire someone else to try it too! Happy blooming! 🌿✨