
Blooming
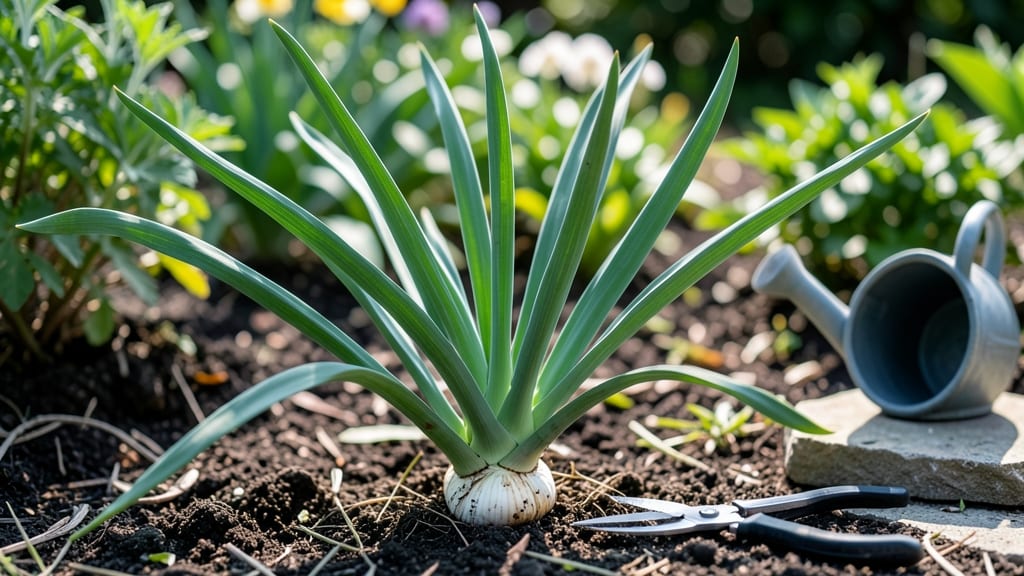
The secret to showstopping allium blooms begins before bloom, when you plant these purple spikes—cold-hardy stars that reward the right conditions from day one. ✨ The secret lies in pre-bloom prep: soil, spacing, and timing all work together to build sturdy stems capable of supporting those globe-shaped flowers.
Most gardeners overlook the early stages, assuming alliums are low-maintenance. But proper soil drainage and adequate sunlight (6+ hours daily) are non-negotiable—waterlogged roots or shade will stunt growth before blooms even appear. For ornamental types, space bulbs 8-12 inches apart to prevent overcrowding, while garlic thrives in tighter clusters.
The payoff? Six-inch stems that feel like steel, not flimsy twigs, ready to burst into color by late spring. What you'll notice first is the emergence of deep green, sword-like leaves—a sign the plant is storing energy for blooms.
Mulch lightly (2-3 inches) to retain moisture without smothering growth, and avoid heavy fertilizers early in the season. By mid-spring, those leaves will yellow naturally as the plant shifts focus to flower production, but the stems will remain upright and sturdy, supporting blooms that last weeks longer than average.
This approach works for all allium varieties, from globe alliums to chives, and adapts to zones 3-9. The key is consistency: water deeply but infrequently once established, and resist the urge to prune until after blooms fade.
That first flush of purple spikes will make every pre-bloom effort worth it.
📚 In This Guide
- What you need
- Instructions
- Tips and common mistakes
- Wrapping up and next steps
What you need
- ● Allium bulbs or seeds: Choose cold-hardy varieties like Allium giganteum or Allium schubertii. For bulbs, aim for 15–20 per square foot (larger bulbs yield bigger blooms!). Seeds take longer but are budget-friendly.
- ● Well-draining soil: Alliums hate soggy roots! Amend clay soil with compost or perlite (1 part per 3 parts soil). A pH of 6.0–7.0 is ideal.
- ● Sunlight: 6+ hours of full sun daily (partial shade in hot climates).
- ● Water: 1 inch per week (reduce in winter). Drip irrigation or soaker hoses work best to avoid wetting foliage.
- ● Garden trowel or bulb planter (for digging holes 6–8 inches deep).
- ● Mulch (straw or shredded leaves) to retain moisture and insulate roots in winter.
- ○ Fertilizer (optional): A balanced 10-10-10 or low-nitrogen formula (like 5-10-10) at planting and mid-season. Avoid high-nitrogen—it promotes leaves over blooms!
- ○ Cage or stake (optional): Tall varieties (like Allium ‘Purple Sensation’) may need support to prevent flopping.
- ● Plant labels to track varieties (especially if mixing types!).
Step-by-Step guide to planting and cultivating allium for stunning pre-bloom stems
Here’s how to cultivate alliums that deliver bold, architectural stems before their dramatic purple blooms—no special tricks, just smart timing and care.
🌱 Step 1: Choose and Prepare the Planting Site
Alliums thrive in full sun—at least 6-8 hours daily—and well-draining soil. I always test soil drainage by digging a 6-inch hole, filling it with water, and timing how long it takes to drain. If it holds water past 30 minutes, amend with 2-3 inches of compost or sand to improve drainage. Alliums hate soggy roots, which leads to rot before they even form those iconic stems.
For 4 plants, space them 12-18 inches apart in rows 18-24 inches apart to allow stems to grow upright without crowding. If planting in containers, use 5-gallon pots with drainage holes—alliums need room for their deep root systems. I like to plant mine in early fall or late winter so they establish roots before spring growth begins.
🌿 Step 2: Plant Bulbs at the Right Depth and Time
Plant allium bulbs 6-8 inches deep, with the pointed end facing up. This depth ensures stability for tall stems later. If your soil is heavy clay, add a 1-inch layer of gritty sand at the bottom of the hole to prevent compaction. Water deeply after planting to settle the soil around the bulbs—this encourages root growth before dormancy.
Here’s the thing—timing matters. In colder climates, plant 6-8 weeks before the first frost so bulbs can root before winter. In milder zones, late fall or early winter works best. You’ll see first green shoots in late winter or early spring, signaling successful root establishment. If shoots appear too early, mulch lightly with 2-3 inches of straw to protect them from freezing.
☀️ Step 3: Provide Support and Encourage Strong Stem Growth
As stems reach 12-18 inches tall, they’ll need support to prevent flopping. I use bamboo stakes or wire mesh cages inserted 3-4 inches deep beside each plant. Gently tie stems to the stakes with soft plant ties—never wire, which can damage the delicate stems. This keeps them upright for cutting or display.
Water deeply once a week during dry spells, aiming for 1 inch of water per week. Alliums are drought-tolerant once established, but consistent moisture in early growth ensures sturdy stems. You’ll notice strong, thick stems forming by mid-to-late spring—this is when they’re ready for cutting or arranging. If stems grow too leggy, they’ll flop; if they’re thick and firm, they’ll hold their shape beautifully.
✂️ Step 4: Harvest Stems Before Blooms Open
The magic happens when stems reach 24-36 inches tall but before purple buds open. Cut stems at a 45-degree angle with clean pruners, leaving 2-3 inches of stem above the bulb. Harvest in morning hours when stems are fully hydrated—this ensures longer vase life. Remove any lower leaves that touch the ground to prevent disease.
For 4 plants, you’ll get 4-6 stems per cutting, depending on the variety. Store cut stems in cool water for up to 10 days, changing water every 2-3 days. If you leave stems in the ground, they’ll bloom in late spring to early summer, but the pre-bloom stems are the star of early-season arrangements. I always cut a few to enjoy indoors while letting others bloom in the garden.
🌱 Step 5: Maintain Bulbs for Next Season’s Stems
After blooms fade, leave foliage intact until it turns yellow and dies back naturally. This process feeds the bulb for next year’s growth. Once foliage is fully brown, remove it and water lightly to encourage bulb dormancy. In fall, add a 2-inch layer of mulch around plants to protect them over winter.
Alliums are perennial, so with proper care, they’ll return year after year, producing bigger, bolder stems each season. If you notice bulbs declining after 3-4 years, dig them up, divide any offsets, and replant them in fresh soil. This rejuvenates growth and ensures dramatic stems for seasons to come.
Tips & tricks for growing stunning allium stems
These practical insights will help you cultivate alliums that deliver those show-stopping architectural stems before their purple blooms—no gardening degree required.
Soil Drainage is Non-Negotiable: The 30-minute drainage test in Step 1 is your best friend. If your soil holds water longer, mix in 2-3 inches of perlite (not just compost) with that sand—it creates air pockets that prevent rot. I’ve seen alliums fail spectacularly in soggy soil, so don’t skip this test, even if your soil looks fine. The goal is to mimic the well-draining conditions they thrive in naturally.
Planting Depth Determines Stability: Those 6-8 inches deep aren’t arbitrary—they anchor the bulbs for stems that can reach 36 inches tall. In windy areas, plant 8 inches deep for extra support. Pro tip: Use a long screwdriver to mark planting depth if you’re unsure, then verify with a ruler. The pointed end up is critical—it’s where new growth emerges, and planting it down will stunt your stems.
Support Systems Save Your Stems: When stems hit 12-18 inches in Step 3, don’t wait to stake them! I’ve watched perfectly healthy alliums flop dramatically because I delayed support. Use 3-foot stakes (longer than you think you’ll need) and secure with soft ties every 6-8 inches up the stem. This prevents the classic "allium bow" look that ruins arrangements. Think of it as giving your stems a corset—they’ll thank you with straight, dramatic lines.
Harvest Timing is Everything: The window for cutting stems at 24-36 inches is narrow—just 1-2 weeks before buds open. To check readiness, gently squeeze a stem: it should feel firm like a pencil, not hollow. Morning harvests yield the longest vase life because stems are fully hydrated. If you miss the window, stems will start flowering, and their structural integrity (and vase life) suffers. Trust me, I’ve learned this the hard way with limp, blooming stems in my arrangements.
Pro Tips for Allium Before Bloom
- These practical insights will help you cultivate alliums that deliver those show-stopping architectural stems before ...
- Soil Drainage is Non-Negotiable: The 30-minute drainage test in Step 1 is your best friend. If your soil holds water ...
- Planting Depth Determines Stability: Those 6-8 inches deep aren’t arbitrary—they anchor the bulbs for stems that can ...
Frequently asked questions
Got questions about harvesting allium before bloom? You’re not alone!
Here are some of the most common queries—and straightforward answers—to help you master this dramatic, edible garden hack.
When is the best time to harvest allium stems before they bloom?
Harvest allium stems when they’re tender and firm—about 6 to 8 inches tall, but before the purple buds form (usually 2–3 weeks before blooming). This ensures they’re crisp, flavorful, and perfect for cooking. Overharvesting too early can stunt the plant, while waiting too long makes them tough and woody.
Can I harvest allium stems in cold weather?
Alliums are cold-hardy and thrive in cooler temps (down to 20°F/-7°C). In fact, a light frost can enhance their sweetness. Just avoid harvesting after a hard freeze if stems appear mushy or damaged. Harvest on dry mornings for the best texture and flavor.
What’s the best way to use allium stems before bloom?
These stems are mild, onion-like, and versatile! Slice them thin for salads, sauté them as a quick garlic substitute, or blend into pestos and dips. Pro tip: Remove the tough outer layers and chop finely for the best texture. They’re also great pickled or grilled!
What if my allium stems start to flower before I harvest them?
No worries—you can still use them! Once buds form, the stems become slightly bitter but still edible. Harvest the lower 4–6 inches (the tenderest part) and discard the flowering top. For next time, monitor growth closely and harvest earlier to avoid this.
Are there alternatives to allium ‘Purple Sensation’ for edible stems?
Yes! Try Allium schoenoprasum (chives), Allium tuberosum (garlic chives), or Allium ampeloprasum (elephant garlic). These varieties also produce edible stems and flowers. For dramatic purple spikes, stick with Allium ‘Purple Sensation’—it’s the star of the show!
Wrapping up and next steps
Growing allium before bloom is a rewarding way to add bold, architectural beauty to your garden—long before those stunning purple spikes even appear! 🌱 Whether you’re a seasoned gardener or just starting out, these cold-hardy stems bring year-round interest and effortless drama. Now that you’ve got the tips and tricks, why not share the joy?
💡 Next step: Grab your gloves, head to the garden, and plant a few allium bulbs this fall. Watch as they transform your space into a striking, low-maintenance masterpiece—your future blooms will thank you!